Samsung Trash: Where Is the Recycle Bin on a Samsung Galaxy?
People always tend to delete unwanted photos so as to free up the memory on their smartphone. But sometimes, users later realize that they need those deleted photos. Well, in such case, if you are a Samsung mobile user you can get your photos back. Want to know how? Well, Samsung smartphone contains a trash folder where you can find the deleted photos. But where is the recycle bin on a Samsung Galaxy? All answers to your questions will be given. Read below to know more.
- Part 1. Is There a Recycle Bin or Trash on a Samsung Galaxy?
- Part 2. Where Is the Recycle Bin on a Samsung Galaxy & How to Enable it?
- Part 3. How to Restore Deleted Photos from Recycle Bin/Trash
- Part 4. How To Empty Trash on Samsung Galaxy?
- Part 5. How to Recover Permanently Deleted Photos on Samsung Galaxy?
Part 1. Is There a Recycle Bin or Trash on a Samsung Galaxy?
Fortunately, the answer to this question is positive. Samsung mobiles do have their own Samsung trash folder. This feature was introduced by the company earlier for its devices running on Android 9.0 Pie. Since then, the Samsung gallery trash folder is available to all the device running on Android 9.0 Pie and above.
In addition to this, many enhancements and improvements were made to this feature. With the launch of Android 10, the company started to offer this feature to its basic applications such as My Files, Contacts, Samsung Notes, and some others. Here is the list of Samsung apps that has the Samsung galaxy trash feature as of now:
- Gallery
- My Files
- Contacts
- Voice Recorder
- Samsung Notes
Part 2. Where Is the Recycle Bin on a Samsung Galaxy & How to Enable it?
Users can find the Samsung recycle bin S8 on their phone and enable it anytime they want. As a matter of fact, the recycle bin or the trash folder is disable by default to all the users. Users need to manually enable it to use this feature and get back their data from the recycle bin.
Follow the below steps to manually enable the Samsung trash folder for different applications.
1. Enable Samsung Gallery Trash
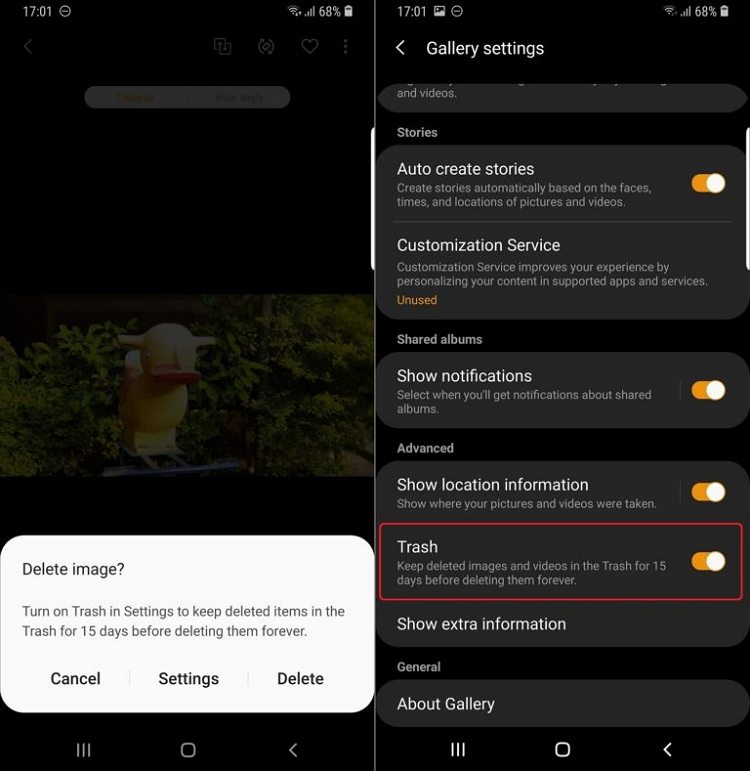
The Samsung gallery app will suggest users to enable the trash feature the first you delete photos. Here is a detailed guide on how to enable the Samsung gallery trash folder:
- Go to the Gallery app’s setting.
- Toggle on the Trash option present there.
Doing so will keep the deleted photos in the trash folder for 15 days, after which the photos will be deleted permanently.

2. Enable Samsung My Files Trash
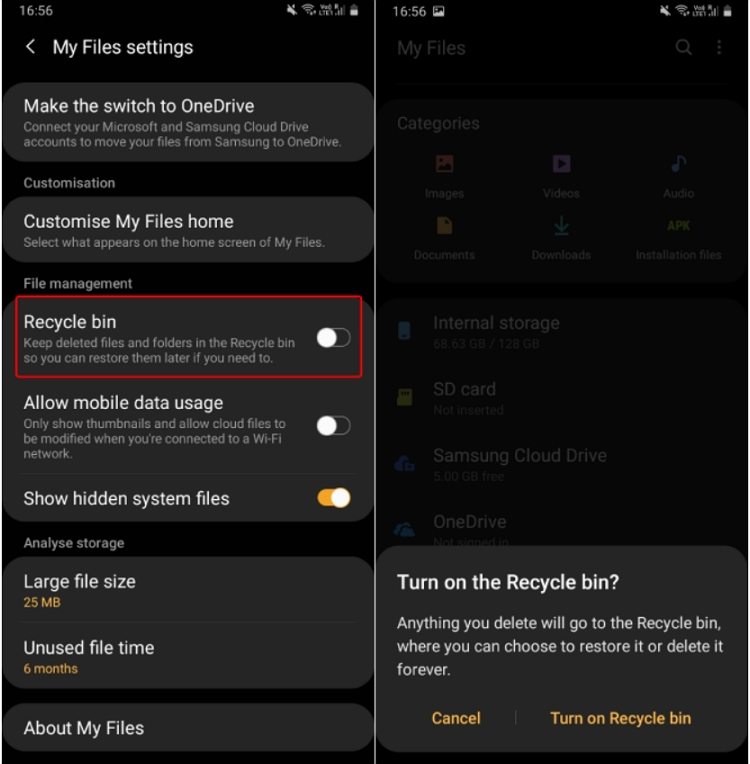
Here is a detailed guide on how to enable the Samsung My Files trash folder:
- Open My Files app.
- Tap the 3 vertical dots in the upper right corner.
- On the menu that opens select settings.
On the settings menu scroll down to make sure trash is turned on.

To make sure the My Files trash folder is enabled, go to My Files and click the 3 vertical dots in the upper right-hand corner. You can see the trash option present there, which will take you to the bin.
3. Enable Samsung Contacts Trash
Here is a detailed guide on how to enable the Samsung Contacts trash folder:
- Open the Contacts-App.
- Open the menu.
- Open the Settings.
Enable or disable Recycle bin.

4. Enable Samsung Voice Recorder Trash
Similar to other mentioned apps, the trash folder for Voice Recorder must be enabled manually. Here is a detailed guide on how to enable the Samsung Voice Recorder trash folder:
- Click the three-dot icon in the top-right corner.
- Go to Settings.
Enable the Trash toggle button.

5. Enable Samsung Notes Trash
Unlike Gallery, Contacts, and My Files app, that have the option to either enable or disable the Trash or Recycle bin feature, users do not have the same option for Samsung Notes. The feature is turned on by default. However, users can follow the below steps to recover/restore deleted memos and notes.
- Open the Samsung Notes app.
- Tap the three lines (≡) icon at the top left-hand side.
Tap Trash.

Here, you’ll see your deleted Samsung notes or memos. Users need to just click on the deleted notes and choose the Restore option at the top right-hand side.
Part 3. How to Restore Deleted Photos from Recycle Bin/Trash
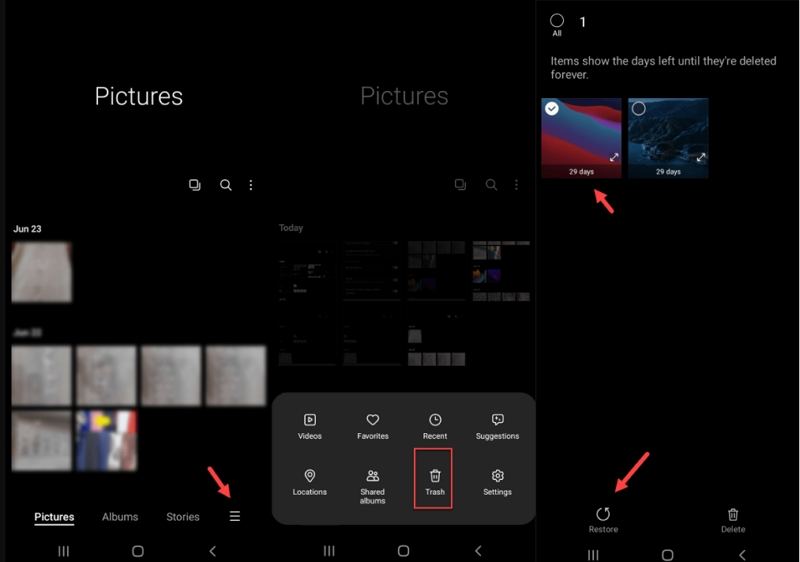
You can easily restore photos from trash but remember the deleted files are kept in the trash for only 15 days. Follow the below steps to restore deleted photos from Samsung trash.
- Begin by launching the Gallery app.
- Now, click on the hamburger menu icon.
- Next, select the Recycle bin option.
- Now, users need to click on the photo that they wish to restore.
Lastly, click on the restore icon to restore the photo.

Part 4. How To Empty Trash on Samsung Galaxy?
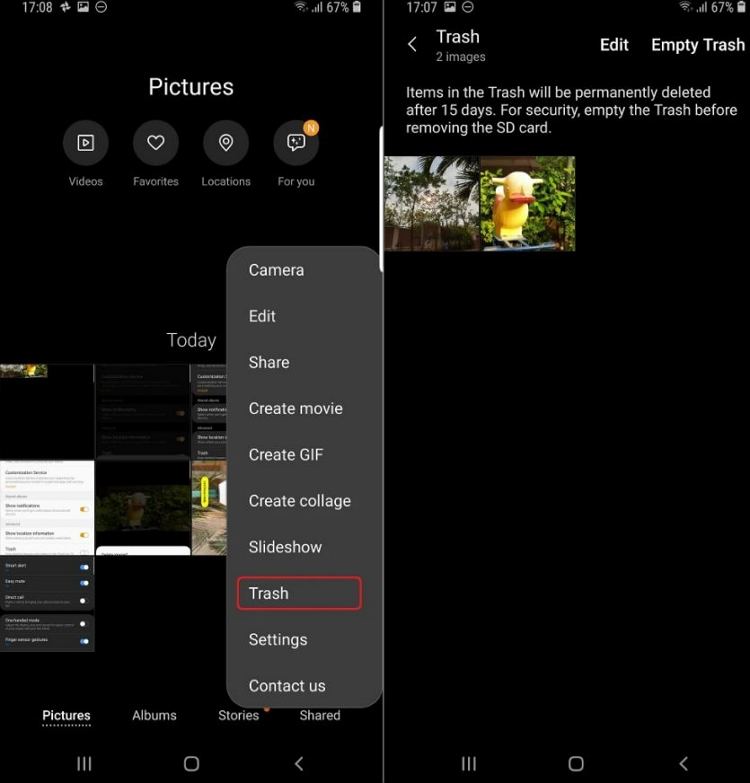
If you need to empty trash in Samsung Galaxy to free up more space for your phone, below we take gallery trash for example telling you how to empty trash on Samsung Galaxy smartphones.
- Begin by launching the Gallery app.
- Now, click on the hamburger menu icon.
- Next, select the Trash or recycle bin option.
- Here, select the Empty option present on the upper right-hand corner.
Lastly, select Empty Trash option. This will empty the trash folder deleting all the items present in it.

Part 5. How to Recover Permanently Deleted Photos on Samsung Galaxy?
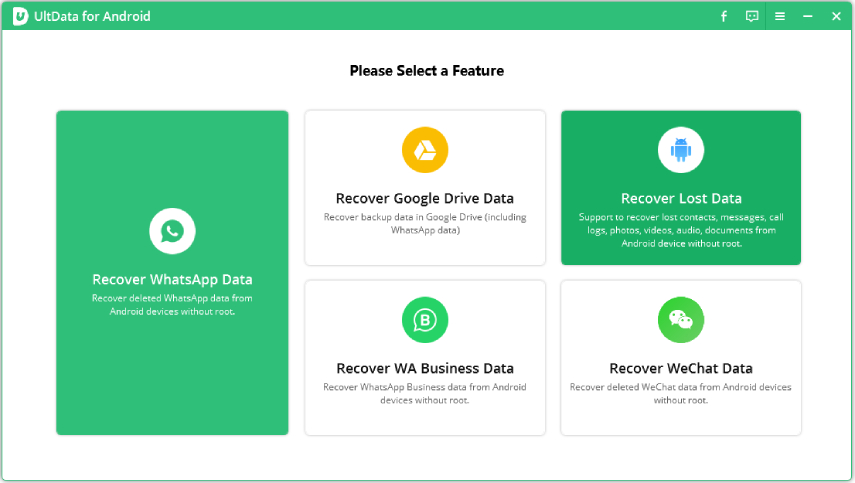
If, by chance you have deleted some important pics from trash, you can recover it using Tenorshare UltData for Android. This powerful Android photo recover software will help you recover photos from Android internal memory without root or backup. Below are the steps to follow.
Connect your Samsung phone with your PC and open the software. On the main screen, tap the "Recover Lost Data" option.

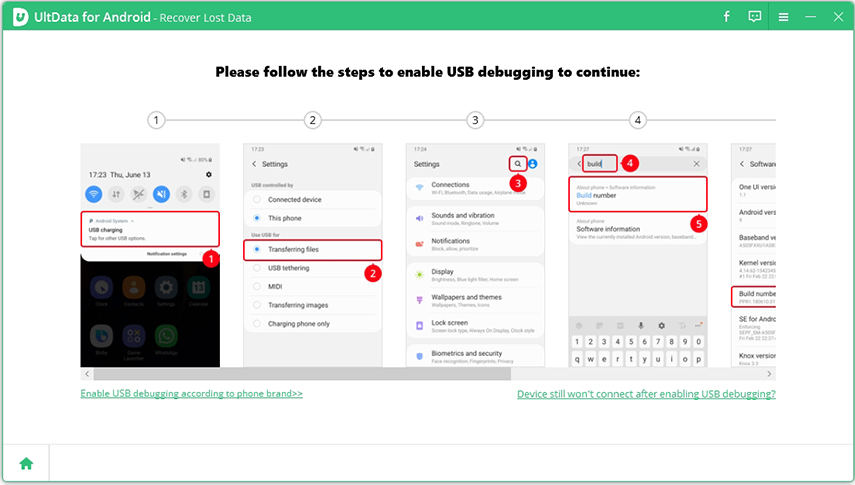
Allow USB debugging by following the steps in the image below.

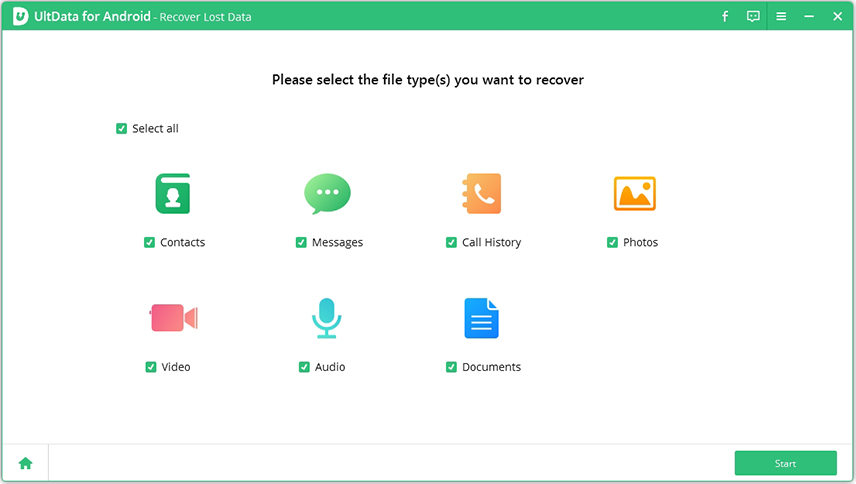
Begin the scanning process by tapping the Scan option.

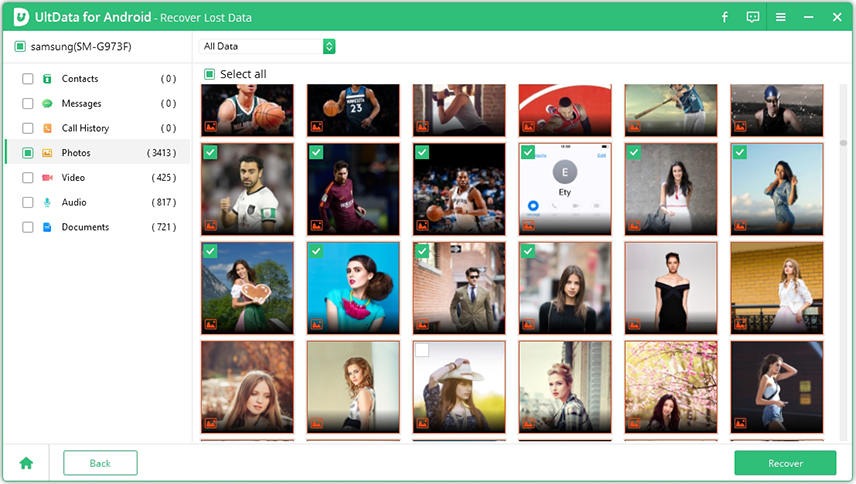
Next, preview the pics you need to recover and tap Recover option.

Conclusion
In a nutshell, you just had a look at the different ways to enable Samsung trash folder, how to empty Samsung trash or restore files from it, and how to recover permanently deleted photos using Tenorshare UltData for Android.
Speak Your Mind
Leave a Comment
Create your review for Tenorshare articles

Tenorshare UltData for Android
Best Android Data Recovery Software
Highest Data Recovery Rate
