Useful! Fixed New iPhone 13 Stuck on Setting Up Apple ID
Sometimes your iPhone is stuck on this message, "It May Take a Few Minutes to Set Up Your Apple ID," while setting the Apple ID. We understand it can be irritating for those who are trying to set up the new iPhone 13. However, this problem can be resolved by following a few simple techniques. If you are worried and don't want to try lengthy procedures, don't worry, all these methods are tested by us, and we assure you they will work for you. Without wasting any second, let’s get into the details.
- Part 1. Why is My New iPhone Stuck on Setting Apple ID?
- Part 2. Force Restart Your iPhone 13 to Fix iPhone Stuck Issue
- Part 3. Restore Your iPhone 13 Using iTunes
- Part 4. Fix Your iOS System with Tenorshare ReiBoot
- Frequently Asked Questions about Setting Up Apple ID
Part 1. Why is My New iPhone Stuck on Setting Apple ID?
There can be numerous reasons why your iPhone 13 is stuck during setting Apple ID. The common ones are mentioned below.
- You haven’t updated your new device.
- The SIM card is not inserted properly.
- This could be an error from the server-side.
- You are not following the steps correctly.
- There is an issue with your mobile.
These were the reasons why your iPhone is stuck on setting Apple ID. However, don't worry; here are a few simple solutions that you can try.
Part 2. Force Restart Your iPhone 13 to Fix
If your iPhone 13 is stuck while setting up Apple ID, the best way is to force restart your iPhone. In this way, you can quickly resolve this problem. Basically, this method makes sure that your iPhone operating system is turned off. Then, after a few seconds, you can turn it on. Here are a few simple steps that you can follow to start this process.
- Press and hold power and volume buttons at the same time.
- Once the Apple logo appears, release the buttons.
- Now, again check your settings and see if everything is OK.
In case this doesn't work for you, don't worry, you can check the second method.
Part 3. Restore Your iPhone 13 Using iTunes
While setting up Apple ID, if your iPhone is stuck, this can be fixed by restoring your iPhone using iTunes. Yes, it is a simple method and doesn’t require technical skills. The good news is that this method can solve other iOS issues as well.
However, make sure that after attempting it, your important data will be removed. But the good thing is that iTunes always backup your data before you restore the information. Let’s see how you can restore your iPhone 13 using iTunes.
Note: Before you start it, make sure that you've put your iPhone into Recovery Mode or DFU Mode otherwise, you won't be able to follow the procedure. Related Read: How to Enter Recovery Mode
- First, connect your iPhone 13 with your PC. You can do that by using an authentic USB cable.
- Open your iTunes application, and it will detect that your iPhone has put into Recovery Mode.
- After that, choose Restore option.
- Now, follow the instructions that you will see on the screen.
Part 4. Fix Your iOS System with Tenorshare ReiBoot
In case your new iPhone is stuck on setting up Apple ID, it is normal and can happen with anyone. However, there are many ways to solve it, and some of them we have mentioned above. But in case the issue is big, we would recommend using Tenorshare ReiBoot.
It is a good program and can quickly correct your problems. It is compatible with all the latest devices, including iPhone 13 as well. The good news is that it is easy to use and doesn't require technical skills. Within a few seconds, you can easily solve the issues. Apart from that, it offers two-mode; Standard and Deep repair that will fix your iOS 15 system. Here are the steps that you can follow to fix this issue.
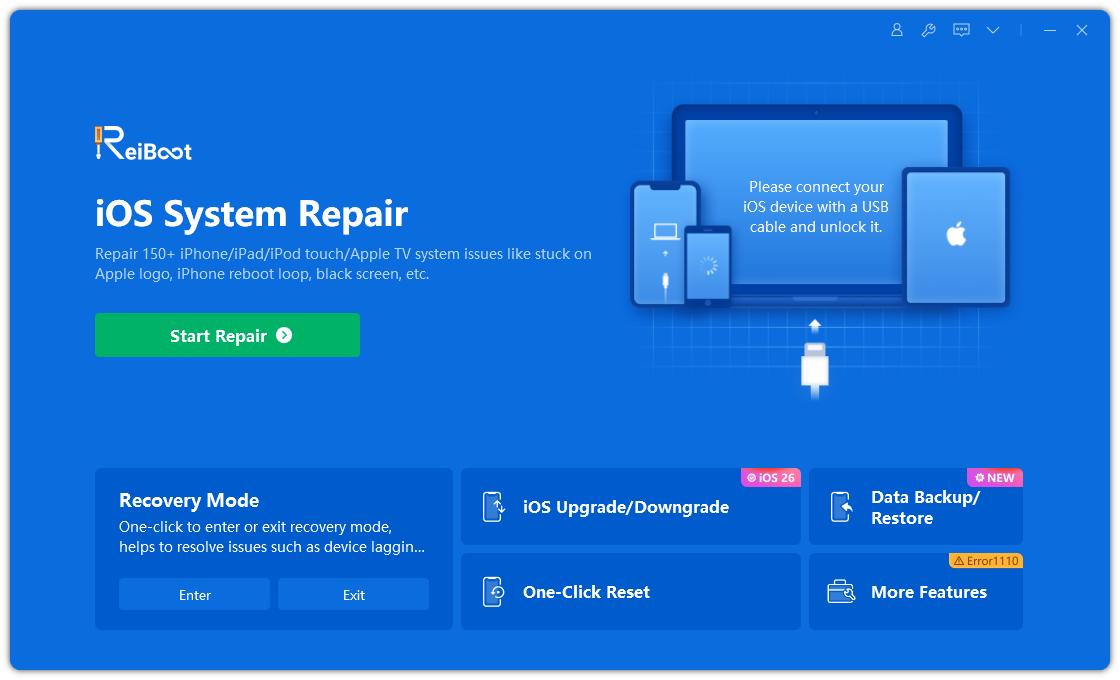
Download and install ReiBoot on your PC. After that, click the “Start” button. Make sure to use the original Apple USB cable.

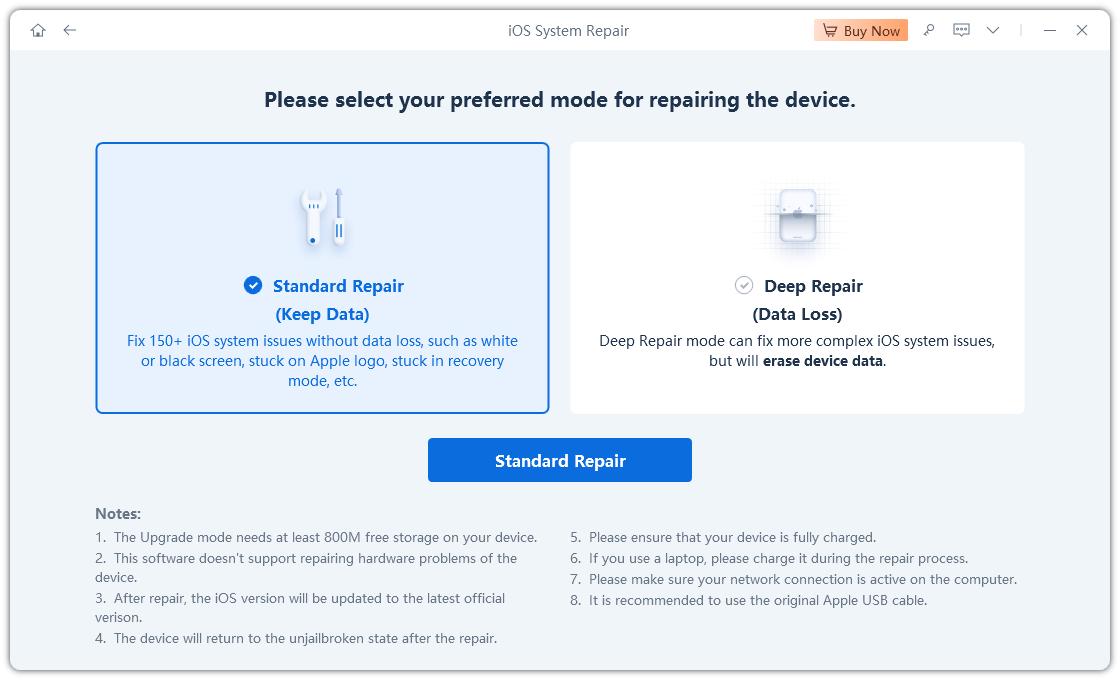
On the main screen, you will see two different options; Standard Repair and Deep Repair. Select the “Standard Repair” option. In case the application can't detect your mobile, don't worry; you can follow the instructions on the screen.

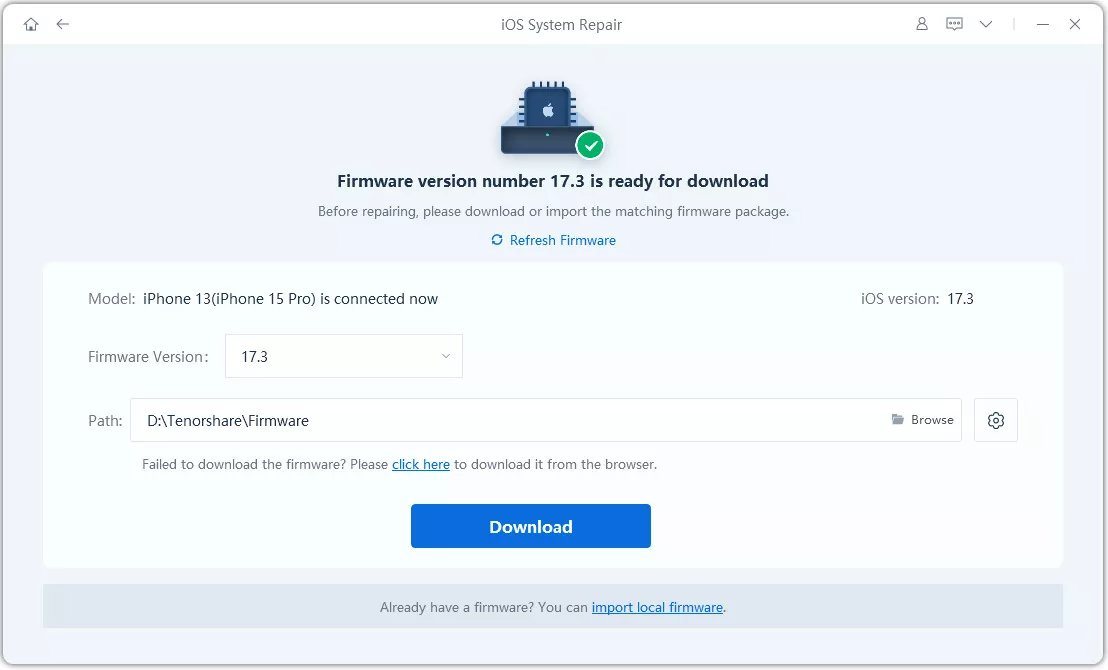
You will be asked to download the firmware package. In order to download it, choose the location and click the “Download” button.

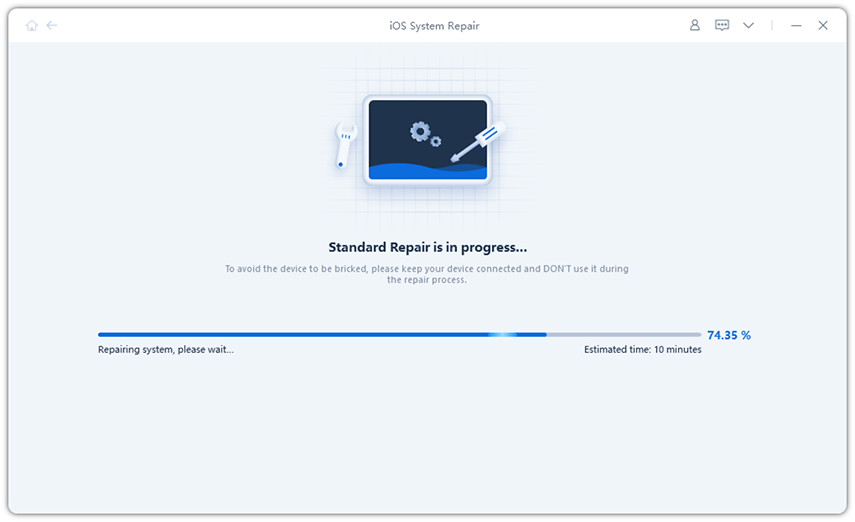
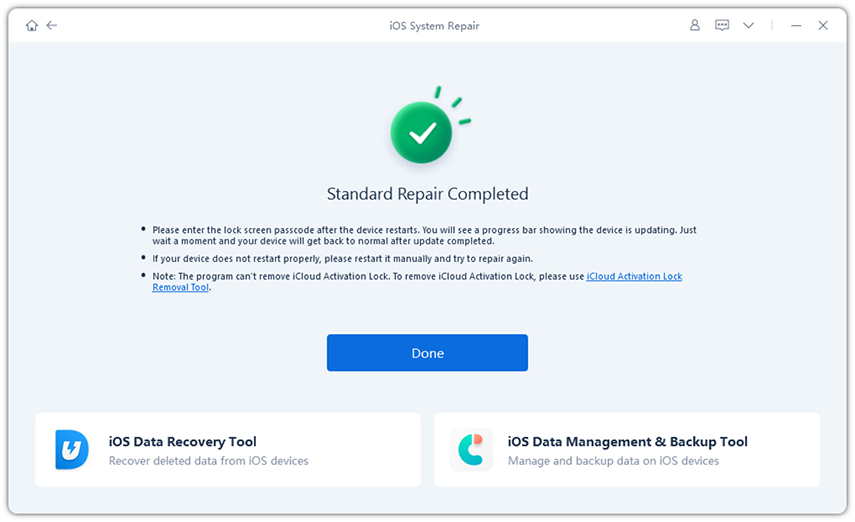
Once the package is downloaded, select the “Standard Repair” option. The whole process will take a few seconds, so don’t disconnect the device.

Wait for a few minutes until the process is completed. Keep in mind that your device will reboot, and all your information will be removed.

This is how you can easily solve your iOS issues. If you have more questions, you can see the FAQs section below.
Frequently Asked Questions about Setting Up Apple ID
Q1. How do I set up my Apple ID for the first time?
Setting Apple ID is very simple on your iPhone. Here are the complete details.
- Click on the Forget Password or Apple ID option.
- Now, click “Create a Free Apple ID.”
- Choose your birthday and name. Now, click the “next” option.
- You will see two different options; Use your email address or Get a free iCloud email address. Select the right one and wait for the message.
- Now, verify your email address, and your Apple ID will be created.
Q2. How long should setting up Apple ID take?
If you have a strong internet connection, then it will take only a few minutes or seconds. So, don’t forget to check your Wi-Fi connection.
Q3. How do I finish setting up my Apple ID?
Here is the process that you can follow to finish your settings.
- First, open your Settings on your iOS device.
- Now, click the error "Finish Setting up your iPhone," and you will be moved to a new screen.
- After that, fill in all the details that you have missed, such as your Apple ID, Set Up Siri, or iMessage.
- Your issue will be resolved once you have added the correct details.
Conclusion
If setting up Apple ID is taking forever, don't panic; you can try the methods above. All of them are simple and easy to use. Also, we recommend using Tenorshare ReiBoot, which is a reliable program for non-technical users. This software is user-friendly and can resolve iPhone issues in no time.
Speak Your Mind
Leave a Comment
Create your review for Tenorshare articles
