Why Does My Phone Say No Service and How to Fix

Updated on 04/15/2022 / Fix Android
100 % Helpful
If your Android device has stopped receiving network signals and it has made you wonder "why does my phone say no service", the following guide will be of great use to you. It teaches you why your phone gets no network coverage and how you can go about fixing the issue on any of your Android or Samsung device.
The issue could be caused due to many things and the post explains those causes as well, so you know what has been culprit on your device preventing you from making and receiving calls on your device.
Part 1. Why Does My Phone Say No Service
"My phone says no service", this issue can appear due to several reasons. It is not easy to pinpoint the source but most often it is caused by displaced SIM cards or due to a bug on your Android device. However, sometimes the reasons are pretty serious, this issue can be caused by a null or void IMEI number that your network provider is just failing to recognize or in general, it is a software issue. But whatever the reason is, it can be fixed pretty easily. So, you try to pinpoint the root of the cause but it is very difficult for a regular user. But without wasting your time, you can try the following solutions one by one. Find out which one of the solutions sticks.
It really depends on the situation, but the following section covers fixes for each of the things that could potentially be causing the issue.
Part 2. How to Fix Android/Samsung Phone No Service
Now that you know the potential culprits, this section should teach you how you can get rid of those and start receiving network signals on your Android based device. All the methods given below are easy to follow and you should be done in no time.
Way 1. Restart Your Device
The first thing you will probably want to do to fix the phone no service issue is to reboot your device. Rebooting the device resets many of the temporary files and settings and it often helps fix network related issues on your device.

Simply press the Power button for a few seconds on your device and choose the Reboot option to reboot your device. When the phone powers up, check if you now receive network signals.
Way 2. Turn On and Off Flight Mode or Airplane Mode
Toggling the Airplane mode also helps fix the issue as it tries to re-establish a connection with your network provider. This method has worked for many of the users and it should work for you, too. There is no harm in giving it a try.
Launch the Settings app on your Android device and tap on the first option that says Wi-Fi & internet. On the following screen, turn the toggle for the Airplane mode option to the ON position. Wait for a minute and then turn the toggle back to the OFF position.
You will no longer have to say "my phone says no service" as your issue should likely be fixed now.
Way 3. Change the Network Mode to Auto
Sometimes changing the network mode to automatic helps resolve the issue as your phone then automatically looks and joins the preferred network rather than you select a network provider for your phone.
On your phone, head to Settings > Wi-Fi & internet > SIM & network > SIM 1 > Network operators and turn on the Choose automatically option. Your phone will find and join the relevant network provider automatically.
Way 4. Select Network Operator Manually
If setting the network mode to the automatic position did not work for you, you may want to change the option to the manual mode. This way you can select a preferred network for your device and the following is how you do it.
Head to Settings > Wi-Fi & internet > SIM & network > SIM 1 > Network operators and disable the Choose automatically option. Then, select a network from the list and your phone will join the selected network.
Way 5. Make Sure SIM Card Placed Correctly
It may be the case that you have incorrectly inserted the SIM card into your phone. If the SIM card is not placed properly, your phone will not be able to read it and as a result you will not receive network signals on the device.
Way 6. Dial Service Mode
Service mode is one of the pre-installed modes your device comes with and you can use it to get various types of information about your network Not very frequently but sometimes the cellular radio ends up getting disabled. Unfortunately, it is not something that you can enable from the Settings. It requires a specific procedure which is detailed below.
Step 1: Open the dialer of your mobile.
Step 2: Type "*#*#4636#*#*" and call that number.
Step 3: You will enter "Service Mode".
Step 4: Now, locate and select the option called "Phone Information" or "Device Information".
Step 5: Now, choose to do a "Run Ping test".
Step 6: After that, check the radio data. You will find it at the bottom of the screen and enable it if it is disabled.
Step 7: Lastly, restart the device.
Hopefully, your Android or Samsung smartphone will start to look for networks after the restart.
Way 7. Restore the Null IMEI
Sadly, there is a possibility that the IMEI number of your device in unrecognizable by the network provider, resulting in this issue. So, you need to check if the IMEI number of your device has gotten corrupted or nulled.
If the issue was caused by it then you need to restore the IMEI number immediately.
Step 1: Open the dialer of your mobile phone and type *#06#. Doing this will show you the IMEI number of your device. If the result shows null, then it is confirmed that the IMEI number of your device has been corrupted. Now, you must take the necessary steps.
Step 2: In order to fix the issue, dial *#*#197328640#*#*. As an alternative option, you can also dial*#197328640#. Dialing these number will provide you access to the "Command Mode".
Step 3: Choose "Common" on your device.
Step 4: Choose the first option, which is "Field Test Mode or FTM". If this mode is turned on then you have to turn it off. After turning off this more, tap on the "menu" button and you will find that the IMEI number has been restored.
Step 5: Now, in order to turn off "FTM", tap option 2.
Step 6: If your device comes with a removable battery then remove it. If not then, just remove the SIM card from the tray.
Step 7: Wait for more than 2 minutes and insert the battery but not the SIM card.
Step 8: Dial*#197328640# from the device again.
Step 9: Now, navigate to the "Debug Screen Menu" and choose "Phone Control".
Step 10: Now, you must tap on "Nas Control" and then tap on "RRC".
Step 11: This final step requires you to tap on "RRC Revision" and tap on "Released".
After completing these steps you need to insert the SIM card and restart the device.
Way 8. Using Your Phone in Safe Mode
If you think a recently installed app is causing the no network issue on your device, you may try rebooting your device into safe mode to see if that is actually the case. Safe mode will only load the necessary resources leaving all other app resources aside.
To reboot your phone into safe mode, press and hold down the Power button. Tap and hold on the Power off option and hit OK when a prompt appears on your screen. You will reboot into the safe mode on your device.
Way 9. Change SIM Card
The error could occur due to the SIM Card. We have talked about the poor placement of the Card but it could also be damaged due to unforeseen reasons.
So, take out the SIM Card and check it thoroughly. If it looks damaged, then take it to your network provider and they will replace the card immediately.
Way 10. Fix Android Emergency Calls Only and No Service Due to Android System
If you have not had any luck with any of the methods given above, the issue could likely be in the core system of your Android device. And if that is the case, you will need to use a dedicated software to repair the core system of your device.
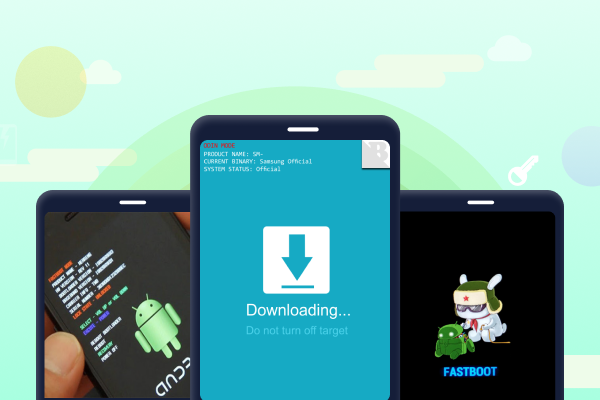
Meet ReiBoot for Android, a software that specializes in fixing the core operating system of your device. Once the core system is fixed, all other issues should be fixed as well as everything, at one level, depends on the operating system of the device.

Step 1: Enable USB debugging from Settings > Developer options on your device and connect your device to your computer. Download and launch the software and click on Repair Android System.
Step 2: Click on Repair Now on the screen that follows.
Step 3: Put in your device info in the given fields and click on Next.
Step 4: Wait for the software to download a file for your device. Click on Repair Now to begin repairing your device. Hit Continue in the prompt that appears on your screen.
Step 5: Step 5. Wait while the software repairs your device. Your device should now be repaired
Conclusion
So, if you are wondering "why does my Android phone say no service", then worry no more. All these solutions are very effective in order to fix the no service problem. Just read the procedure from the article and execute them properly. If the phone is still not budging then use the final ReiBoot for Android solution, it could definitely be a software related issue.
Speak Your Mind
Leave a Comment
Create your review for Tenorshare articles
Don’t forget to share this post!


