
then write your review

UltData - Best iPhone Data Recovery Tool
Recover Deleted & Lost Data from iOS Devices Easily, No Backup Needed!
UltData: Best iPhone Recovery Tool
Recover Lost iPhone Data without Backup
Many times we want to export music from iPhone to Mac. You may want to listen to the same music on Mac, back up your music list, or free up storage space on your iPhone.
There are many ways to export music from an iPhone to a Mac for free. You can use iTunes, cloud-based methods, and third-party apps to transfer music files. In this guide, we have shortlisted four proven ways to easily and accurately export music. So, let's head right to it!

You can export music files using AirDrop, iTunes, or the Finder app. Follow along to learn how to use all these methods:
AirDrop offers a wireless way to export music from iPhone to Mac free. Just like Bluetooth, it can migrate music files from one Apple device to another in seconds.
If you have macOS 10.10 or later versions, follow the steps below to learn how to export music from iPhone to Mac using AirDrop:

Now, wait till AirDrop transfers all selected music files from iPhone to MacBook. You can also use this method to export music from Mac to iPhone.
You can use the iTunes file sharing feature to transfer app-downloaded music. It requires you to connect your iPhone to the computer and click a few buttons to export music.
Here are the steps to export music from iPhone to Mac free via iTunes file sharing:

This way, you can easily export app-downloaded music from iPhone to Mac.
Finder is an alternative version of iTunes on macOS Catalina and later versions. It lets you sync music files between your iPhone and Mac. Check out the steps below to export music from iPhone to Mac using Finder:


Once the sync is completed, you should be able to play music directly from your Mac.
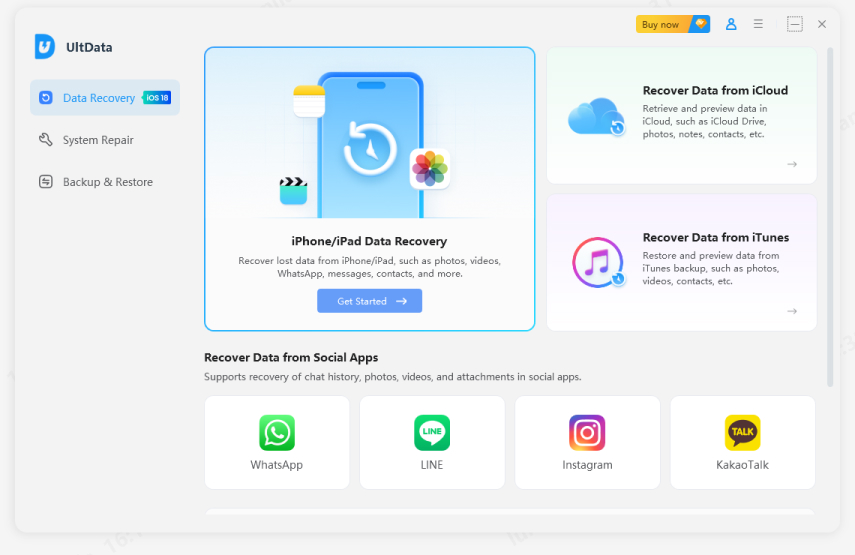
The highly recommended way to export music from iPhone to Mac is by using the UltData iPhone Data Recovery app.
UltData iPhone Data Recovery is a powerful tool for recovering and transferring iPhone data. It can quickly export music and other data types from iPhone to Mac with a few simple clicks. It first extracts all the music files available on your iPhone and then lets you preview the music files and only save the selected ones.

The key features of UltData iPhone Data Recovery include:
In short, UltData iPhone Data Recovery provides a convenient platform to extract music files from an iPhone and export them to your Mac.
Follow the steps below to learn how to export music from iPhone to Mac:


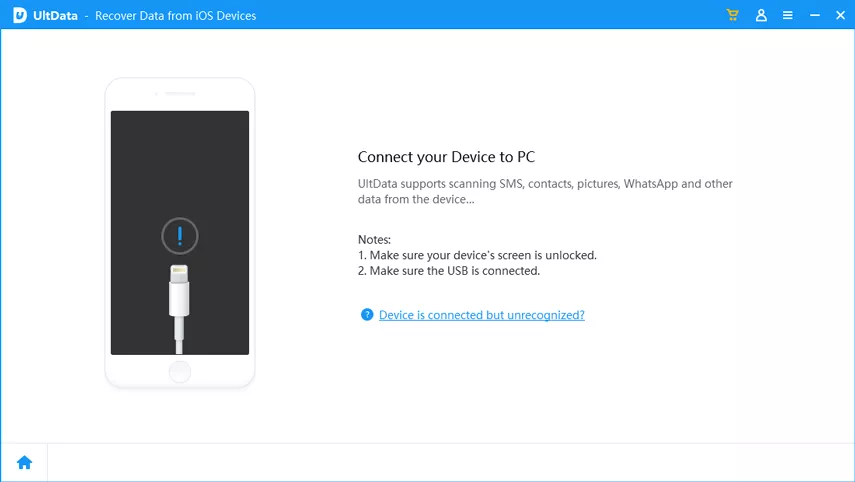
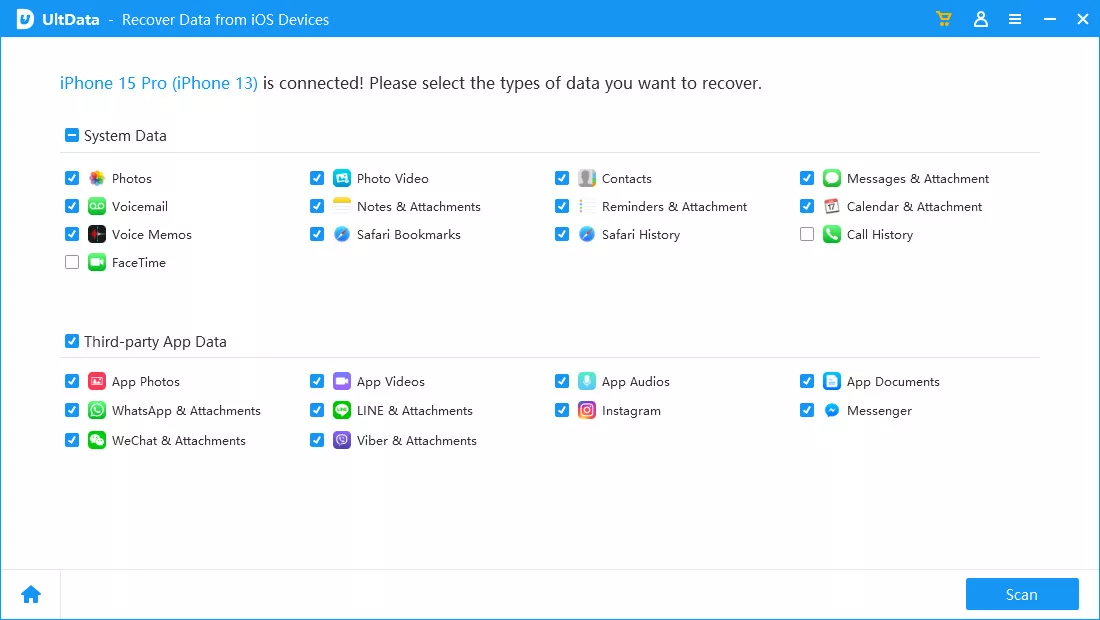
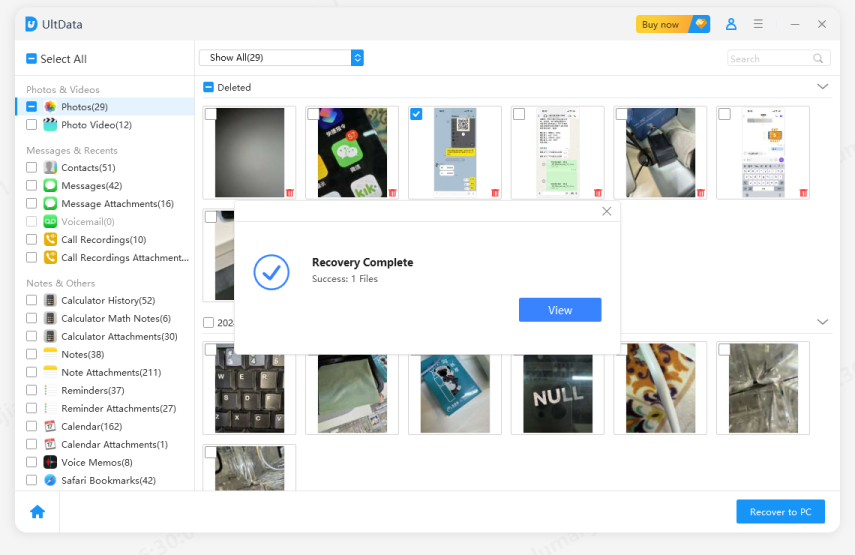
That's it! This is how effortlessly you can export music files with UltData iPhone Data Recovery.
There is no rocket science to export music from iPhone to Mac. You can make the transfer through AirDrop, iTunes, Finder, or a third-party app. Out of all the methods, we would recommend using UltData iPhone Data Recovery, as its deep scan and preview-based transfer provide the best and highly accurate way to export music files.
You can use Finder to export music from Mac to iPhone. You can manually select all the music files you want to transfer and then copy them to your iPhone. This way, you can transfer specific songs without syncing everything.
No, the song quality will not be affected during the transfer. The transfer process copies the exact bit-for-bit data of the original file, which ensures that the song's quality is not degraded.
Yes, you can use the iTunes File Sharing feature to transfer songs from iPhone to Mac. You can select the music files stored in supported apps and save them to your Mac in the same quality.
then write your review
Leave a Comment
Create your review for Tenorshare articles
UltData - Best iPhone Data Recovery Tool
Recover Deleted & Lost Data from iOS Devices Easily, No Backup Needed!
UltData: Best iPhone Recovery Tool
Recover Lost iPhone Data without Backup
By Jenefey Aaron
2026-06-30 / iPhone Recovery