Easy Way to Make iPhone Ringtones with iTunes on Windows 10

Tired with the ringtones that come with your iPhone and want to set your own favorite song as the ring? Actually, it is necessary to download any additional apps; you can make iPhone ringtones with iTunes on computer easily. Here we show you a quick guide to create a custom ringtone on Windows 10; the steps are similar on Windows 8/7 and Mac.
How to Create iPhone Ringtones on Windows 10
Step 1: Launch iTunes and choose the song you want to turn into ringtones, alerts or text tones. Click it and then press “Get Info” to go on.
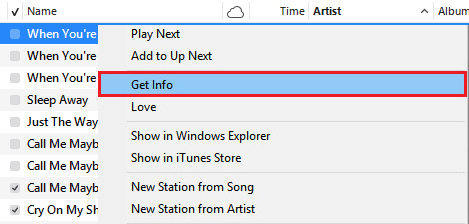
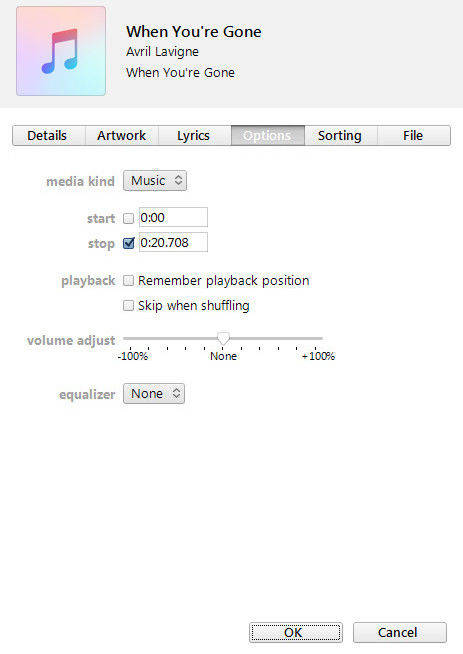
Step 2: Now you’ll see a pop-up iTunes window, click “Option” on the upper of the window. You are allowed to set the volume, media kind, start and stop time. An alarm ringtone can be of maximum 30 seconds. You can also make it shorter according to your needs. After that, click “OK”.
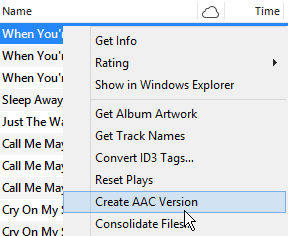
Step 3: Right click on the song again and click “Create AAC Version”, there will be a copy in your iTunes library. Now you can listen to the AAC version to check it is correct or not.
Step 4: Choose the copy and right click it and then select “Show in Windows Explorer”, a pop-out window will ask you to rename the newly created file. Click ‘Yes” to rename it and change the format into .m4r.

Step 5: Go to File, Add File to Library in iTunes. Find the files you just created and add it to iTunes library.
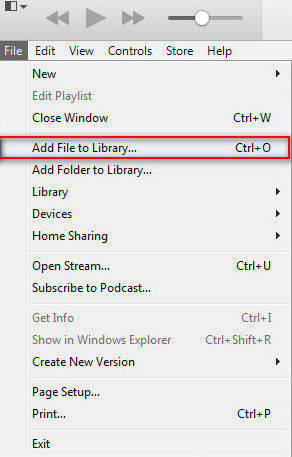
Step 6: Then there will be a Tones folder under the iTunes library. Connect iPhone to computer and sync it with iTunes.

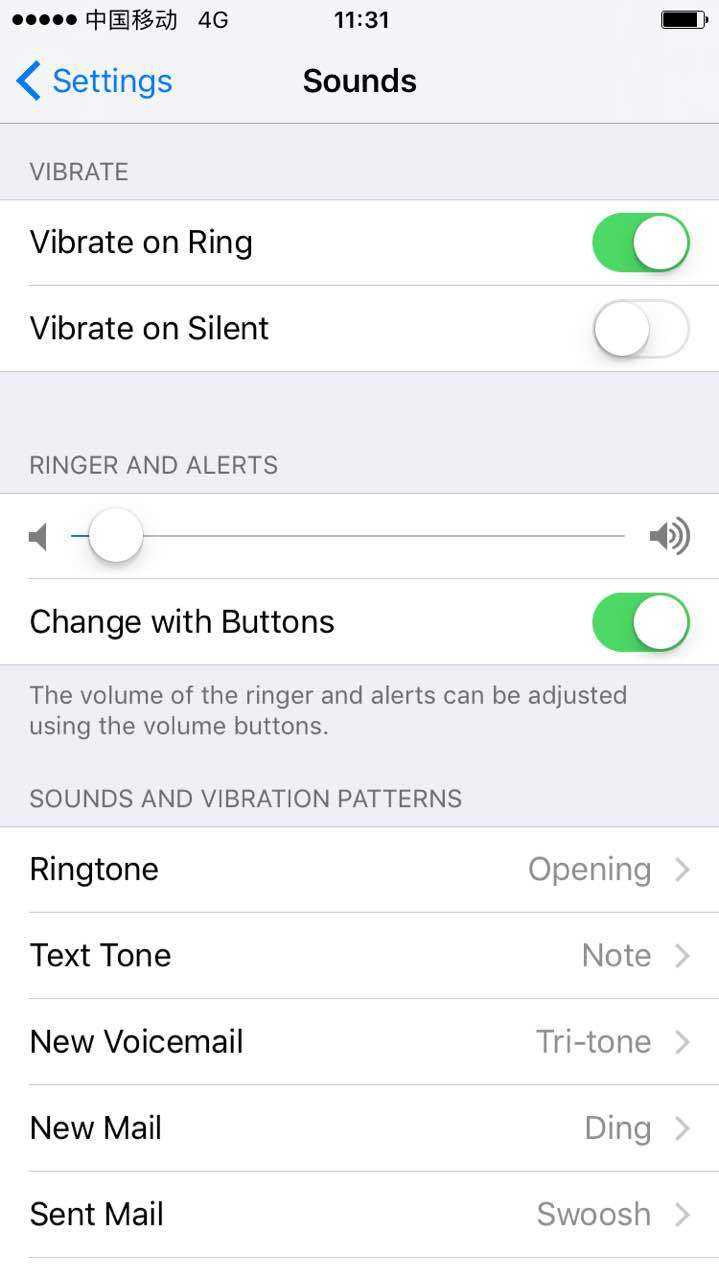
Step 7: Go to Settings on iPhone, tap Sounds, Ringtone to find the custom ring you just added. Click the song to make a custom ringtone on iPhone successfully.
More Info: How to Transfer Ringtones Between iTunes and iPhone
iTunes allow you to add and manage music to your iDevice conveniently. But sometime duplicate files can be made and redundant data can be accumulated on iPhone. We sincerely recommend you Tenorshare iCareFone, the most effective iPhone management tool to transfer iTunes media to iPhone or iPad in one click. Here’s how it works:
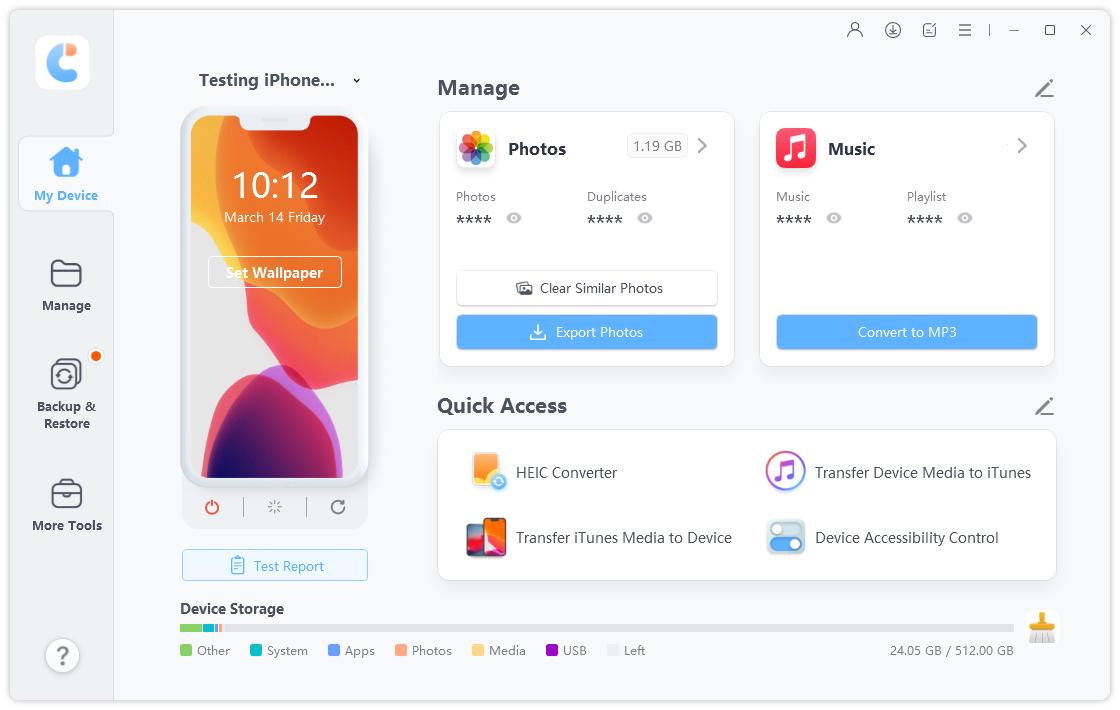
Connect the iPhone to the computer using a USB cable and click Transfer iTunes Media to Device from the main interface to move on.

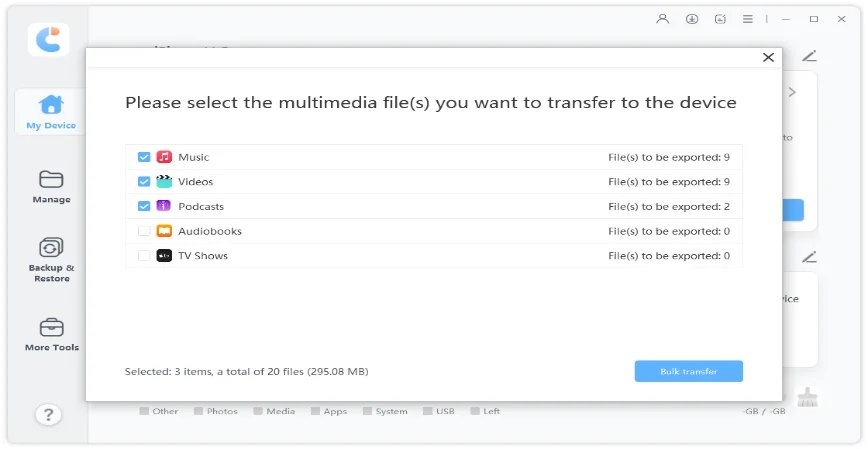
Select the media file types you want to transfer and click on Bulk Transfer.

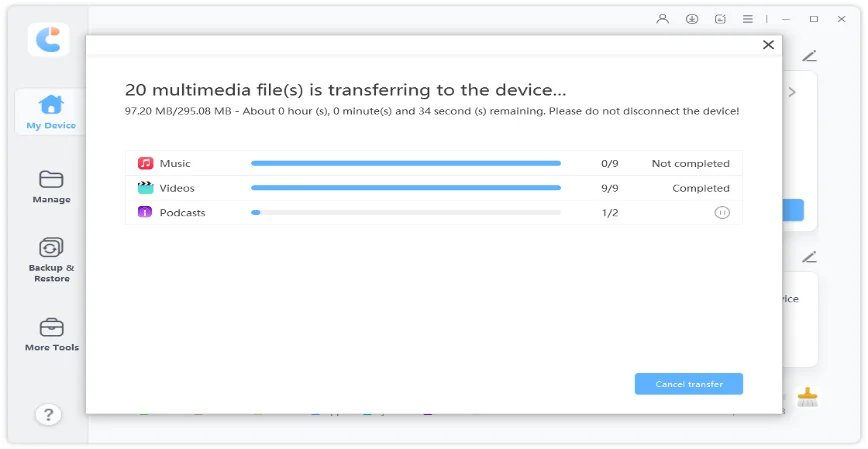
After that, the program will begin transferring. The entire process should take a few minutes.

Speak Your Mind
Leave a Comment
Create your review for Tenorshare articles

Tenorshare iCareFone
Best Free iPhone Transfer & iOS Backup Tool
Easily, without iTunes


