

UltData - Best iPhone Data Recovery Tool
Recover Deleted & Lost Data from iOS Devices Easily, No Backup Needed!
UltData: Best iPhone Recovery Tool
Recover Lost iPhone Data without Backup
If you're wondering how to restore data from iCloud, this comprehensive guide covers proven methods to help you successfully restore from iCloud backup in 2024. Whether you need to recover data from iCloud backup, restore deleted files, or want to restore iPhone from iCloud without resetting, we'll show you exactly how to do it safely and efficiently.
Many users face challenges when trying to restore iCloud data, especially when they want to avoid factory resetting their device. The good news? There are multiple reliable methods to restore data from iCloud - from professional tools that preserve your current data to traditional Apple methods for complete device restoration.
What you'll learn:
Important: Before attempting to restore data from iCloud backup, understand that traditional methods often require erasing all content and settings. This guide shows you both safe alternatives and conventional approaches.
The biggest challenge with traditional iCloud restore methods is they require erasing your iPhone first, causing you to lose all current data. Fortunately, Tenorshare UltData iPhone Data Recovery offers a superior solution to restore data from iCloud without resetting your device.
UltData enables you to selectively recover specific files from iCloud backup while preserving all your current iPhone data. With over 5 million users worldwide and a 98% success rate, it's the most trusted method to recover iCloud data without factory reset.
Follow these steps to recover your iCloud data without resetting. This method takes approximately 10-15 minutes and has helped millions of users successfully restore their data.


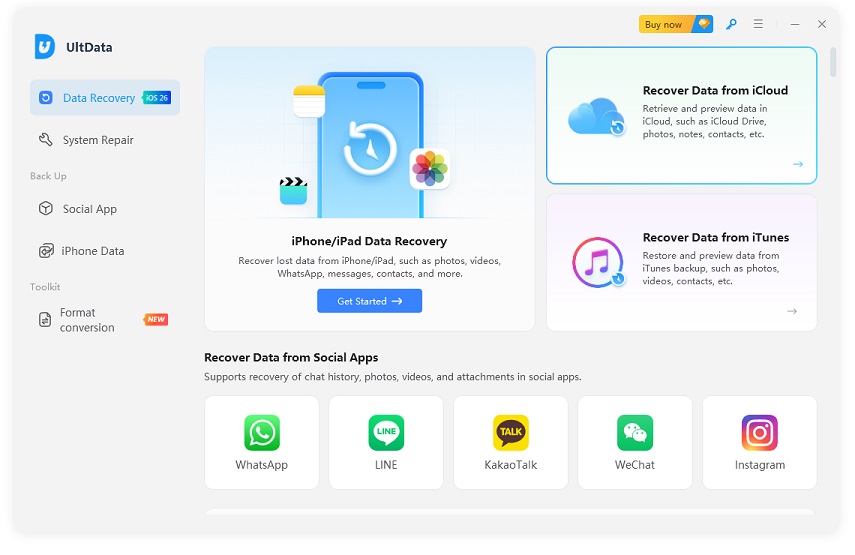
Step 1: Download and Launch UltData
Download Tenorshare UltData from the official website and install it on your computer. Launch the program and click "Recover Data from iCloud". Connect your iPhone using a USB cable for faster data transfer.
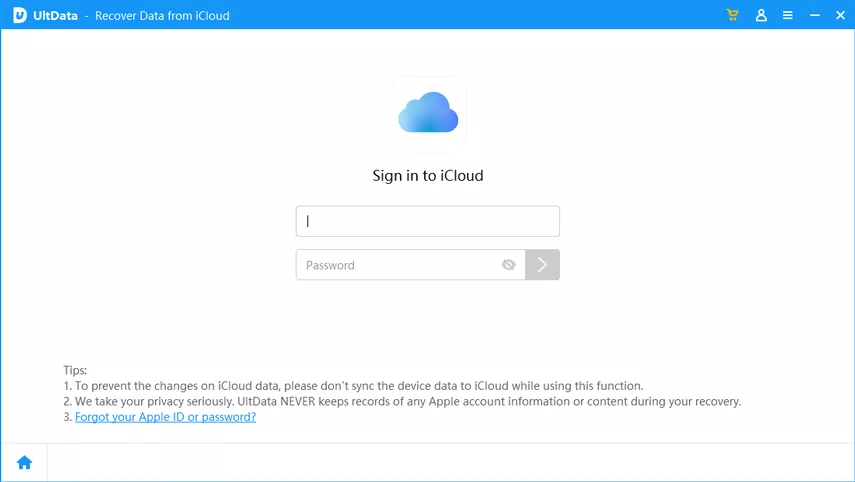
Step 2: Sign In to Your iCloud Account
Enter your Apple ID and password to access your iCloud backup. UltData uses industry-standard encryption to protect your credentials - they're never stored or shared. If you have Two-Factor Authentication enabled, enter the verification code when prompted.
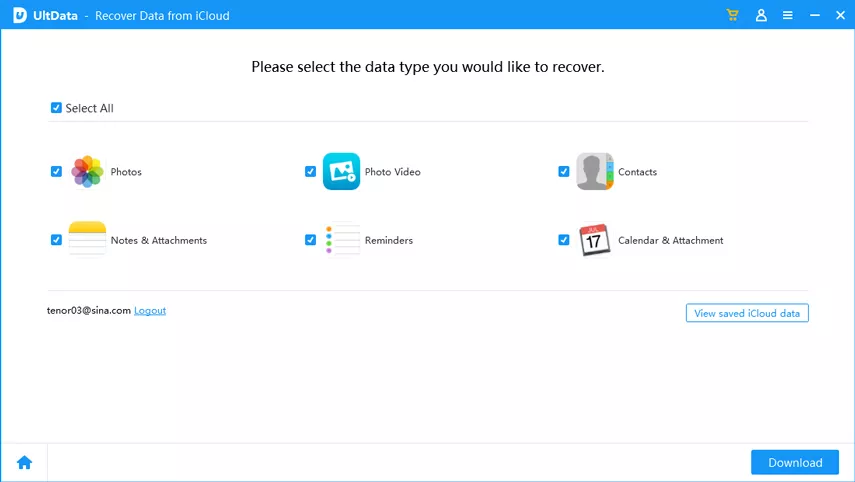
Step 3: Select Data Types and Download
Choose the specific data types you want to recover (photos, messages, contacts, etc.) or select "All" to scan everything. Click "Download" to begin downloading your iCloud backup data. Download time varies based on backup size - typically 5-10 minutes for a 5GB backup.
Step 4: Preview and Restore Selected Data
After downloading, UltData displays all recoverable files. Browse through categories, preview files to verify their content, then select the specific items you want to restore. Click "Recover to PC" to save files to your computer, or "Recover to Device" to restore directly to your iPhone.

That's it! Your iCloud data is now restored while all your current iPhone data remains safe and untouched.
Try it free: Download now to scan and preview your iCloud backup at no cost. Only pay if you decide to recover. 30-day money-back guarantee.
While Part 1's method is recommended for most users, some situations require using Apple's built-in iCloud restore features. This section covers traditional methods to restore from iCloud backup, along with important warnings about data loss.
Both traditional methods will ERASE ALL current data from your iPhone. Before proceeding:
This is Apple's official method to restore iPhone from iCloud backup. It's built into iOS but requires factory resetting your device first. Use this method when setting up a new iPhone or completely replacing your device.
What you'll need:
Steps to restore from iCloud backup:
Step 1: Erase All Content and Settings
Go to Settings > General > Transfer or Reset iPhone > Erase All Content and Settings. Enter your passcode and Apple ID password to confirm. This will delete all data from your iPhone.

Step 2: Set Up Your iPhone
After the erase completes, your iPhone will restart showing the "Hello" screen. Follow the setup prompts: select language, connect to Wi-Fi, and complete initial activation.
Step 3: Choose "Restore from iCloud Backup"
On the "Apps & Data" screen, select "Restore from iCloud Backup". Sign in with your Apple ID, then choose the backup you want to restore from the list. Select the most recent backup or an older one if needed.
Step 4: Wait for Restoration to Complete
The restore process begins - keep your iPhone connected to Wi-Fi and power. Restoration time varies:
Your iPhone will restart when complete. Apps will download automatically and data will continue syncing in the background.
If you only need to restore certain files from iCloud like photos, contacts, or calendars, use iCloud.com. This method is less invasive but has significant limitations compared to UltData.
What you can restore via iCloud.com:
Steps to restore from iCloud.com:
Step 1: Access iCloud.com
Open a web browser and go to iCloud.com. Sign in with your Apple ID and password. Enter the Two-Factor Authentication code if prompted.
Step 2: Navigate to the Data You Want to Restore
For photos: Click Photos > Recently Deleted. For contacts/calendars: Click Account Settings > Advanced section at the bottom.
Step 3: Restore Your Data
Select the items you want to restore and click "Recover" or "Restore". Data will sync to all devices signed in with your Apple ID.

Restoring data from iCloud doesn't have to be complicated or risky. As covered in this guide, you have multiple options depending on your needs:
We strongly recommend Tenorshare UltData for most users because it:
Join over 5 million satisfied users who have successfully recovered their iPhone data with UltData. Start your free trial today - only pay if you decide to recover. 30-day money-back guarantee included.
Don't let lost data cause stress. Take action now and restore your important files, photos, messages, and more from iCloud. Choose your method and get started today!
Yes! Using Tenorshare UltData, you can restore specific files from your iCloud backup without erasing your iPhone. This method allows you to:
Traditional Apple methods require factory reset (iPhone Settings) or have limitations (iCloud.com). UltData eliminates these risks. See detailed instructions in Part 1.
Time required depends on your method and backup size:
Factors affecting time: Wi-Fi speed, Apple server load, backup size, and number of apps/photos.
Yes, in many cases:
Best practice: Enable automatic iCloud backup and sync features (iCloud Photos, Contacts, Drive) to maximize recovery options.
Impact depends on your method:
Warning: Always back up current data before using iPhone Settings method.
Depends on your method:
Recommendation: Using a computer with UltData provides significantly better control, safety, and success rates.
Common causes and solutions:
Faster alternative: Use UltData for selective recovery - downloads only what you need in 10-20 minutes.
With UltData: Yes! You can selectively choose specific photos, messages, contacts, or any individual files to restore while leaving everything else untouched.
With iPhone Settings: No. Traditional iCloud restore is all-or-nothing - you must restore the entire backup.
With iCloud.com: Limited. You can restore certain file types (photos, contacts), but not individual items within contacts/calendars.
This is why UltData is recommended - it offers complete control over which data to restore.
then write your review
Leave a Comment
Create your review for Tenorshare articles
UltData - Best iPhone Data Recovery Tool
Recover Deleted & Lost Data from iOS Devices Easily, No Backup Needed!
UltData: Best iPhone Recovery Tool
Recover Lost iPhone Data without Backup
By Jenefey Aaron
2026-07-16 / iCloud