ReiBoot - No.1 Free iOS System Repair Software
Fix 150+ iOS Issues without Data Loss & Safely iOS 26 Upgrade/Downgrade
ReiBoot: No.1 iOS Repair Tool
Fix 150+ iOS Issues, No Data Loss
Fortunately, we've got you covered with the best 11 answers to solve this issue. In this article, we'll take you through some easy troubleshooting steps to fix your iPhone's Wi-Fi connection and get you back online quickly. Let's dive in! Following are all the possible methods to resolve the “iPhone connected to WiFi but no internet” issue. All the solutions mentioned are in descending order, so go one by one to resolve the issue on your iPhone.
A quick restart is one of the basic, simple, yet effective ways to resolve any issue on an iPhone. It might seem useful, but it mostly solves major common and minor iOS-related problems. It’ll refresh your iPhone's network settings and resolve the issue.
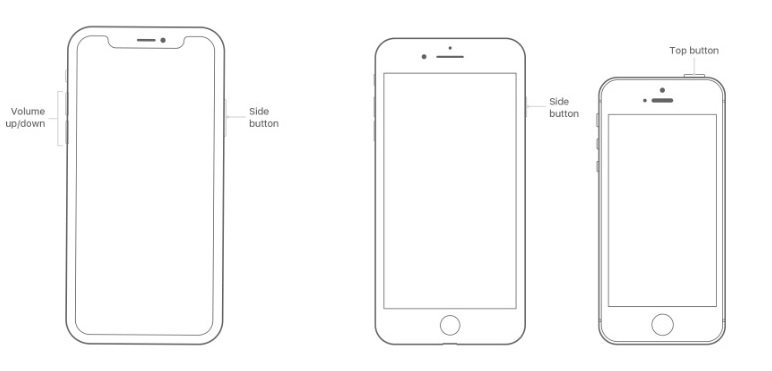
Here’s how you can force restart your iPhone properly to resolve the issue:
Hold the power button again, and release it when you see the Apple logo on the screen.
The “iPhone connected to WiFi but no internet” issue can also occur when there’s any issue with the router. Try connecting any other device to the same WiFi network and see if there’s the same issue. If it's the same case with the other devices, the problem is on the router's end.
A simple restart of your router can resolve most of the minor issues. To restart your router, turn off the power to the router, wait about a few seconds, and turn it on back and see if the issue is resolved. If the issue persists, try contacting your internet service provider or replacing the router.
The “iPhone connected to WiFi but no internet” issue occurred after the latest iOS 16, which led to the anticipation of iOS 16 being the buggy update. If the previously mentioned solution didn't resolve the issue, then there’s the possibility of bugs and glitches in the OS.
Tenorshare ReiBoot is a powerful program that offers a one-click solution to remove all the bugs, glitches, and errors from your iPhone’s OS. All you need to do is give minimal instructions to the tool, which will automatically complete the job in a few minutes.
Here’s how to resolve the “iPhone connected to WiFi but no internet” issue using Tenorshare ReiBoot:
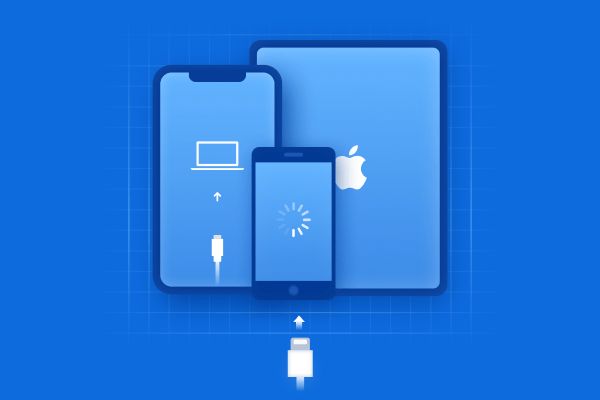
Download the program. Install and launch it on your computer, then connect your iPhone using the compatible cable. On the main screen of the Tenorshare ReiBoot, click on the Start button to get started with the process.
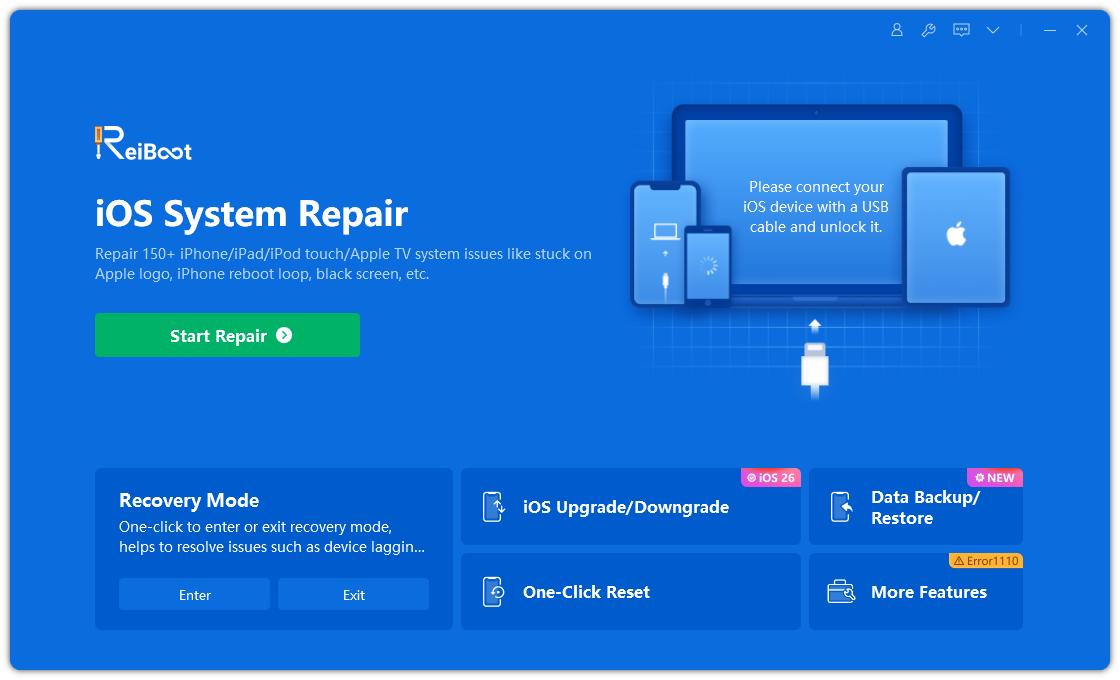
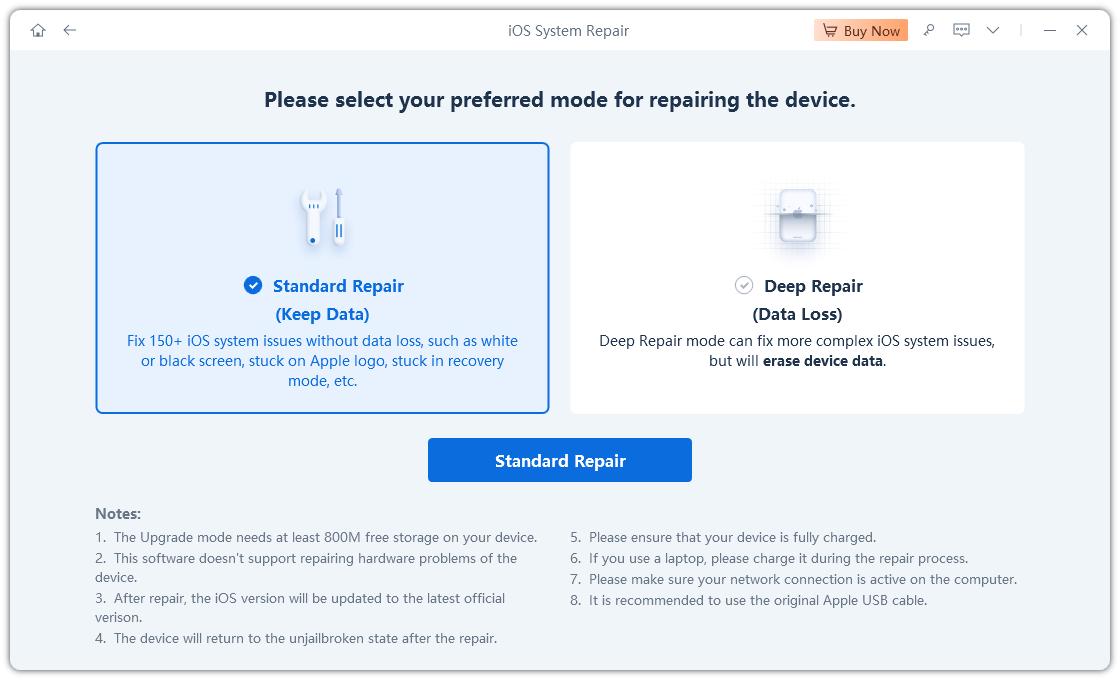
The program will give you two repair options to select from. Click on the Standard Repair option to repair your iPhone’s OS.
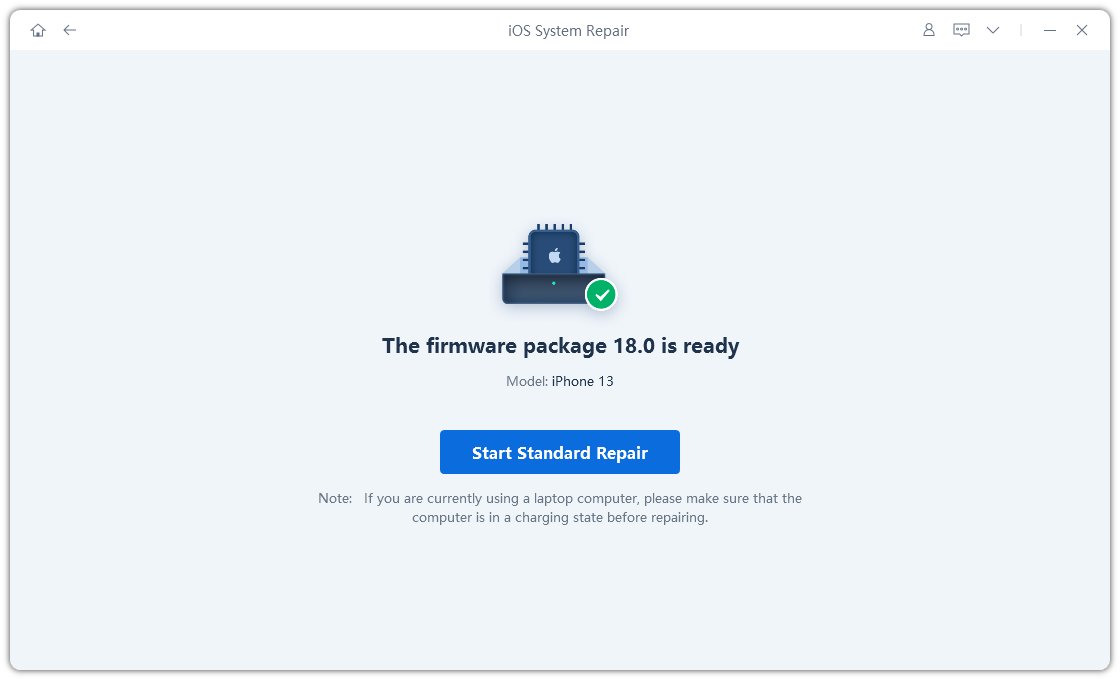
Next, it’ll automatically suggest the firmware package according to your iPhone’s model; click Download to initiate the downloading process.
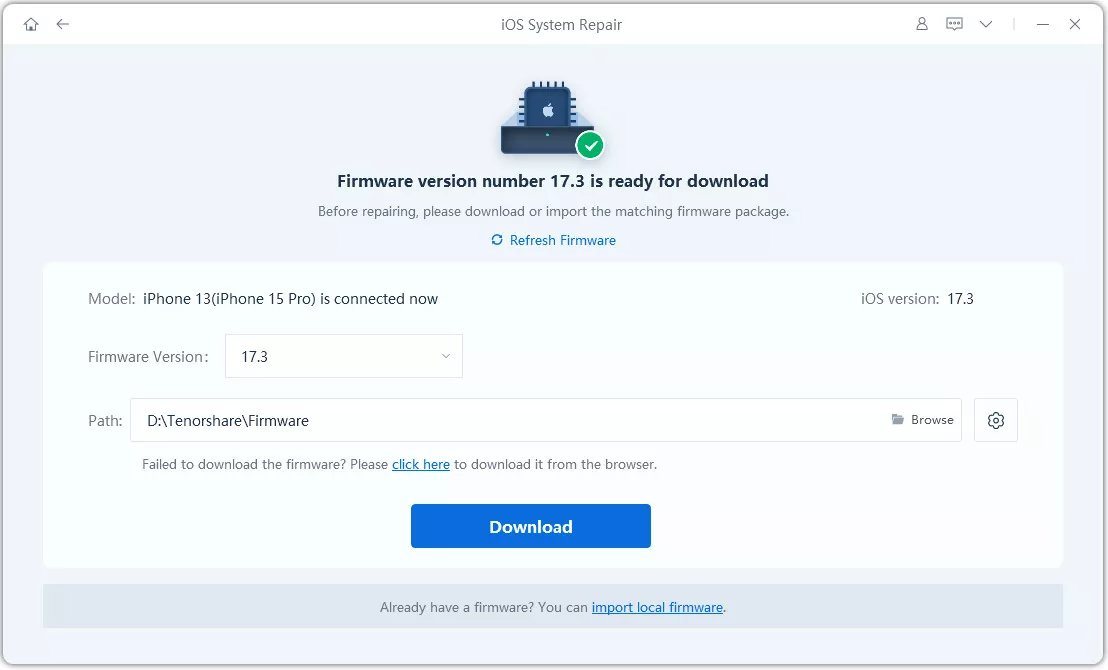
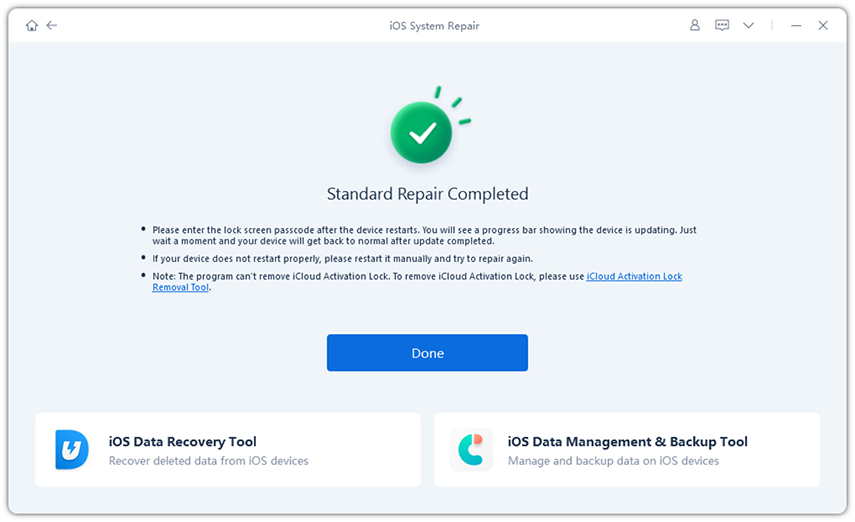
Once the download completes, click the Start Standard Repair option to start the repair process. It’ll take a few minutes to complete. Your device should restart once the process gets completed.
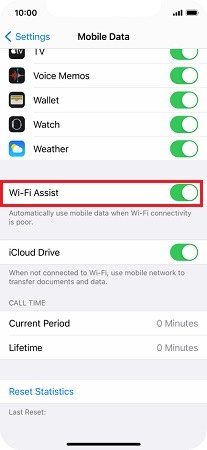
iPhones have the “WiFi Assist” feature that automatically switches to the cellular data when the WiFi signals are weak or not in range. The “iPhone connected to WiFi, but the WiFi Assist causes no internet”, can be caused by the WiFi Assist. Disable WiFi Assist and see if the issue is resolved.
Go to the Settings app on your iPhone >> Mobile Data >> Scroll down and tap WiFi Assist Toggle to turn it off.
If you have turned on the VPN or use any third-party VPN app service, this can surely interfere with the connectivity of your iPhone and cause “iPhone connected to WiFi but no internet” issue. The VPN can also reduce the internet speed on your device, so it’s recommended to use it only when needed. Here’s how to turn off VPN on your iPhone:
he toggle should turn gray once you turn it off.
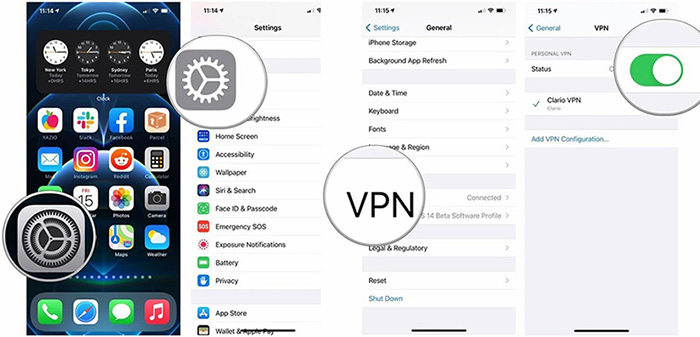
If you’re using any 3rd party VPN app, then go into the app and turn it off, or you can also directly uninstall it by long pressing it and selecting “Remove App”.
Renewing the lease on your iPhone is another effective way to resolve the “iPhone connected to WiFi but no internet” issue. What does the “renew lease” do? It reset the DHCP that’ll reassign a new IP address to your iPhone. Try renewing the lease on your iPhone and see if the issue is resolved:
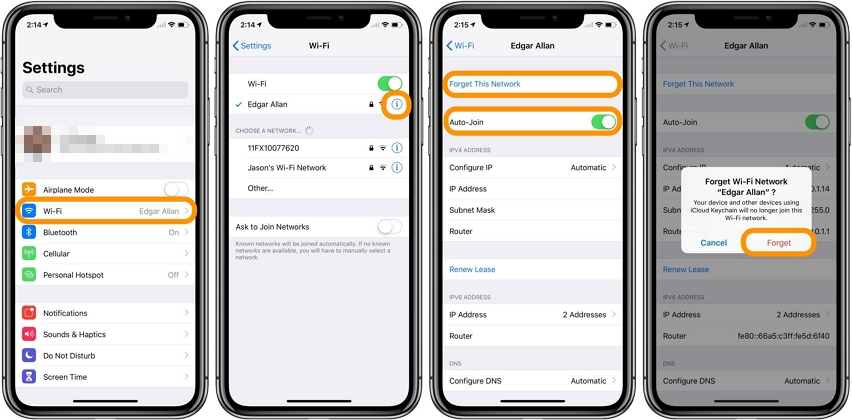
Forgetting the WiFi Network and connecting again often resolves the connectivity issues. The iPhone will connect and register it as a new WiFi network, thus resolving the connectivity issue. Follow the steps below to forget the WiFi network on your iPhone:
1. Navigate to Settings >> WIfi and tap on the “i” next to the WiFi network that you’re facing the issue with.
2. On the next information screen, tap on the Forget button and confirm to disconnect it.
3. Now go back one step, and connect again to the WiFi network.
Changing the DNS server can help resolve your iPhone's slow internet or connectivity issue. The popular option to switch to your DNS server is Google DNS which offers improved internet connection speed. Here’s how you can switch to Google DNS on your iPhone:
Step 1: Navigate to the Settings app and open WiFi. On the next screen, locate your Wi-Fi network, and tap “i” for the information screen.
Step 2: Scroll down to the bottom of the page, and tap on Configure DNS. Tap on the Manual option, then tap on the Add Server.
Step 3: Type 8.8.8.8 and save it as New Server DNS.
Step 4: Type 8.8.4.4 and save it as Google DNS.
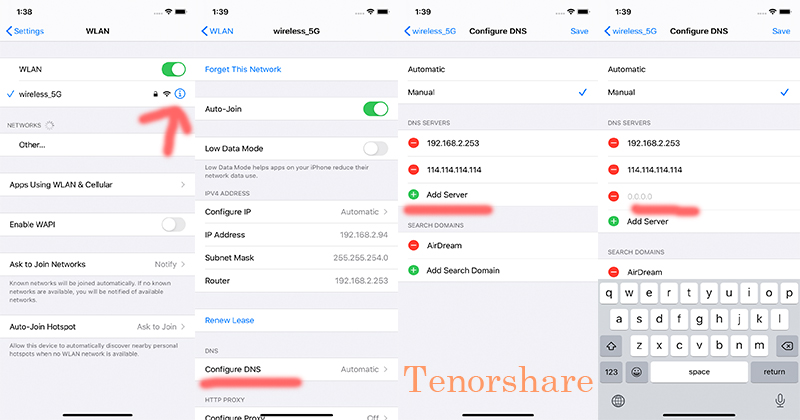
After adding the Google DNS to your iPhone, delete your service providers' previous DNS server by tapping the red minus button and the save button to save the changes.
Resetting Network settings can also help resolve the connectivity issue caused by glitches or bugs. It’ll reset the network settings on your device and configure them once you reset the network settings. All the WiFi network passwords saved on the device will be deleted, so ensure you’ve them beforehand.
Follow the steps mentioned below to Reset network settings on your iPhone:
1. Go to the iPhone’s Settings and tap on the General option.
2. Scroll down to locate Transfer & Reset iPhone and tap on it.
3. Select the Reset Network Settings, enter your passcode to confirm it, and that’s it.

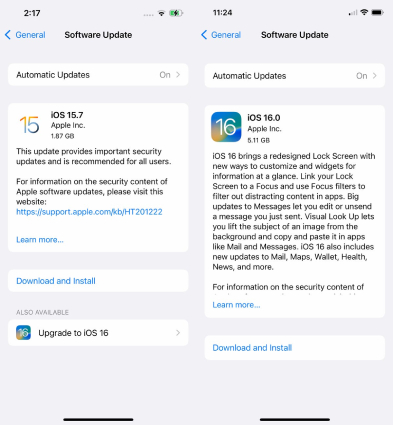
The newer iOS updates include bug fixes, improvements, and stability. If you haven’t updated your iOS system on your iPhone, it’s time to update it to resolve the “iPhone connected to WiFi but no internet” issue.
Follow the steps below to update the iOS system:
If the newer updates are available, tap the Download & Install button to update the iOS system.
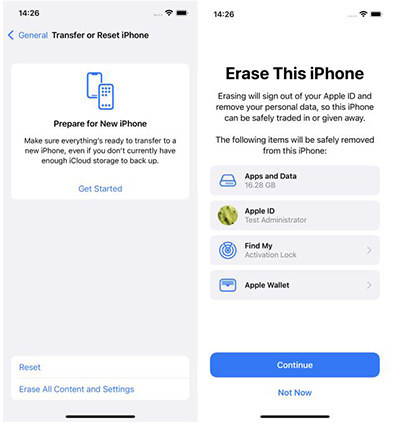
If none of the above-outlined solutions resolve the issue on your iPhone, the last resort is to factory reset your iPhone. It’ll cause permanent data loss to your device, so make sure you’ve backed up the data on your phone before proceeding to the steps.
Steps to factory reset an iPhone:
Your iPhone will start erasing everything and will eventually restart after factory resetting.
Several reasons can cause the “iPhone connected to WiFi but no internet” issue. We discussed resolving the “iPhone connected to WiFi but no internet” with the top 11 methods. If you don’t feel like going through all 11 methods, Tenorshare ReiBoot is the ultimate way to resolve issues.

then write your review
Leave a Comment
Create your review for Tenorshare articles
By Sophie Green
2026-02-03 / Fix iPhone