

ReiBoot - No.1 Free iOS System Repair Software
Fix 150+ iOS Issues without Data Loss & Safely iOS 27 Upgrade/Downgrade
ReiBoot: No.1 iOS Repair Tool
Fix 150+ iOS Issues, No Data Loss
So, you’ve just bought a brand-new iPhone 17 and are excited to quickly set it up and enjoy the new features. But if you’re not sure how to set up & activate iPhone 17, don’t worry. In this guide, we’ll explain the full setup process step by step, whether you’re transferring data from your old iPhone or starting fresh without one. But if your iPhone 17 is unable to activate, we’ve also shared several proven solutions to help you troubleshoot!
Prior to learning how to set up & activate iPhone 17, you must take care of some things. This is necessary for the process to go smoothly without data loss and to finish without trouble:
Make sure your iPhone 17 has at least 20–50% battery before setup, so it doesn’t switch off before the procedure even completes.
Place a SIM card into your iPhone 17 or prepare an eSIM before setting up an iPhone 17. Here’s how:
Step 1: Find the SIM tray on the left side. Use the eject tool/paperclip to open.
Step 2: Insert Nano-SIM (match the notch). Then, push the tray back in until it clicks.

Step 1: Head to “Settings” on your iPhone 17. Then, choose “Cellular.’
Step 2: Tap “Add eSIM.” You can also scan a carrier QR code or use the carrier’s app.
Have your Apple ID + password ready (or create one during setup).
If you’re setting up a new iPhone 17 from an old phone, back up your old iPhone for data transfer. Here’s how to do that:
Step 1: Head to “Settings” on your iPhone 17. Then, choose “[your name].”
Step 2: Select “iCloud.” Next, tap “iCloud Backup.” Pick “Back Up Now.”
After you’ve taken care of the necessary things, here’s how to set up and activate the iPhone 17 with and without an old iPhone:
From an Old iPhone:
Here’s how to set up new iPhone from the old iPhone:
Step 1: Switch on your new iPhone 17. Place it near the old one.
Step 2: Make sure your old iPhone (iOS 11+) and new iPhone 17 are on Wi-Fi and Bluetooth is activated.
Step 3: A “Quick Start” screen will appear. Confirm the correct Apple ID. Then, hit “Continue.”
Step 4: Use the old iPhone to scan the animation on the new iPhone 17. Enter the old iPhone’s passcode on the new one.
Step 5: Set up Face ID/Touch ID. Then, enter your Apple ID password. Enter other device passcodes if asked.
Step 6: Choose how to transfer/restore:
Tap “Transfer Directly from iPhone.” Keep both phones close and plugged in. You can’t use them until the transfer finishes.


Step 7: Set up iCloud Drive, Apple Pay, and Keychain. Agree to Terms. Then, choose to enable “Siri” now or later.
Step 8: Pick options for analytics, True Tone, and display view (Standard/Zoomed). Tap “Get Started.” Then, begin using your iPhone 17.
Here’s how to set up new iPhone without old iPhone:
Step 1: Turn on your new iPhone 17. When on the “Hello” screen, swipe to start.
Step 2: Pick language + country/region. Choose “Set Up Manually.”
Step 3: Use WiFi or cellular if a SIM is inserted, or eSIM. Set a passcode (optional, can change later). Then, set up “Face ID” on your iPhone 17.
Step 4: Sign in with your Apple ID (or create one / skip for later). On the “Apps & Data” screen, choose how to transfer/restore data:

Choose “Download from iCloud” (if you have an iCloud backup). Data and apps restore in the background, so you can start using your iPhone right away.
Apple’s activation servers verify your iPhone before you can use it. If the servers are down, your device won’t activate. Checking Apple’s System Status page helps you see if the issue is on Apple’s side. If so, the only solution is to wait until the servers are working again.
A strong internet connection is needed for your iPhone to communicate with Apple’s activation servers. If Wi-Fi is weak, activation may fail. Thus, switching to a better Wi-Fi network or using cellular data can help. You can also try restarting your router or connecting to another network to fix the issue.
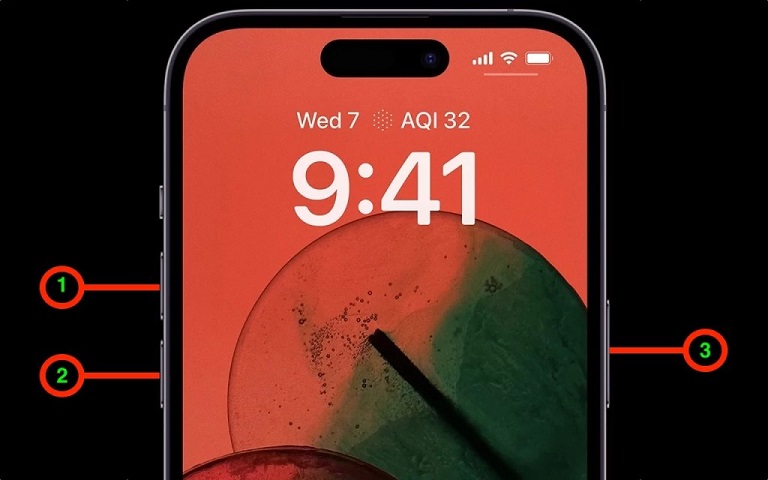
Restarting your iPhone 17 can fix small software glitches that block activation. A force restart is stronger and can help if the phone is frozen or unresponsive. Restarting clears temporary files, while a force restart forces the activation process to reset. Here’s how to do both:
Step 1: Press and hold a “Volume” or “Side” button. Then, drag the slider to switch it off.
Step 2: Wait 20-30 seconds. Then, press the “Side” button. Keep it pressed until your iPhone 17 reboots.
Your iPhone 17 needs a SIM card to connect to your carrier, and activation may fail if it’s damaged or not inserted correctly. Taking it out and reinserting it makes sure it’s seated properly. Also, check that the SIM card is clean and not broken.
You can activate your iPhone 17 using Finder (on macOS Catalina or later) or iTunes (on older macOS or Windows) if activation over Wi-Fi fails. A computer gives a more stable connection to Apple’s servers and can also install needed software updates for activation. This method is also ideal if you wish to activate your phone without a SIM card. However, your phone must not be locked to a specific carrier. Here’s how to set up & activate iPhone 17 with iTunes/Finder:
Step 1: Connect your iPhone 17 to a computer with iTunes/Finder installed. Then, if asked, tap “Trust This Computer” on your phone and enter your passcode.
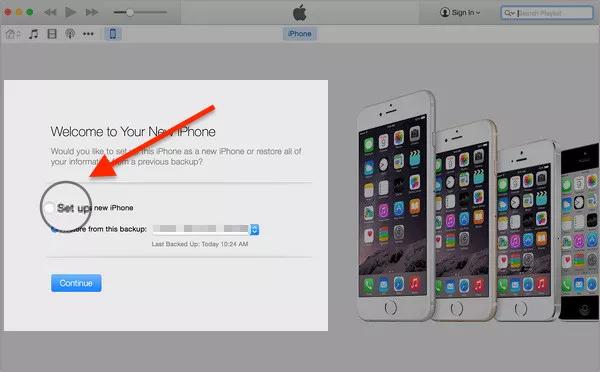
Step 2: Open Finder/iTunes. Your iPhone should appear automatically. Choose “Set up as a new iPhone.” Hit “Continue"
Step 3: Follow the on-screen steps. Next, enter your Apple ID if asked. Wait while Apple verifies your device.
Step 4: Once done, disconnect your iPhone 17 and finish setting it up.
Using Recovery Mode can fix serious software problems blocking activation by giving your iPhone 17 a fresh iOS reinstall. It also lets you reset your iPhone to factory settings, but it erases all data, so it should be a last resort. Here’s how to place your iPhone 17 into Recovery Mode:
Step 1: Place your iPhone into Recovery Mode:
Step 2: Connect your iPhone 17 to a computer with iTunes/Finder installed. Then, if asked, tap “Trust This Computer” on your phone and enter your passcode.
Step 3: Open Finder/iTunes. Your phone will be detected automatically in Recovery Mode.

Step 4: A message will appear asking you to update or restore your iPhone 17. Tap “Restore.”
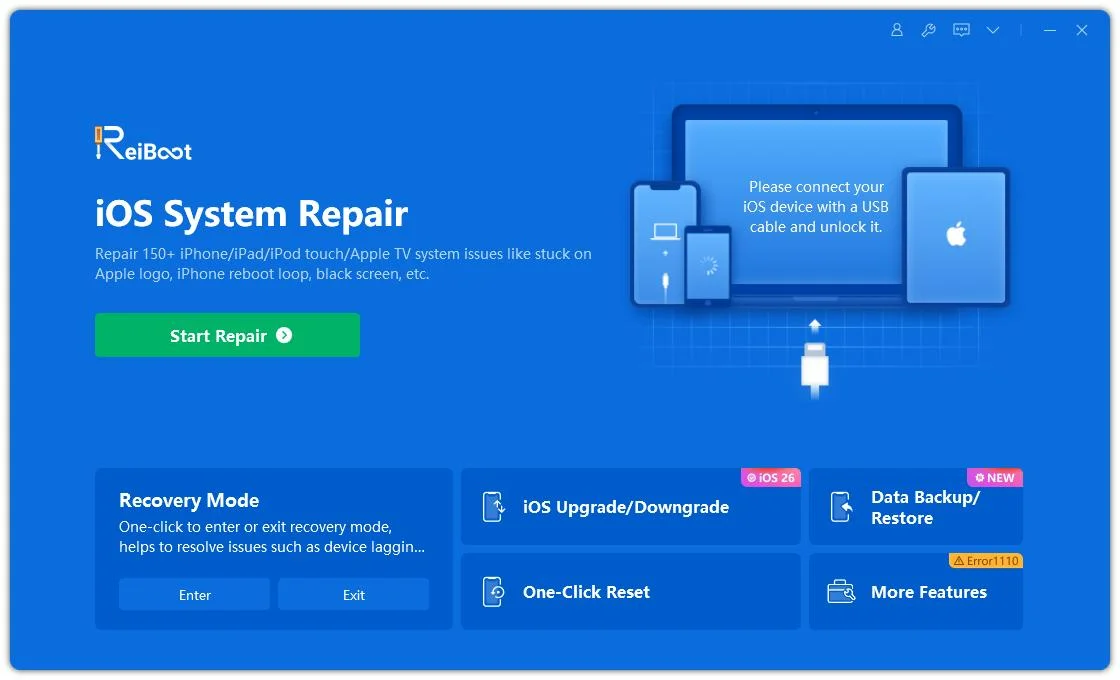
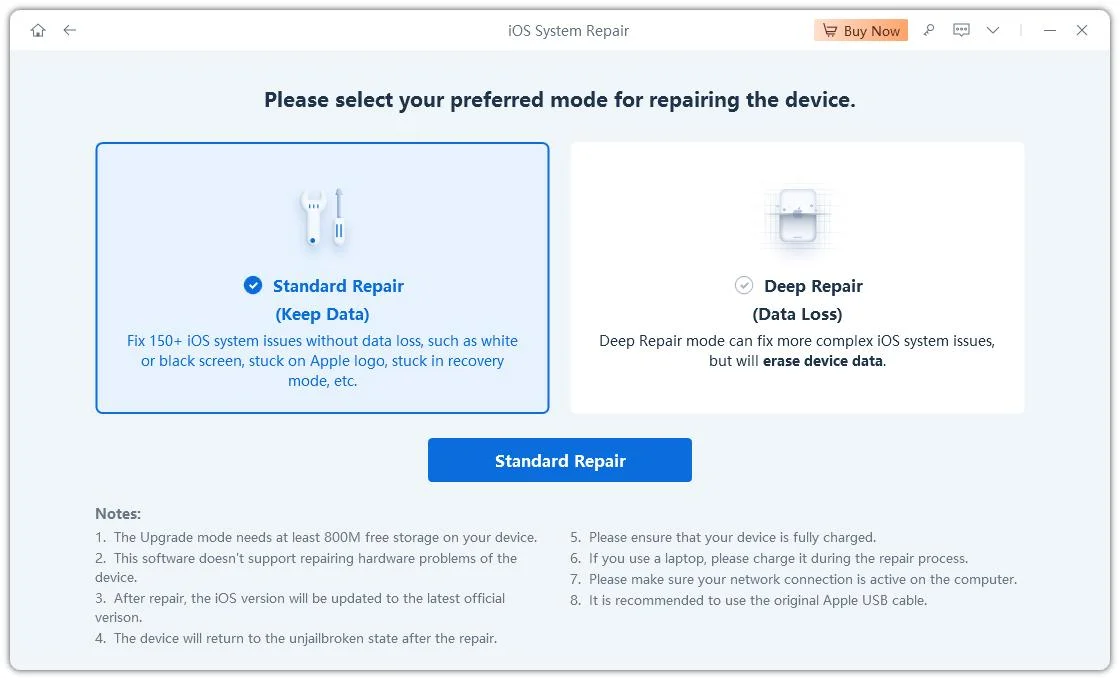
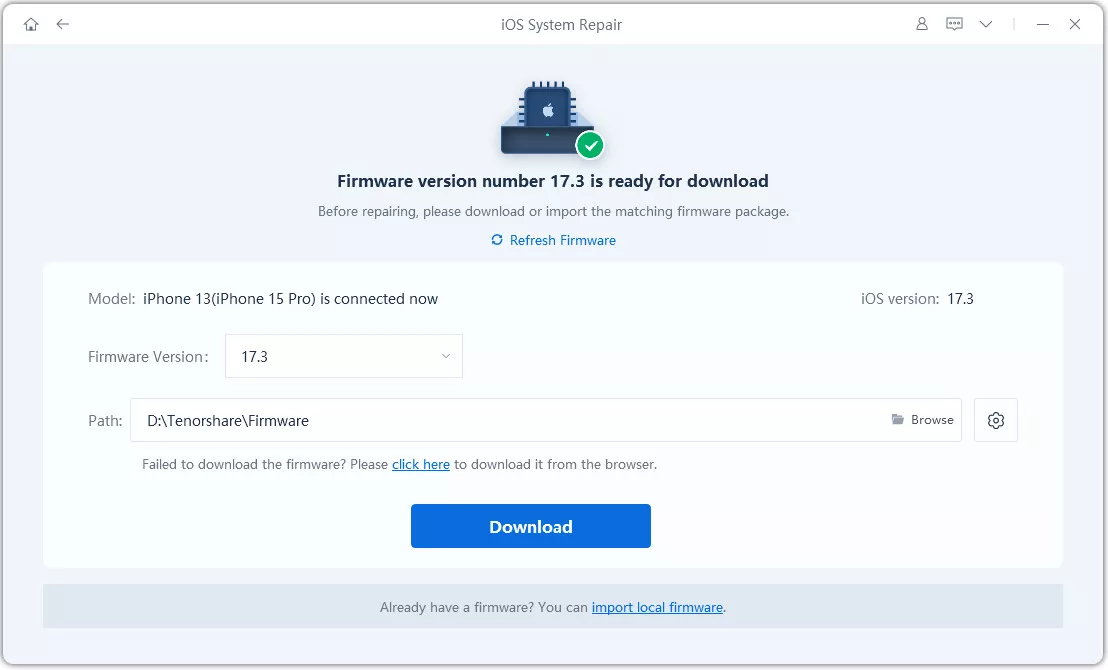
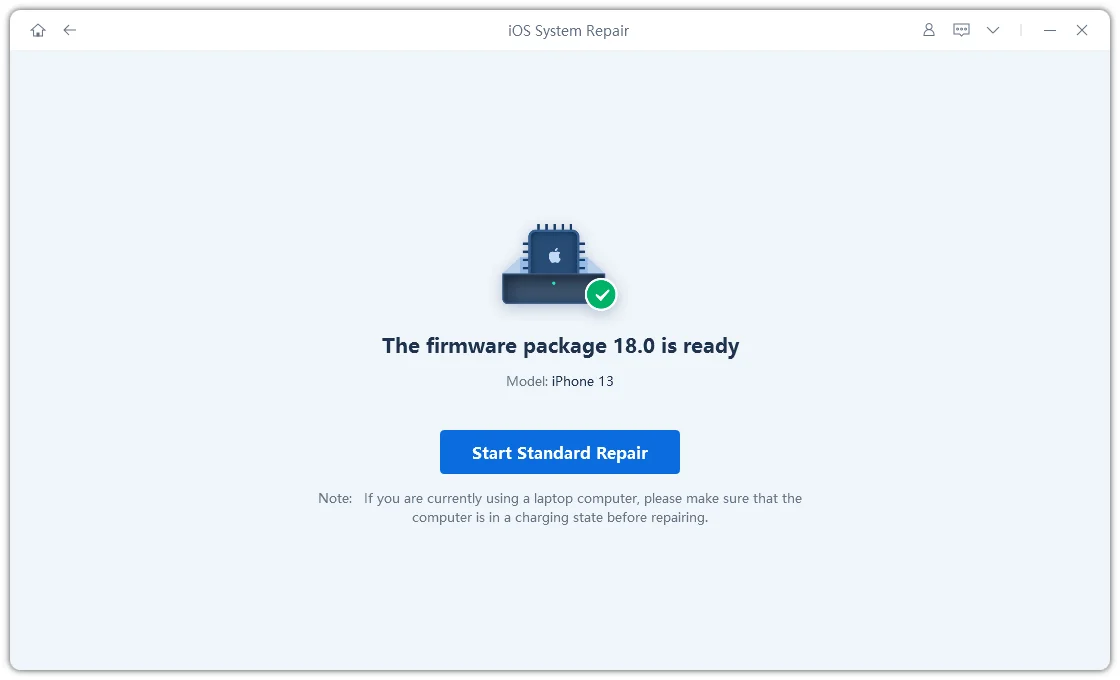
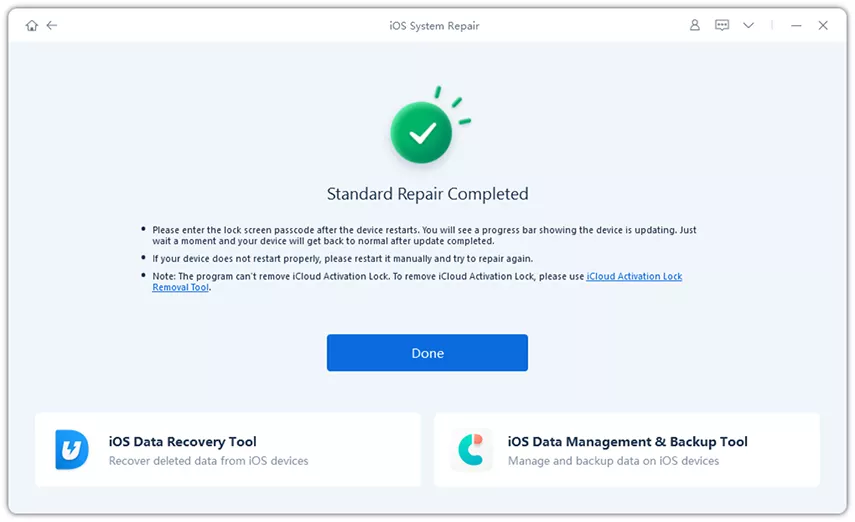
You also have a chance to fix your iPhone 17 if it’s not activating without data loss. You can avoid restoring it by employing a third-party tool like Tenorshare ReiBoot to fix whatever iOS problems are preventing it from activating. The tool can troubleshoot 150+ iOS problems and also manage your iDevices. Here are its key features at a glance:


Follow the instructions beneath to use ReiBoot to fix the iOS issues preventing iPhone 7 activation:
For iPhone 14 and later models in the US, there’s no physical SIM tray, so you’ll set up an eSIM instead. In regions with physical SIM cards, you can insert the SIM either before turning on the iPhone or when the setup process asks for it. The phone will guide you through activation if needed.
Activating an iPhone 17 can take a few minutes to over an hour, depending on your setup. Quick Start may take longer if you’re transferring lots of data. But activation through Finder or iTunes usually takes just a few minutes. However, the overall time depends on your data size and internet speed.
When setting up a new iPhone, you can move your data using Quick Start, iCloud, or a computer backup. This transfers apps, settings, photos, contacts, and more. With iCloud, data downloads in the background, so you can use your phone right away.
Knowing how to set up & activate iPhone 17 is usually easy with Quick Start, iCloud, or a fresh setup. If activation fails, you can try checking Apple’s servers, switching networks, restarting, or using Finder/iTunes. Recovery Mode may help, but it will erase data.
So, to fix the activation issue without data loss, Tenorshare ReiBoot is a great option. It can solve 150+ iOS issues, including whatever software malfunction is preventing activation, and also offers numerous iOS management features.

Tenorshare ReiBoot - Fix iOS Issues


then write your review
Leave a Comment
Create your review for Tenorshare articles

ReiBoot - No.1 Free iOS System Repair Software
Fix 150+ iOS Issues without Data Loss & Safely iOS 27 Upgrade/Downgrade
ReiBoot: No.1 iOS Repair Tool
Fix 150+ iOS Issues, No Data Loss
By Anna Sherry
2026-06-17 / iPhone 17