How to Backup and Restore Windows 7 (with Pictures)
One of the great things about Windows 7 is the easiness to backup and restore Windows 7 files and folders. The operating system comes with a really great tool to help you backup as well as restore files in a few clicks on your machine. The feature is so great that it has even been made available in the Windows 10 OS.
In this guide, we are going to specifically look at how you can backup your files on your Windows 7 based computer. You will learn three of the best ways to backup files Windows 7 and then restore them when you need on your computer.
- Part 1. Backup and Restore Windows 7 Using Windows Built-in Tool
- Part 2. Backup and Restore Windows 7 Free with Professional Data Backup
- Part 3. Backup Files Windows 7 Using a Cloud Storage Service
Part 1. Backup and Restore Windows 7 Using Windows Built-in Tool
Backup and Restore is the built-in tool you have on your Windows 7 machine to create and restore your backups. Although it is not as efficient as the software mentioned above, it helps create files and folders backup on your computer.
To Backup Windows 7 Using Backup and Restore
Choose the local drive that you want to back up and right-click on it. Select the Properties option and then Back up Now available under the Tools tab.

Pic 1. backup and restore windows 7 In the Back up or restore your files window click the link to set up a backup.

Pic 2. set up a backup Select a location to store the backup and click the Next button.

Pic 3. select a location Now you can choose what do you want to backup.
Let Windows choose: Windows will back up data and files saved in libraries, desktop, default Windows folders. It will also create a system image.
Let me choose:: You can freely choose the files, folders and directories to back up.

Pic 4. what to backup In the next window you have to choose what the backup will contain. You cam check the Include a system of drives: System Reserved, (C:) option.

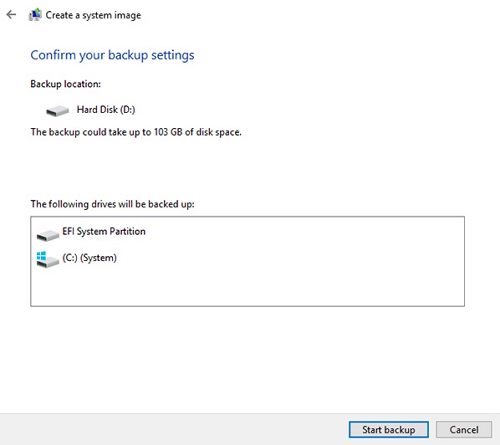
Pic 5. select files to backup Now you can review your backup settings. If you'd like to change the backup schedule, you can click Change schedule link. You can schedule the days and times the backup occurs. When done, click Save settings and run backup.

Pic 5. save backup settings A new window will appear which shows the status of your backup. You can click the View Details button to see the backup details during the process.

Pic 6. start backing up
To Restore Windows 7 Using Backup and Restore
- Launch Control Panel on your PC and head to System and Maintenance > Backup and Restore.
click on Restore my files in the Backup and Restore Center.

Pic 7. restore my files Click Search, Browse for files, or Browse for folders to search the most recent backup for a file or folder you lost.

Pic 8. search files Select a location where you want to restore the backup file

Pic 9. where to restore files Select the original location option or specify a new location to restore files and finally click Restore to restore them.

Pic 10. start restoring
Part 2. Backup and Restore Windows 7 Free with Professional Data Backup
No matter how good the built-in backup tool on Windows 7 is, there are still a few things that it does not do properly. One of these things is that it is not as user friendly as some of the backup software available in the market.
Take a look at Tenorshare Free Data Backup, for example. It allows you to create your Windows 7 backups with extreme ease and even lets you restore them whenever you want.
- Create full backups of your entire Windows 7 system
- Easily backup a full Windows 7 disk or partitions to local/external hard disk
- Backup Hard Disk or Partition to An Image File
- Clone Hard Drive to SSD without Reinstalling
- Restore backups with the click of a button
- Easy and secure
1 Click to Backup Hard Drive/Partition Windows 7
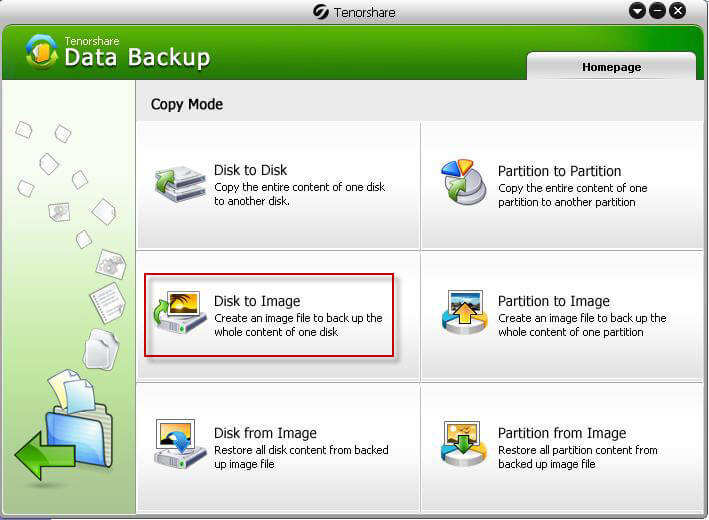
Install the software on your computer. Open the software and click on the option labeled as Disk to Image.

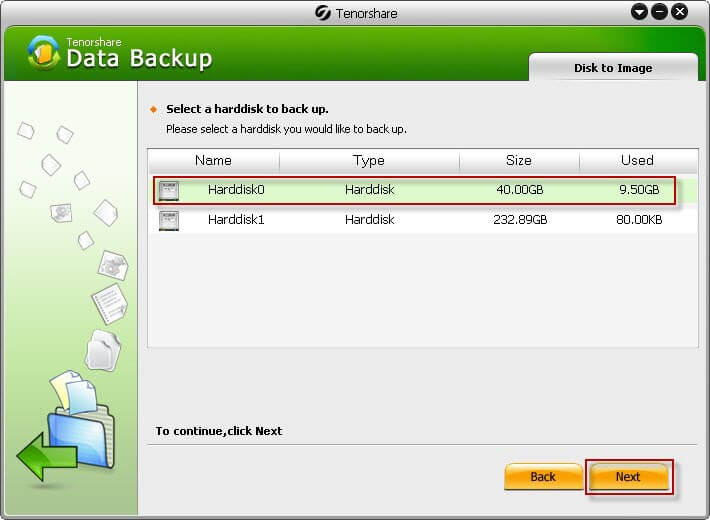
Fig 1. select disk to image Select the hard disk or partition you want to backup and then click on the Next button.

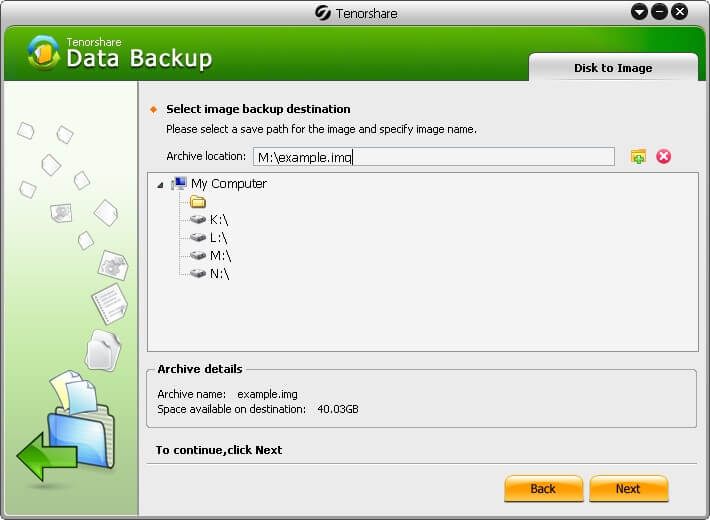
Fig 2. select target disk Choose the location to save the backup on and click on Next.

Fig 3. save location Choose a compression level on the following screen and click on Next to backup.

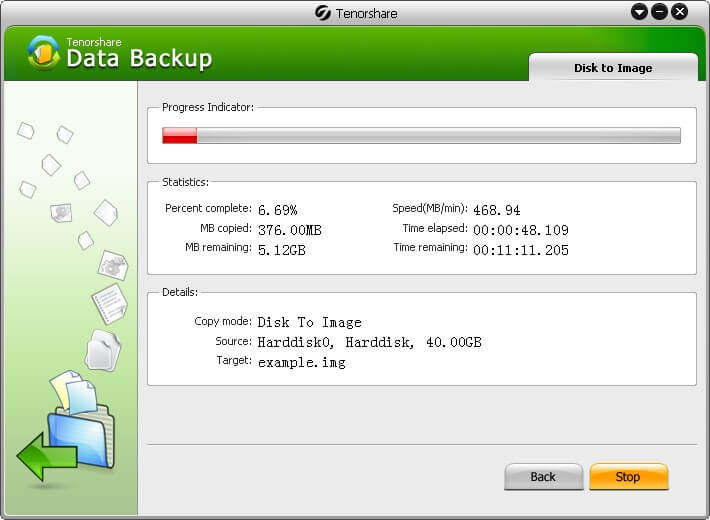
Fig 3. create image backup
An image file containing your PC data will be saved in your chosen location.
1 Click to Restore Windows 7 from Image
Connect the external drive containing the image file into your computer. Select "Disk from Image" and find your backup image file and click "Next"

Image 1. select disk from image Select the hard drive you're restoring, and click "Next"

Image 2. select disk The software will start the restoring process. Wait for the disk to be restored.

Image 3. start restoring
Part 3. Backup Files Windows 7 Using a Cloud Storage Service
Cloud backups are a new thing. In these services, what you do is you create a backup of your computer and then upload it to a cloud storage service. That way even if your computer fully crashes, you still have something to fall back on.
There are various providers to use for your cloud backup needs. Here we show you how to use the OneDrive free backup software for Windows 7 to backup Windows 7 to OneDrive.
- Head over to the OneDrive site and download and install the app on your computer.
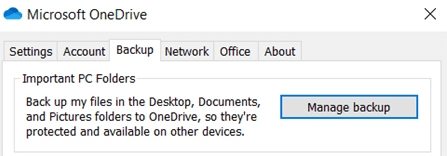
Open the app, click on the tab that says Backup, and then click on the Manage backup button.

Pic 11. onedrive backup Specify the folders you want for OneDrive to back up. Once you have done that, click on Start backup.

Pic 12. start onedrive backup
OneDrive will start backing up your files on your computer. When it is done, your files will be uploaded to your OneDrive account on the cloud storage. You can then use your account credentials to access your files in your account.
One of the main drawbacks of using OneDrive for your backups is that it uploads your entire backup to the cloud. That means you will easily eat up your Internet bandwidth in just one backup. Secondly, when you restore the backup, it will consume the same amount of your bandwidth as your entire backup will be downloaded from cloud to your computer.
Also, if someone finds out your login details, they can get access to your backup and can access all the files in it. So it does not seem good in terms of security.
Wrap It Up
If you do not want to lose the data of your Windows 7 PC at any time, it is a good idea to keep the data backed up. There are various tools to do it as shown above and we hope you find the one that you like in this guide. Tenorshare Free Data Backup is highly recommended to backup files in Windows 10/8/7.
Speak Your Mind
Leave a Comment
Create your review for Tenorshare articles


