How to Undo on the iPhone Notes Application
You may need to redact the immediately typed text or drawn sketch when typing a note in the Notes app. Although you can select and delete it or even use the backspace, a simpler method is to undo what you've just typed. The undo feature is not a preserve of the Notes app. This article explains how to undo on iPhone notes and details how to undelete notes on iPhone XS/XS Max/XR/X/8/8 Plus/7/7 Plus/6S/6/SE/5s/5.
- Part 1. How to Undo Typing, Sketch Strokes, Deletions, etc. on iPhone Notes
- Part 2. How to Undo Deleted Notes on iPhone
- Part 3. How to Backup iPhone Notes to Avoid Data Loss
Part 1. How to Undo Typing, Sketch Strokes, Deletions, etc. on iPhone Notes
1. Shake to Undo
To display the on-screen undo button on the iPhone, users have to, and shockingly so, shake their iPhones. To enable this feature and to iPhone notes undo delete, follow the procedure below.
Step 1: Launch the Settings app.
Step 2: Navigate to General > Accessibility > Shake to Undo then toggle on the slider.
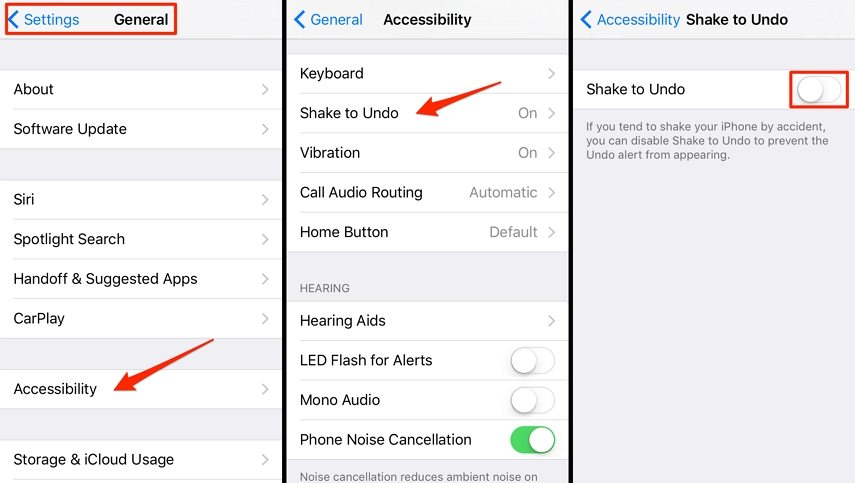
Step 3: Flip your iPhone and select Undo when the alert appears on the screen.
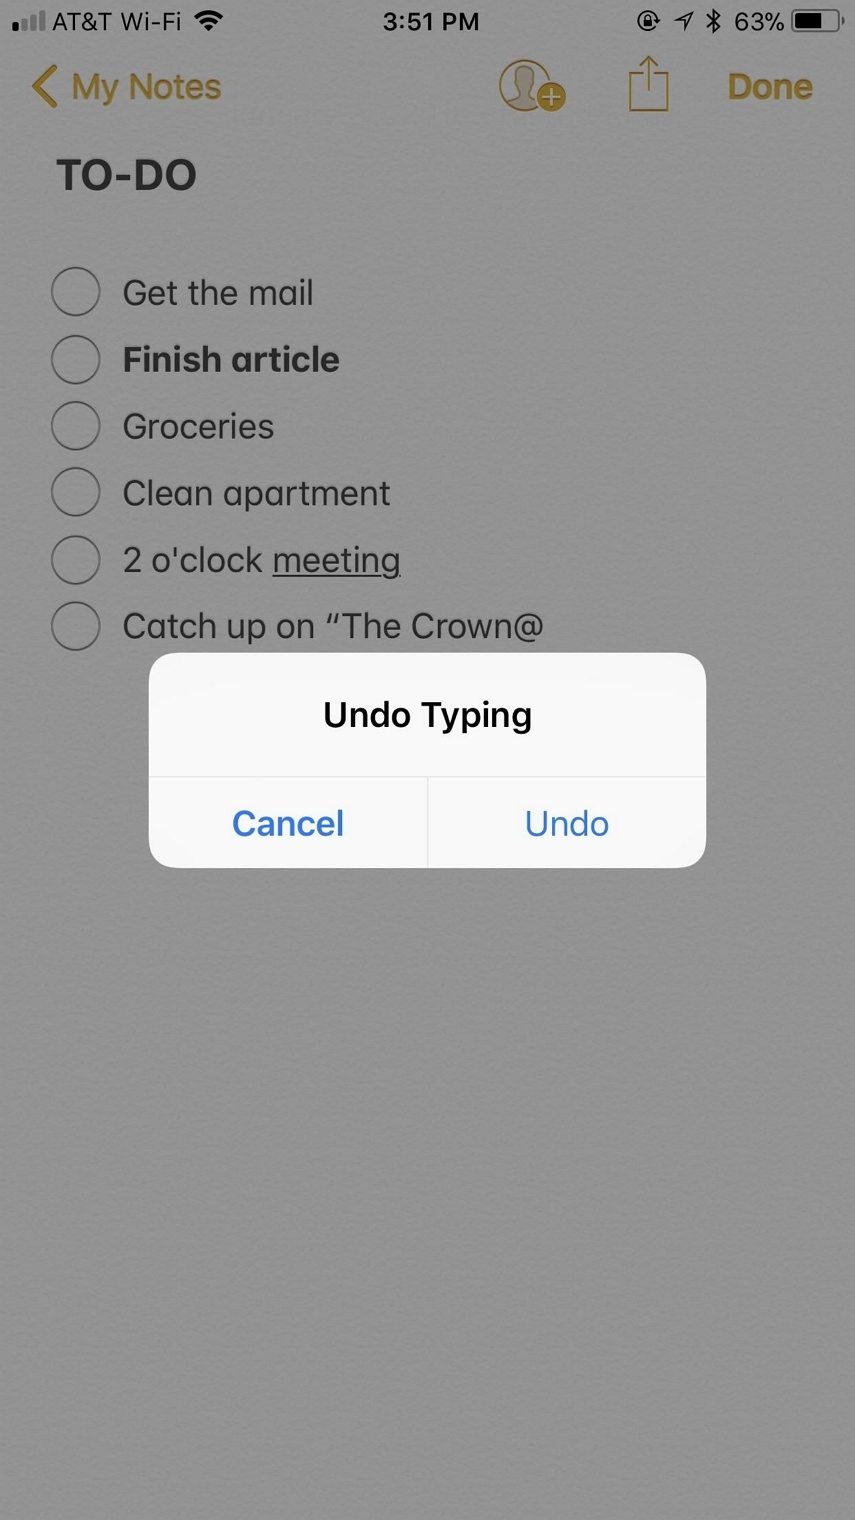
Repeat step 3 as many times as you need to, achieve the results you wish.
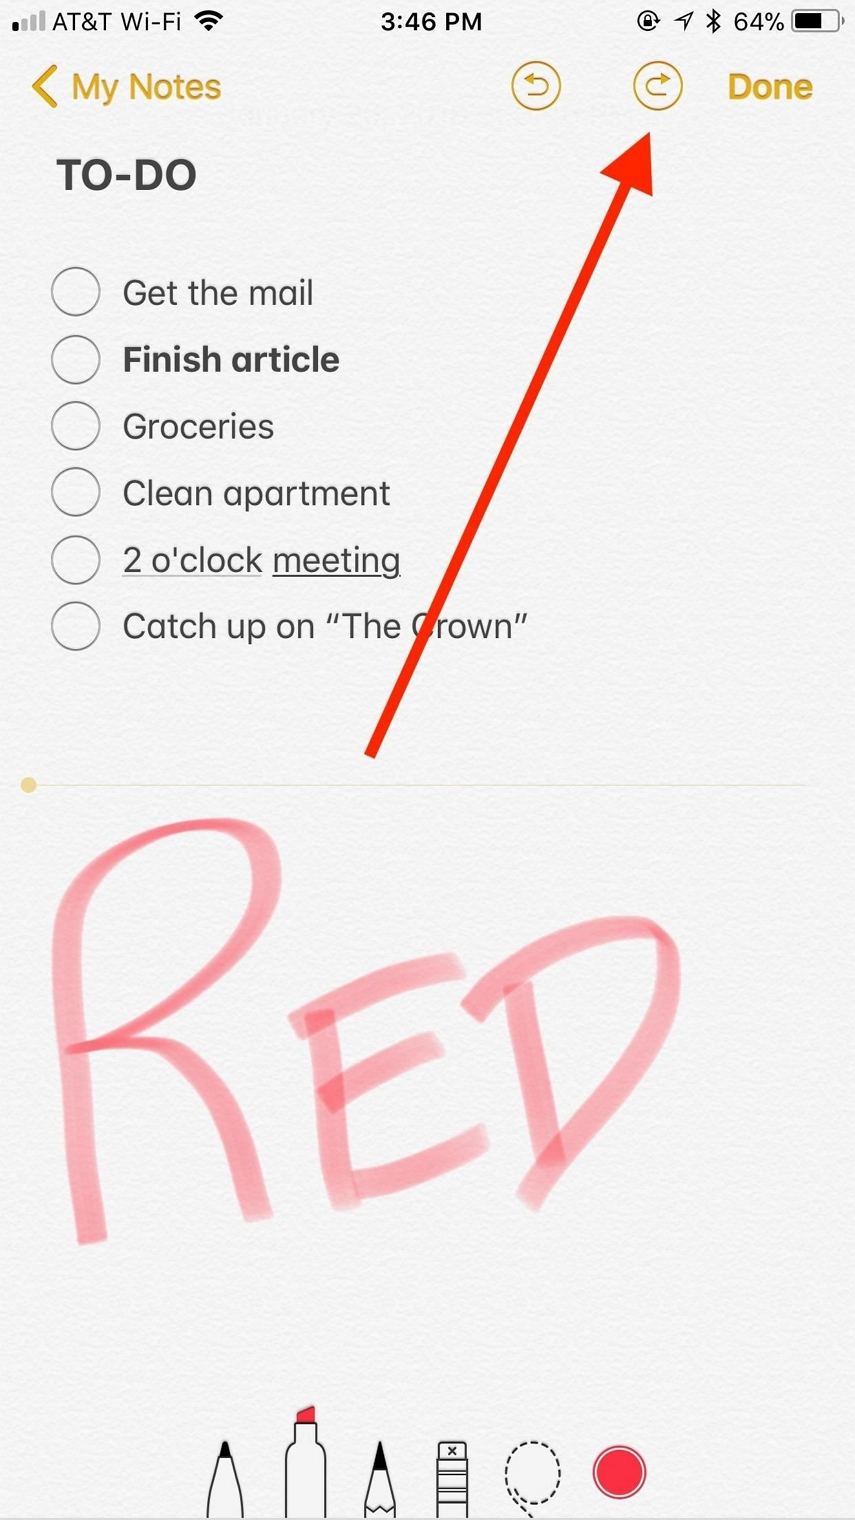
When drawing sketches on the Notes app, tap the undo button. It is a curved arrow that points left.
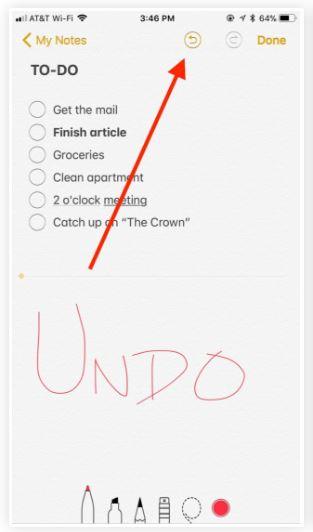
2. How to Redo Actions in Notes
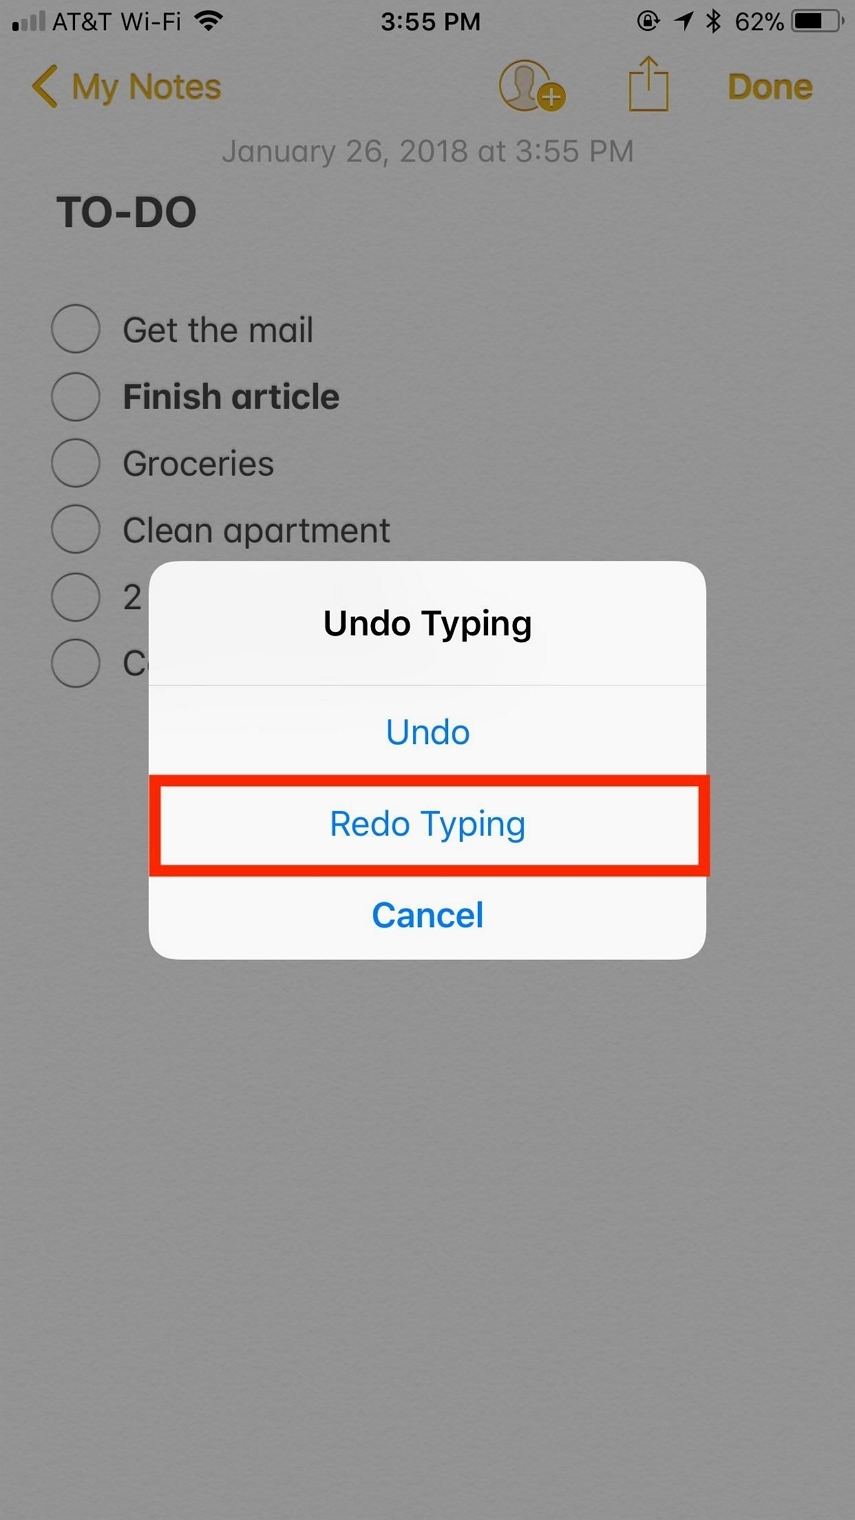
As is expected, you may have "undone" so much, making it necessary to redo your actions. Simply shake/ flick your iPhone and select Redo Typing when the alert appears on the interface.
To redo your sketches, tap the redo button. A right-pointing arrow.
Part 2. How to Undo Deleted Notes on iPhone
Want to iPhone Notes undo delete? Tenorshare UltData is a great tool that allows iPhone users to restore notes using three methods: directly on your iPhone, using iTunes and iCloud backups without erasing the content on your iPhone. Users can undelete notes by previewing and selecting only they notes the wish to recover, making retrieval of unwanted notes a non-issue. To use Tenorshare UltData to undelete notes on your iPhone, follow the procedure below.
1. Recover Notes Directly to iPhone
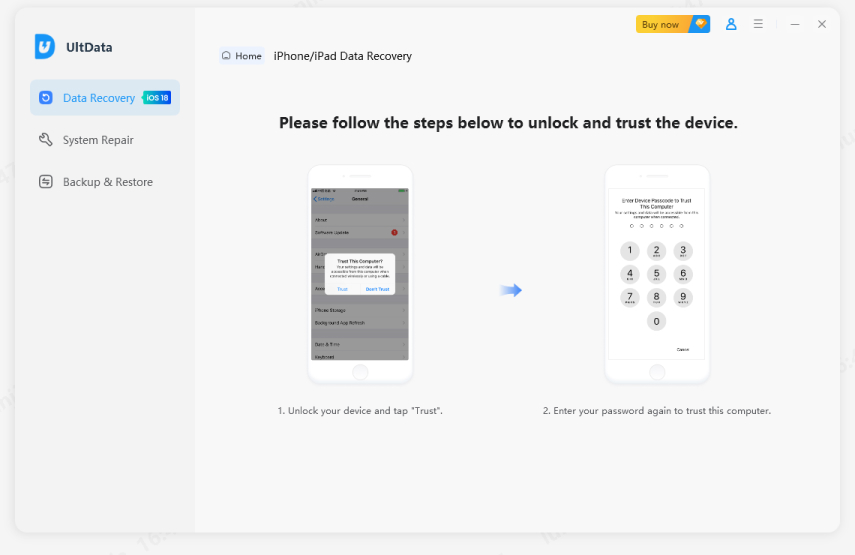
Step 1: Step 1: Download, install and launch Tenorshare UltData on your Mac or PC then connect your iPhone to your computer using a USB cable. (If your iPhone is not detected, tap Trust.)

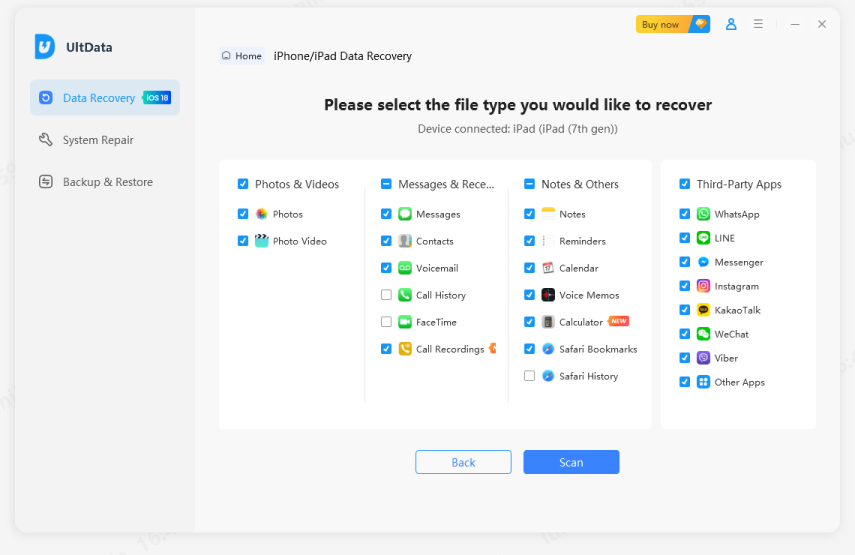
Step 2: The Recover from iOS Device option is the default selection. Select Notes and other data types you would like to recover then click Start Scan.
Step 3: Preview the notes you wish to recover then click Recover.
Step 4: Choose to either Recover to Device or Recover to Computer to recover to your iPhone or computer respectively.
2. Recover Notes from iTunes Backup
Step 1: Run UltData and click Recover Data from iTunes Backup File located at the top bar in the interface.
Step 2: Select a backup file and click Start Scan.
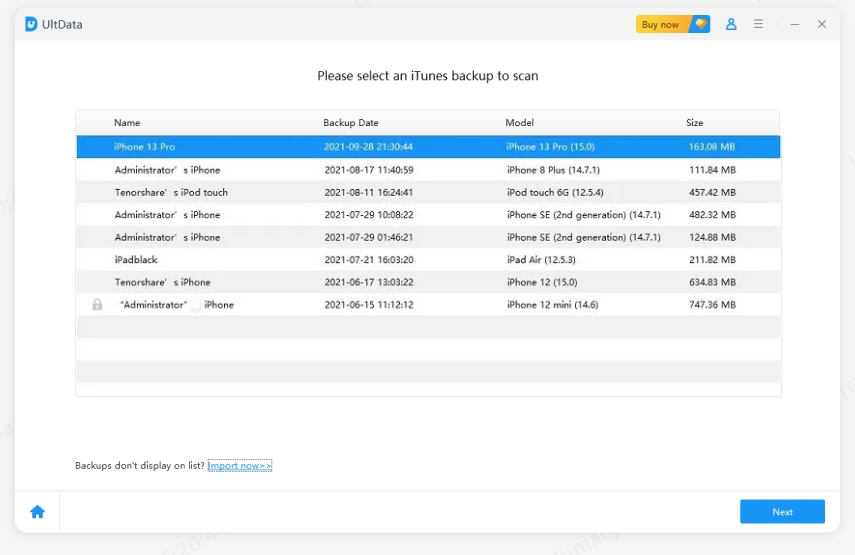
Step 3: Preview the notes that disappeared then click Recover.
3. Restore only iPhone Notes from iCloud Backup
Step 1: Launch UltData and select Recover Data from iCloud Backup File.
Step 2: Type in the same Apple ID credentials you used when setting up your iPhone or click Login Shortcut to automatically log in.
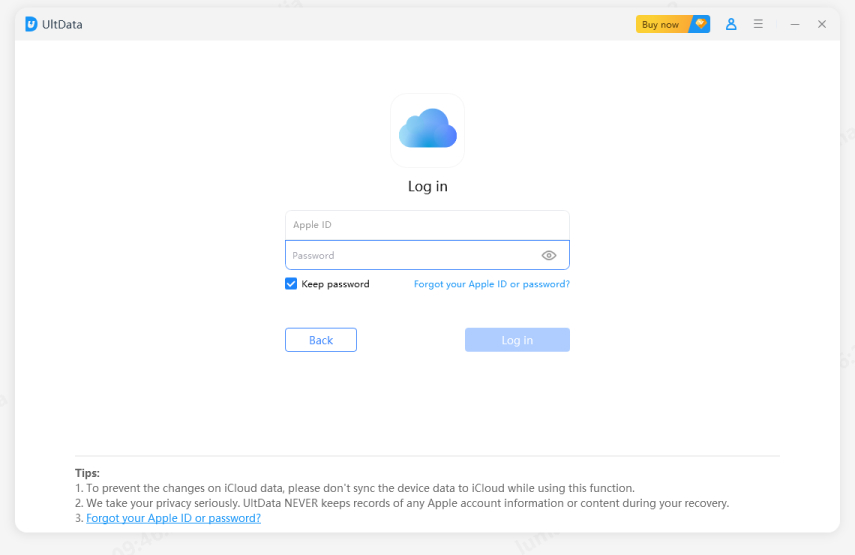
Step 3: Preview and select the notes you wish to recover and click Recover.
Part 3. How to Backup iPhone Notes to Avoid Data Loss
>Tenorshare iCareFone enables users to back iPhone Notes on your Mac and PC; this prevents loss of data. Considering Apple only provides 5 GB of free data, and with iTunes, users cannot preview and select their backups, Tenorshare iCareFone is a great alternative. To backup iPhone Notes following the procedure below.
Step 1: Connect your iPhone to your computer using a USB cable.

Step 3: Select "Backup & Restore" tab from the top menu to start and select Notes to backup.

Conclusion
To undo typing and sketches in the Notes app is a simple process that has been described herein. If you have accidentally deleted or lost your notes, we recommend using Tenorshare UltData for reasons that include previewing and selectively recovering notes without erasing your iPhone.
Speak Your Mind
Leave a Comment
Create your review for Tenorshare articles

Tenorshare iCareFone
Best Free iPhone Transfer & iOS Backup Tool
Easily, without iTunes


