

ReiBoot - No.1 Free iOS System Repair Software
Fix 150+ iOS Issues without Data Loss & Safely iOS 27 Upgrade/Downgrade
ReiBoot: No.1 iOS Repair Tool
Fix 150+ iOS Issues, No Data Loss
Want to make your iPhone 17 stand out with a sound that’s all yours? Knowing how to get a custom ringtone on iOS 26 can help you do just that. Apple makes it easy to choose your favorite songs, sounds, or even recordings as ringtones, so every call or message can feel personal. You can pick a fun tone for messages, a cool beat for calls, or any sound that shows your style.
In this guide, we will explain step by step how to set custom ringtones on iOS 26. It’s simple, clear, and anyone can follow.

Creating your own custom ringtones on iOS 26 is a great way to make your iPhone 17 feel personal and unique. Instead of using the default tones, you can choose your favorite songs, sounds, or even recordings and turn them into ringtones. In this part, we’ll guide you step by step on how to make custom ringtones using GarageBand directly on your iPhone or with optional third-party apps, so you can easily add a custom ringtone on iPhone iOS 26 no PC without needing a computer.
Creating a custom ringtone on iOS 26 for your iPhone 17 is easier than you might think. You don’t need a computer, and the process is simple using GarageBand.
Step 1: Install GarageBand If GarageBand isn’t on your iPhone, download it from the App Store. Once installed, touch and hold the app icon and select Create New Audio Recording.

Step 2: Open Tracks View When GarageBand opens, tap the Tracks button at the top. Then tap the instrument icon on the left and open the Loops Browser.
Step 3: Choose Your Audio To use a file stored on your iPhone or iCloud, tap Files → Browse items from the Files app. To use a song from Apple Music, tap Music and select a downloaded file (protected files cannot be used).
Step 4: Drag the File to Tracks Touch and hold the audio file, then drag it all the way to the left in the Tracks view.

Step 5: Trim the Section Select the portion you want for your ringtone (max 30 seconds). Tap the file and drag the left or right edge. For precise editing, touch and hold an edge to zoom in. Make sure the clip starts at the far left with no blank space.

Step 6: Save Your Ringtone Tap the Navigation button, then My Songs. Tap the More button, select your song, and tap Share → Ringtone. Name your ringtone, then tap Export. GarageBand will shorten clips longer than 30 seconds automatically.
Step 7: Assign Your Ringtone When exporting is complete, tap Use sound as. Choose Standard Ringtone to replace the default tone, Standard Text Tone for messages, or Assign to Contact to personalize for someone. Tap Done to return to My Songs without assigning.
Tips for Best Quality: Use high-quality MP3 or M4A files. Keep the ringtone under 30 seconds and test it to make sure it sounds clear. This ensures your file for custom ringtones on iOS 26 has the best audio quality.
If GarageBand seems too complicated, you can add a custom ringtone on iPhone iOS 26 no PC using third-party apps. Popular apps include Ringtone Maker, Zedge, and Audiko, which let you create ringtones easily.
Step 1: Download the App Search for one of the apps in the App Store and install it.

Step 2: Select or Create a Ringtone Cut a song from your library or choose from pre-made tones. This is another way to make custom ringtones for iPhone 17 without using GarageBand.
Step 3: Save and Apply After editing, save your ringtone. Some apps allow you to assign it directly to calls or messages, while others export it to your iPhone settings.
Tenoshare
Tenoshare
With iOS 26, Apple has made it much easier to personalize your iPhone 17. You can now add a custom ringtone on iOS 26 directly from your device, without the need for a computer or complicated software. This guide will also show you how to make custom ringtones for iPhone 17, a big improvement from previous iOS versions where PC access was required.
In iOS 18, creating a custom ringtone required a computer. Users had to convert their audio files to the .m4r format using iTunes or Finder. This process often involved multiple steps, such as trimming the audio, converting it, and syncing it to the iPhone.
With iOS 26, the process is much simpler. You can now create and set a custom ringtone directly on your iPhone. The audio file must meet certain requirements, but you can complete the entire process on your mobile device without needing a PC.
Step 1 – Prepare Your Audio File
Make sure your audio file is in a supported format (.mp3 or .m4a) and trimmed to under 30 seconds. You can use third-party apps if you need to cut or edit your audio.
Step 2 – Save the File to Your iPhone
Transfer the file to your iPhone using AirDrop, email, or download it directly. Ensure it is saved locally in the Files app or Voice Memos.
Step 3 – Access the File
Open the Files app or the location where your audio file is stored. Tap the file to open it.

Step 4 – Set the Audio as a Ringtone
Tap the Share icon (square with an upward arrow), then select Use as Ringtone. Your audio will now be added to your iPhone’s ringtone list.

Step 5 – Assign the Ringtone
Go to Settings → Sounds & Haptics → Ringtone, and select your new ringtone. You can assign it as your default ringtone or to specific contacts.
If your iPhone 17 isn’t running iOS 26, adding a custom ringtone on iOS 26 directly from your device isn’t possible. Older versions, like iOS 18, still require a computer to convert files and set ringtones. The simplest way to enjoy custom ringtones for iPhone 17 without a PC is to upgrade your iPhone to iOS 26.
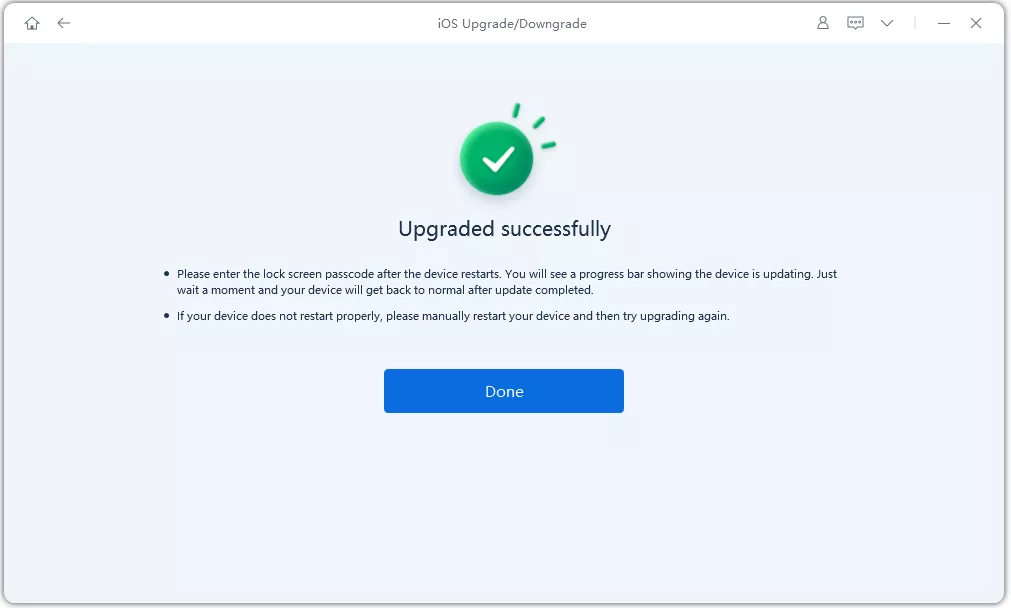
One reliable tool to make this process smooth is Tenorshare ReiBoot. This software is designed for safe and hassle-free iOS system repair and upgrades. Using ReiBoot ensures that your iPhone updates to iOS 26 without glitches, so you can easily create and set custom ringtones. It also helps prevent issues that sometimes occur during an iOS update, making the entire process stress-free.


Your iPhone will reboot with iOS 26 installed, keeping all your data intact and ready for custom ringtones on iOS 26.
Even after following all the steps, some users may encounter minor issues while setting custom ringtones on iOS 26. This section will cover common problems and provide quick solutions to help you enjoy your personalized tones without hassle.
Sometimes, after exporting or adding a custom ringtone on iPhone iOS 26 no PC, it might not appear in the Ringtone list. This usually happens if the file wasn’t saved locally or was not properly exported from GarageBand or a third-party app.
iOS only allows ringtones up to 30 seconds. If your file is longer, it won’t show up as a valid ringtone.
Files must be in .m4r, .mp3, or .m4a formats. DRM-protected files, such as songs from Apple Music subscriptions, will not work.
Step 1: Check File Location Ensure your audio file is stored locally on your iPhone, not just in iCloud Drive. Use the Files app or Voice Memos for proper storage.
Step 2: Trim the Audio Use GarageBand or a ringtone app to make sure your clip is under 30 seconds.
Step 3: Confirm the File Format Make sure your audio is in a supported format and DRM-free. Convert the file if necessary using GarageBand or a third-party app.
Step 4: Restart Your iPhone Sometimes, a simple reboot resolves the issue and the ringtone will appear in Settings → Sounds & Haptics → Ringtone.
Step 5: Re-export the Ringtone If the ringtone still doesn’t show, delete the previous file and export it again from GarageBand or your chosen app.
Setting a custom ringtone on iOS 26 is a simple way to make your iPhone 17 truly yours. By following this guide, you can create, trim, and assign custom ringtones for iPhone 17 without needing a PC. Whether using GarageBand, third-party apps, or directly through iOS 26, personalization is quick and hassle-free. If your iPhone isn’t on iOS 26 yet, upgrading is essential, and Tenorshare ReiBoot offers a safe, reliable way to update your device without losing data or facing glitches. With these tools, adding your favorite sound as a ringtone has never been easier or more fun.

Tenorshare ReiBoot - Fix iOS Issues


then write your review
Leave a Comment
Create your review for Tenorshare articles

ReiBoot - No.1 Free iOS System Repair Software
Fix 150+ iOS Issues without Data Loss & Safely iOS 27 Upgrade/Downgrade
ReiBoot: No.1 iOS Repair Tool
Fix 150+ iOS Issues, No Data Loss
By Jenefey Aaron
2026-07-14 / iOS 26