3 Easy Ways to Identify Location from Photos on iPhone
The newest trend among smartphone users is to Geo-tag photos. Geo-tagging is a feature where the GPS location is embedded inside a photo so that it will be visible to others. But most people don’t know how to activate such feature on iPhone 12/11/X/8/7/6/5 or even how to look for it. It will be even convenient for you to identify location from photo if you are organizing your collection or looking for a specific photo among thousands. Enabling location services can simply turn on the Geo-tagging feature automatically. This article is going to introduce a few ways by which you can identify the location data of your Photos, and you can do it on your iPhone, Mac or even Windows PC. So, let’s begin.
- Way 1: Identify Location from Photo in Album
- Way 2: View Photo Location on Mac
- Way 3: Find Picture Location on Windows Computer
Way 1: Identify Location from Photo in Album
iPhone has the capability to store hundreds and thousands of photos in that internal storage but it would be impossible for you to search for a single photo. It would be like looking for a needle in a haystack. Fortunately, when you took that picture and if your location data was activated then you will have no trouble finding it. Even if you don’t remember the date, you can still find it if you just remember where was this picture taken. This is how to view Geo-tagged photos on map:
1. First, open Settings and go to Privacy.
2. Now, tap to turn on Location Services.
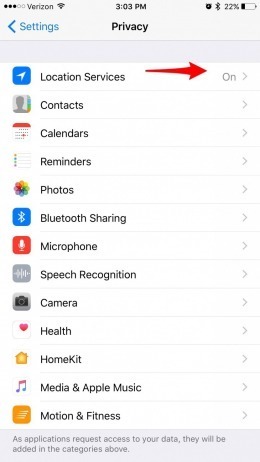
3. Scroll down, select camera and select the option “While using the App”.

This will activate the location services of your iPhone camera.
4. Run the Photos App on iPhone and navigate to Albums.
5. Now, search for the Album known as “Places”, and enter the folder.
6. Then, you will be able to view the Apple Maps.
7. It will be a bit different from normal Apple Maps. A bunch of photos will be visible on the particular locations on the Map. These photos that you will see were taken there.
8. Now, you can tap on each of the bunch to view the photos.
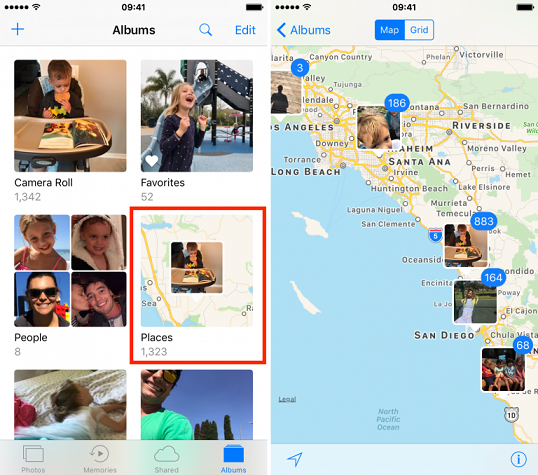
As you can see, it will be very convenient for you to find photos this particular way. You can always zoom in and out to view the different collection of pictures.
Way 2: View Photo Location on Mac
If you generally use a GPS or location enabled iPhone then all of your snapped photos will be Geo-tagged. As the GPS information is automatically added to those photos, you would have no difficulty to find picture location. But if you don’t know how to get geotag info from a photo then read the guide below:
1. Go to your Mac and click on Photos in the Sidebar.

2. Now, click on the location at the top.
3. If your goal is to see those photos on a map then Double-click on it. You can always zoom in or out.
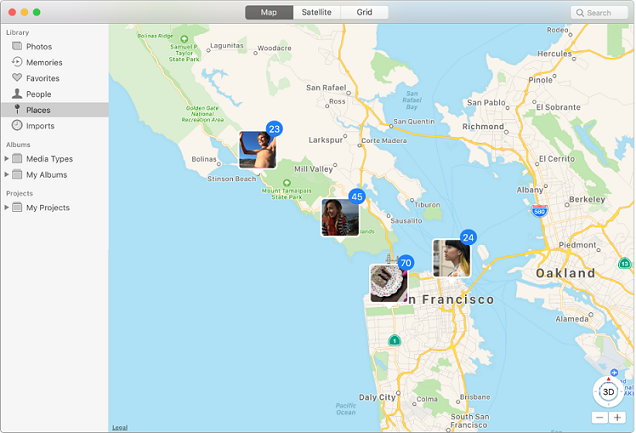
4. If you want to know if there were any other photos taken in that area, click on “Nearby Photos”.
5. You can drag the map if you want to reposition it.
It is not so difficult to find the photo location on a Mac. If the Map you are using is not of convenience to you then you can always change the format of the Map. You have 3 options: Map, Grid or Satellite.
Way 3: Find Picture Location on Windows Computer
If you want to find the GPS coordinates of your photos in your Windows PC then the very first step you need to take is to transfer those selected photos to your PC from your iPhone. You can use Tenorshare iCareFone to import those files to the PC. It is a data transfer program capable of transferring photos or any data between iOS devices and computers. When it comes to transferring photos, it is simple, efficient and you can do it in just 1-click. The exported photos will be saved on your PC but they will be saved under the original folder.
Here’s how to transfer photos from iPhone:
1. Download and install iCareFone on PC.
2. Run the program and connect your iPhone to your PC with USB.
3. After detection, simply tap “One-click Export Photos to PC” option on the main interface.

4. This will start exporting all your photos right away.
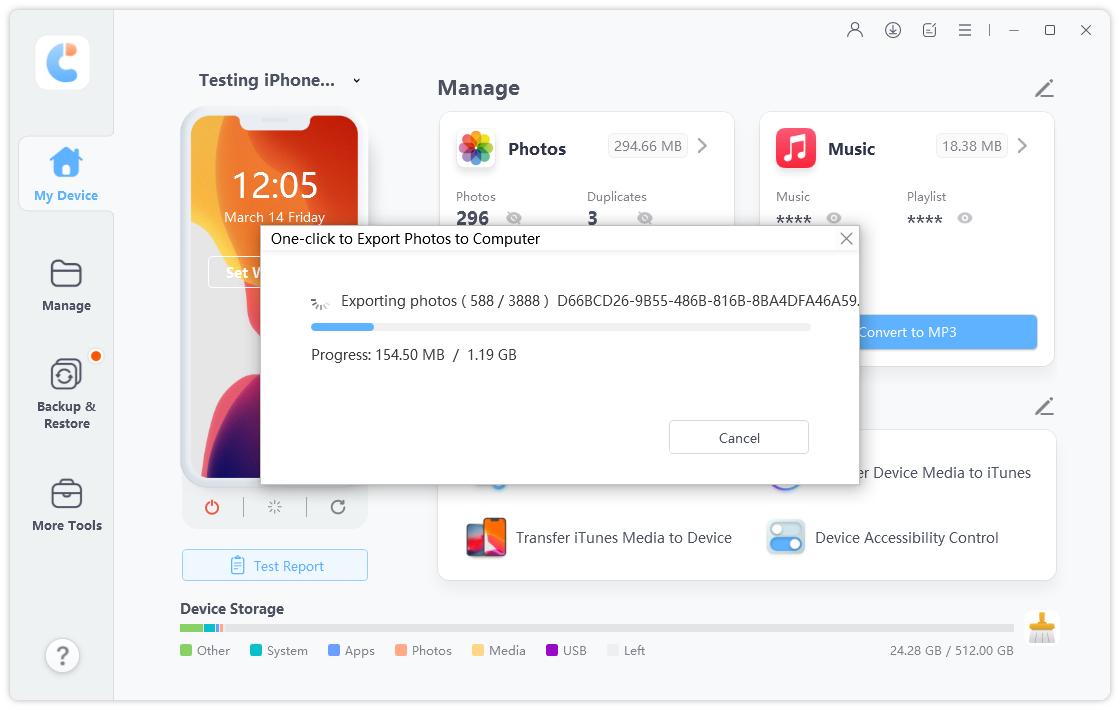
5. After exporting, tap “Open Folder” which contains all your transferred photos. Choose Places folder here and you will get the required photos.
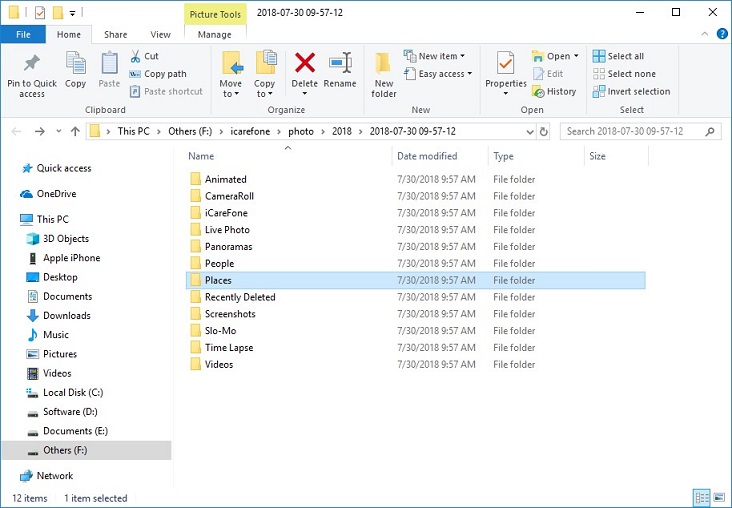
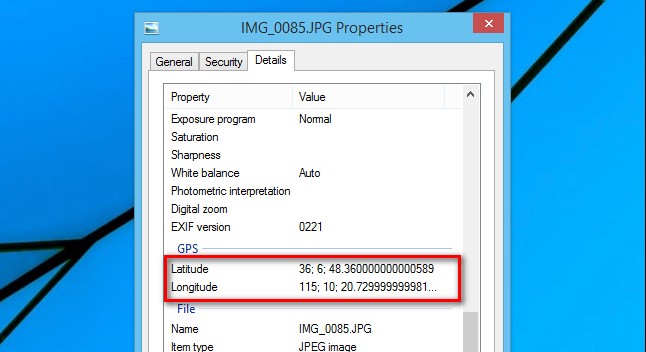
Now that you have transferred the photos to your Windows PC, you need to Right-Click on a picture and then click on Properties. On the Properties tap just click on the Details. The location on photo will be visible to you. The latitude and the longitude of the locations are stored as the metadata inside the photos, you just have to know where to look. It is that easy!
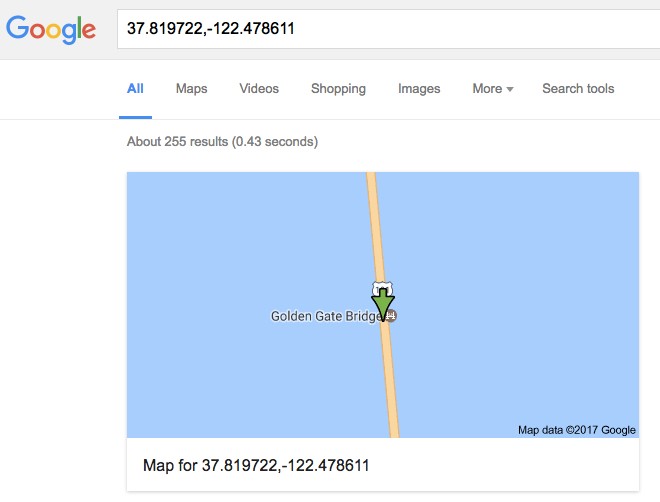
After that, you can open Google Maps and enter the latitude and longitude info to the search box. This will locate the place where the photo is taken.
Conclusion
Enabling the Geo-tagging on your iPhone provides you with the latitude and longitude of each location where you have taken photos. Unfortunately, not a lot of users are aware of the activation process of this function and how to view that embedded data. This article will help users to find iPhone photo location. You can also transfer those pictures to Mac and view the details there. The file export can be done by Tenorshare iCareFone as well, it is very efficient and we highly recommend this software!
- 1-Click to change current location on iPhone
- Bluetooth Integration for Mac& Win both
- Easy to simulate GPS movement based on customized route
- GPS joystick to take better control
- Import GPX file to start a designed route
Speak Your Mind
Leave a Comment
Create your review for Tenorshare articles

Tenorshare iCareFone
Best Free iPhone Transfer & iOS Backup Tool
Easily, without iTunes


