then write your review
UltData - Best iPhone Data Recovery Tool
Recover Deleted & Lost Data from iOS Devices Easily, No Backup Needed!
UltData: Best iPhone Recovery Tool
Recover Lost iPhone Data without Backup
Somebody help me! Would you mind telling me how to delete burst photos? I’m stuck in this misery. It started with me learning some photography skills, and someone told me that the iPhone is good for taking 3D images. I wrongly figured out that the burst mode would save my time by taking multiple photos. The result is horrible as I have hundreds of burst shots saved in my phone, eating my phone’s memory. I’m unable to delete all of those pictures at a time. Please, Please help me how to get rid of these shots as I’m going crazy. Thanks!”
Finding and deleting your Burst shots isn’t a problem. It’s easy, and we’ll explain how to delete these burst shots but first, let us tell the audience what these are so they know what to do.
A burst shot inside an iPhone refers to a series of photos. These burst shots can be smaller, or they can be larger. Usually, the typical burst shot for an iPhone is ten frames per second. Sometimes you might need multiple shots from a single frame so you can pick the best one from it. Burst shots help you in this purpose.
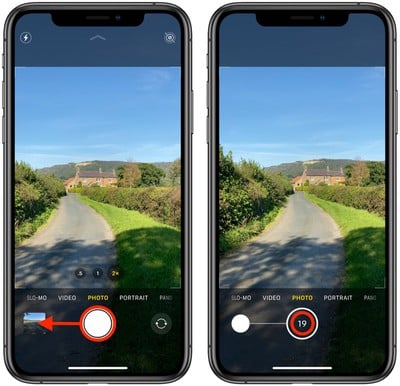
The burst shots are there to take a bunch of pictures when we long-press the volume button. Then iOS will select the best image from those multiple pictures for us so we can use them. We can also handpick the shots that we deem usable.
Once you are done selecting the best clicks from the burst shot, you are left with a residue of other unnecessary pictures that do nothing except consume your memory.
You need to manage and delete those unwanted shots to save up some space from your iPhone.
Now that we know what burst photos are, it is time to learn how to remove burst in the iPhone. Whenever you click burst shots from the iPhone, they go towards your main Photo Library, the Moments section in the Photos tab, or the Photo app under the Burst album.
Here is how to delete burst photos on iPhone after viewing them and selecting the best ones from the pool.
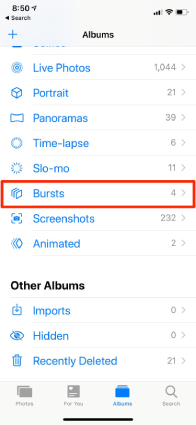
Navigate the Photos app and launch it on your iPhone. Once it is opened, scroll down and click on the “Bursts” album from the list. You can select any burst shot then.
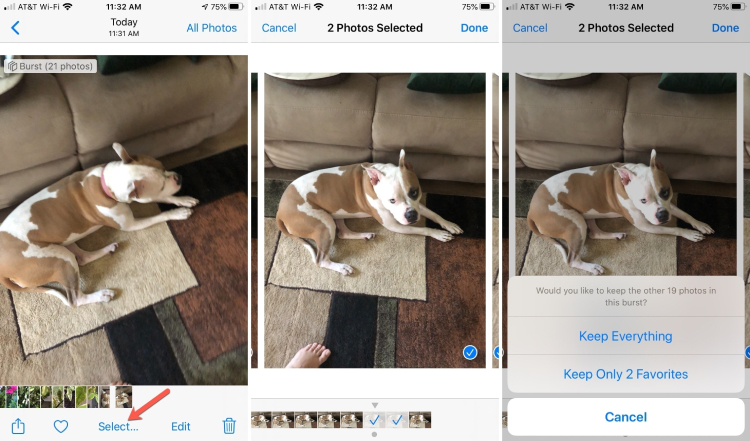
Tap on any burst shot. Once it is opened, tap on the “Select” option present underneath the burst. The entire burst will open. You can select as many photos from it as you want. iOS will automatically put a dot under the pictures its algorithm thinks are the best ones.
Q1. How Do I Change Burst to Normal Photo?
Many of you might be wondering how to cancel burst photos on iPhone. Well, it is not difficult at all. Oddly enough, there is no way to disable the burst mode from your camera settings or the Photos app. However, you can choose some of these things.
Enable HDR: Enter the HDR mode into the iPhone. Your camera will automatically come out of the burst mode.
Enable Flash:If your burst mode is on, then turn on or off your camera’s flash. The phone will get out of the burst mode.
Enable Timer:Yes, you can also enable a timer to stay away from the burst pictures mode.
These methods can come in handy, especially the flash one, but we would recommend not to long-press the shutter button as it will again lead to burst photos. Once you get used to taking burst photos, you wouldn’t deviate from long-pressing the button again.
Q2. How Do I Select All Burst Photos?
You cannot select all photos from the burst photos. If you want to finish all the pictures, follow the method we told you above but only keep one favorite.
When you keep the one favorite, then other burst shots would be deleted. You can then follow these steps:
What to do if you accidentally deleted a burst shot that you did not intend to delete? How do you recover such files? Well, Tenorshare UltData iPhone Data Recovery is the most reliable data recovery tool for the iPhone. It can recover deleted data from your iOS, iCloud, and iTunes directly.
Here is how you can restore your deleted photos:
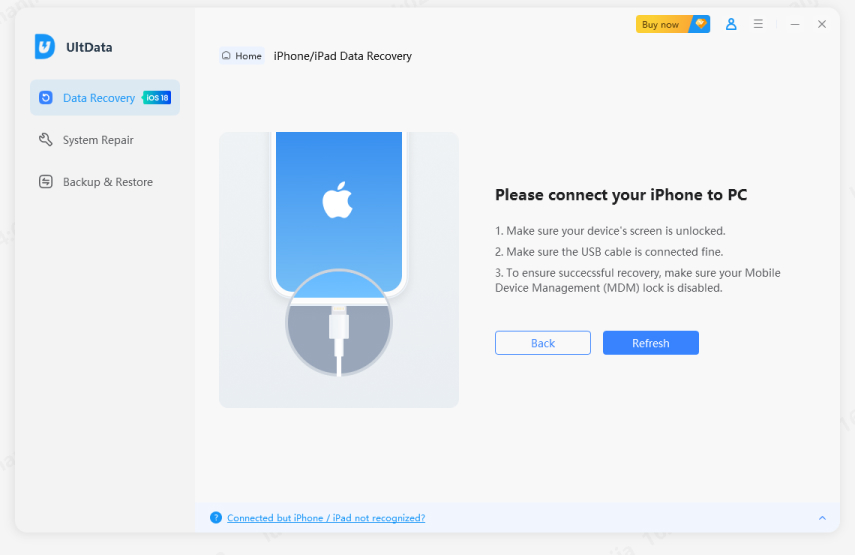
Download and launch UltData on your Mac or PC. Choose the “Recover Data from iOS devices” option. Then connect your iPhone and let UltData recognize your device automatically.
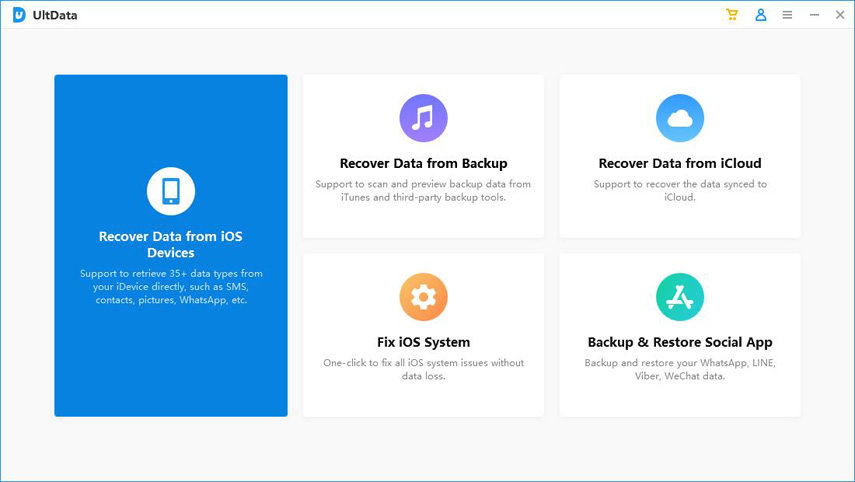
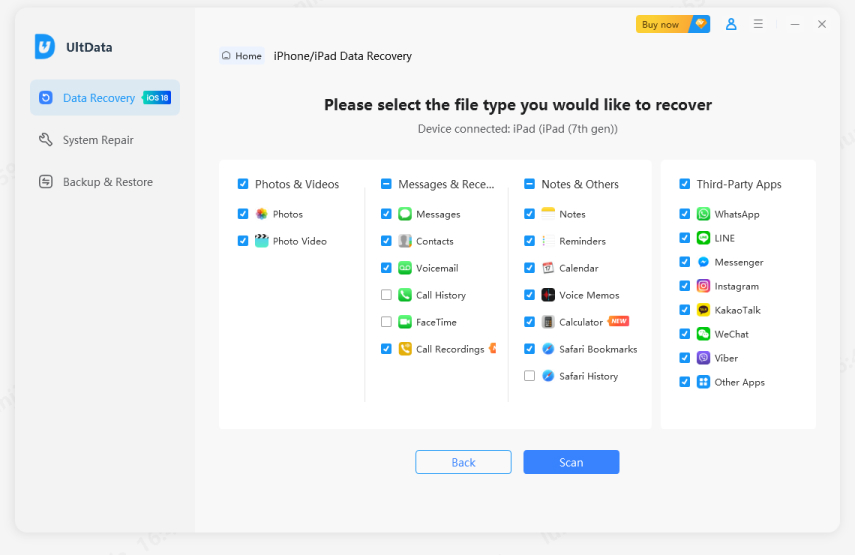
When your device gets recognized, the software will display a page full of options to scan for. You can select the options like “Photos and Videos” and related ones if you want your burst shots back.
Click on “Scan,” then preview the files. Select those you wanted and click on “Recover to PC.” You got them.
Now you can preview what has been shown in the program.
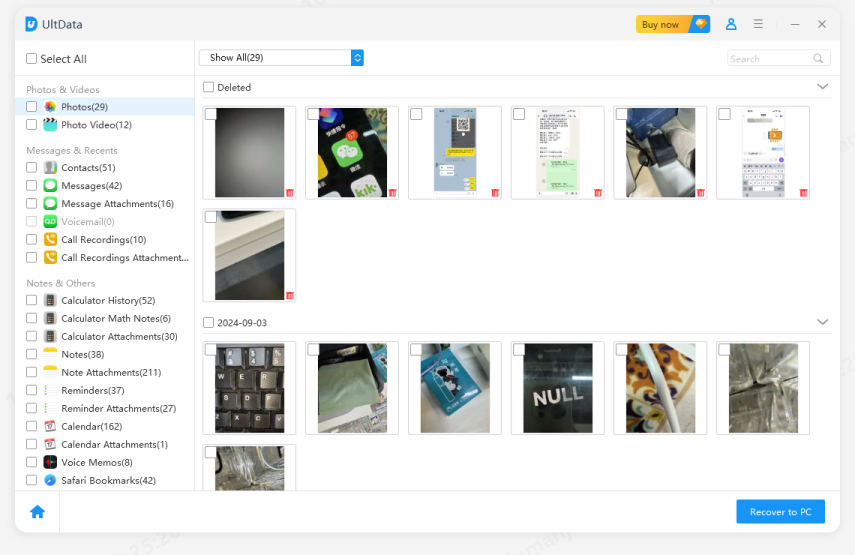
The red messages are deleted. Click on “Recover,” and the deleted messages will start to recover back to your iPhone’s inbox.

So now you know how to remove burst photos on an iPhone. The procedure is quite straightforward. However, if you accidentally deleted a burst you did not want to, you can rely on UltData to get those pictures back safely.
then write your review
Leave a Comment
Create your review for Tenorshare articles

By Jenefey Aaron
2026-01-23 / iPhone Tips