then write your review
UltData - Best iPhone Data Recovery Tool
Recover Deleted & Lost Data from iOS Devices Easily, No Backup Needed!
UltData: Best iPhone Recovery Tool
Recover Lost iPhone Data without Backup
Hello, Sir! Can you please tell me how to upload photos from Google Drive to Facebook? I have recently uploaded my entire picture gallery to Google Drive and deleted those pictures from my Android phone. Now I want some of those pictures for a Facebook post. Can you tell me the correct way to upload my photos from the Drive to my Fb? Thanks in advance.”
If you are facing the above issue and don’t know how to upload your important pictures from Google Drive to Facebook, don’t worry because we have an effective solution for you. Also, make sure to select your important pictures first before you start this process. Continue reading to find the correct solution.
If you ask us the easy and less tricky way about how to upload pictures from Google Drive to Facebook, then we'd recommend downloading pictures to your computer and then uploading them on Facebook. The procedure is simple and easy.
After accessing your Drive folder, navigate the folder that has your desired pictures. Choose the pictures you want to share, right-click on them and download them on your PC.
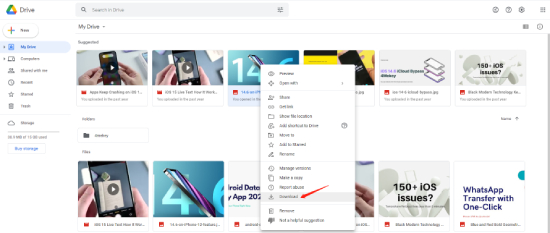
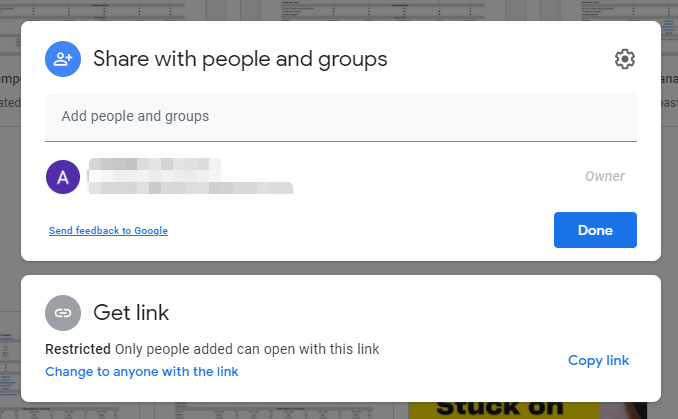
If you do not have a PC and still want to learn how to upload photos to Facebook from Google Drive, then there is another way too. You can copy the image's link and then paste it on Facebook. The only drawback of this procedure is that you can share only one picture at a time.
Access the Drive and search for the file you wish to upload. When you find it, right-click on it and choose the “Get Link” option.
What if you want to add your Facebook albums or photos to your Google Photos for safekeeping. Well, this can be done in two ways. Let’s discuss them one by one.
The first way is pretty simple and straightforward. You download your photos from the Facebook album and upload it then on your Google Photos. This way also works to upload video from Google photos to YouTube.
Open facebook.com and go to your photos and open albums. Then click on the three dots above the album without opening it. Select the "Download Album" option, and it will be downloaded.
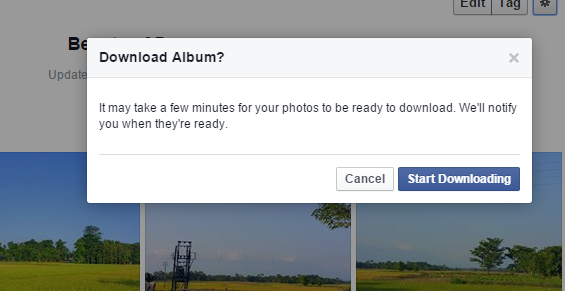
There’s another easy and official way to get Facebook photos directly into your Google Photos. See the details below.
From the Settings, navigate the “Your Facebook Information” option and click it. It will require your password to enter this feature.

If you have lost your Facebook Photos and want to recover them, then use these ways. All of them are highly effective and will work 100%.
It is nearly impossible, but you can recover some of your deleted Facebook photos. Go to your Settings and click on "Download a Copy" of your Facebook data. The archive will be downloaded, and you might retrieve your deleted pictures.
The above way might not work, but this iPhone data recovery tool named Tenorshare UltData can do wonders.
Download and launch the UltData tool. Then connect your iPhone to your PC and select the “Recover Data from iOS Devices” option. In case the connection is not established, you can follow the instructions on the screen.
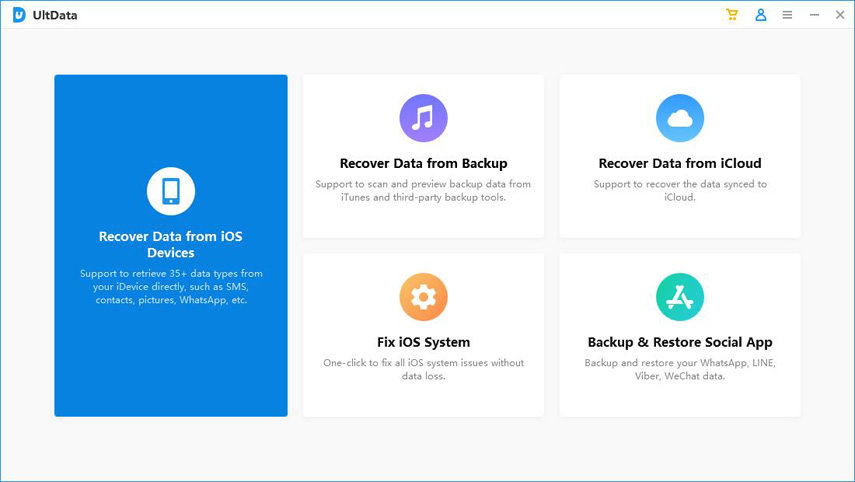
After the detection, a list of apps and utilities will show. Select “Facebook” from it and hit the scan option. Once scanned, check for your deleted photos and click on “Recover to PC.”
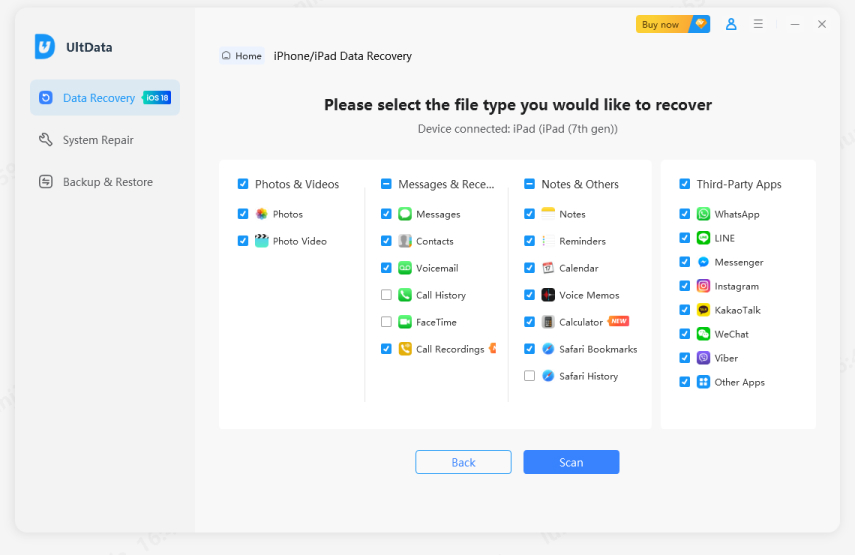
You can also preview the images before recovering them. All you have to do is click the “Preview” option.
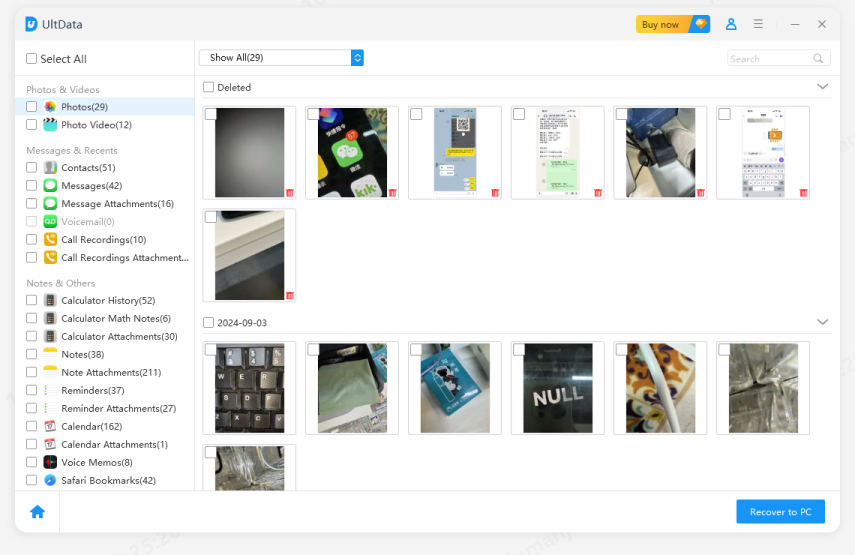
Within a few seconds, you will see all the images on your PC. This is the simplest method to get your images back. Also, it's totally free and doesn't require technical skills. However, there are some limitations as well, such as Windows can't recover "Kik&Attachements" data.

These are the methods that can help you upload your Facebook photos to Google Photos and vice versa. However, if you want to recover any deleted photo, then you can recover it through Tenorshare UltData. Don't forget to give a thumbs up if you liked this software.
then write your review
Leave a Comment
Create your review for Tenorshare articles
By Jenefey Aaron
2026-01-23 / Cloud Merge