
then write your review

UltData - Best iPhone Data Recovery Tool
Recover Deleted & Lost Data from iOS Devices Easily, No Backup Needed!
UltData: Best iPhone Recovery Tool
Recover Lost iPhone Data without Backup
Restoring your iPhone from a backup can save you a lot of time and effort, especially if you've upgraded your device or if your iPhone has encountered issues. However, many users worry that the restore process might result in losing important data or that the backup won't work properly.
In this guide, we will walk you through different methods of restoring your iPhone from a backup and provide tips for backing up your iPhone more efficiently. Whether you're using iCloud, iTunes, or a third-party tool, you’ll learn how to restore your iPhone without losing any of your precious data.
Before diving into the specifics of how to restore your iPhone from a backup, it’s important to understand the difference between and restoring, versus resetting or restoring to factory settings.
In this chapter, we will show you two quick and effective methods to restore iCloud backup.
Restoring from an iCloud backup is one of the easiest ways to get your data back on your device, especially if you're setting up a new iPhone or have erased your device.


The restore process may take some time depending on the size of the backup and your internet connection speed.
To restore your iPhone from a computer backup, follow these steps based on your device:
If you're using a Mac with macOS Catalina 10.15 or later, open Finder. For a PC or a Mac running macOS Mojave 10.14, open iTunes instead. Connect your iPhone to the computer using a cable. You may be asked to enter your device passcode or confirm "Trust This Computer" to proceed. Once connected, your iPhone will appear in Finder on Mac or iTunes on Windows.
Next, follow these steps:

Restoring data via iTunes or Finder is another reliable method, especially if you have a backup saved on your computer.
Use a USB cable to connect your iPhone to your computer.
If you're using a Windows PC or an older version of macOS, open iTunes. For macOS Catalina and newer, open Finder.
Click on “iPhone” button in iTunes or Finder to access your iPhone settings.
In the "Summary" tab, click on "Restore Backup." Choose the most recent backup and click "Restore."

The restore process will take some time. Once completed, your iPhone will reboot, and your data will be restored.
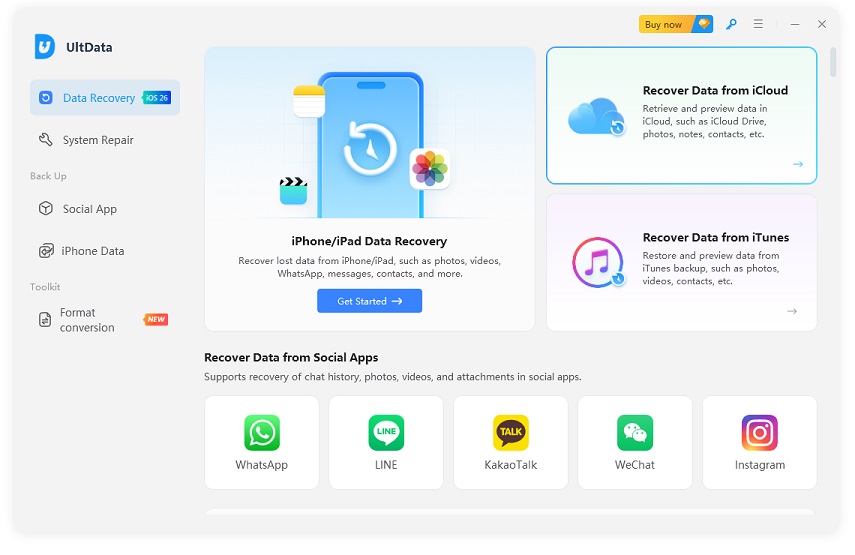
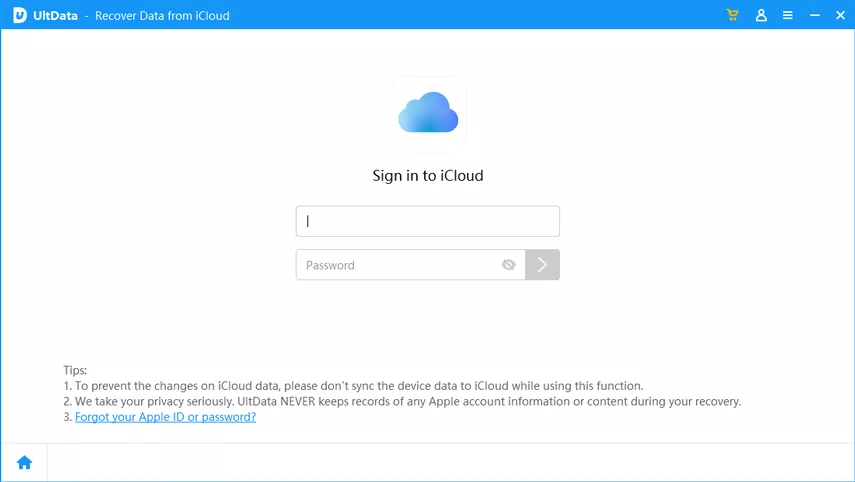
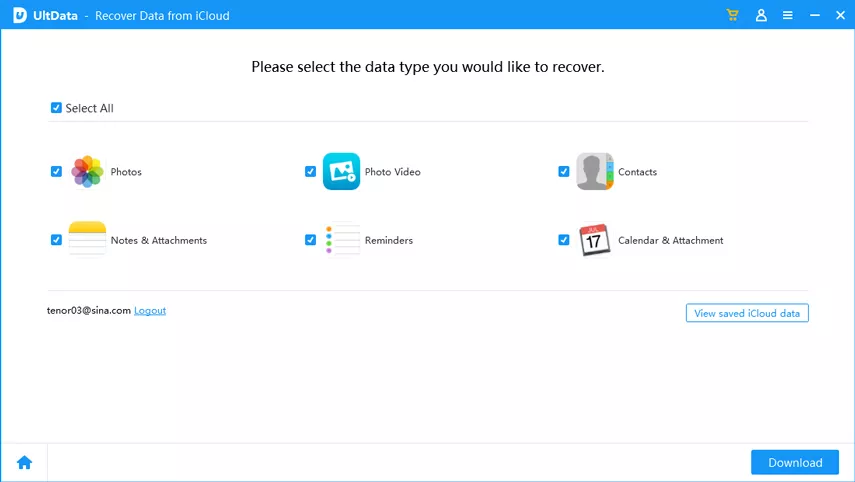
To selectively restore data from your iCloud backup without performing a full reset of your iPhone, you can use UltData iPhone Data Recovery iCloud’s feature. This method allows you to restore specific items like contacts, photos, messages, or app data, rather than resetting your entire device.
How to Selectively Recover Data from iCloud:


To back up and restore your iPhone efficiently using Tenorshare UltData iPhone Data Recovery, you can follow these tips and best practices. Tenorshare UltData is a powerful tool that allows you to easily back up and restore iPhone data, recover lost files, and perform more advanced tasks like selectively restoring data without a full reset.


UltData allows for both full and selective backups, so you can back up only the data you need rather than the entire device.
Restoring your iPhone from a backup is an essential skill that every iPhone user should master. Whether you’re using iCloud, iTunes, or third-party tools like UltData, you now have all the necessary steps to restore your iPhone without losing any important data. Always remember to back up regularly and use tools that allow selective restoration to save time and effort.
By following these methods, you can be confident that your iPhone will always be restored the way you want it, and without losing any important data along the way.
then write your review
Leave a Comment
Create your review for Tenorshare articles
UltData - Best iPhone Data Recovery Tool
Recover Deleted & Lost Data from iOS Devices Easily, No Backup Needed!
UltData: Best iPhone Recovery Tool
Recover Lost iPhone Data without Backup
By Jenefey Aaron
2026-06-08 / iPhone Recovery