[Full Guide] How to Make a Geotag on iPhone Photos and Add GPS Info
You are using one of the most expensive and advanced gadgets on the planet, it is quite natural for you to take it everywhere you go and take a lot of pictures with its powerful camera. But one day when you are looking back at your library while going through your photos and looking at the places you visited, a few pictures will surely make you think if you could just remember exactly where it was taken.
This is the time you should think about Geotagging your photos. Geotagging the photos will let you figure out the exact location of the taken photo, you will also get the map of the location and a list of your favorite pictures. If you want to know more about how to Geotag photos, read this detailed guide!
Part 1: What is Geotagging?
A clever way of storing the location data inside your photos is Geotagging. The metadata actually stores the location’s latitude and longitude inside the EXIF data of the picture. Geotagging can be applied to any kind of media files but it is most commonly used on photos. Aside from the latitude and longitude, the details include bearing, altitude, distance and even name of the places. And once you have the location services enabled on your iPhone, Geotagging becomes automatic.
Geotagging is an excellent way to organize and provide proper exposure to your photos through social media platforms like Flickr, Instagram etc. As the photos can be tagged with respect to its location, other people can find it very easily even if the photo’s title doesn’t depict the location in the first place! It is a big social media trend nowadays and it can really help budding photographers to get that much-needed exposure and most importantly for free. There are basically three ways to Geotag photos and they are:
- Automatic Geotagging
- Manual Geotagging
- Hybrid Geotagging
And all of this will be covered in this article.
Part 2: How to Geotag Photos on iPhone
So, now that you know what is Geotagging, you should also know that there are several ways to Geotag a photo even if it was taken by your iPhone or not. Mainly, iPhone already contains that feature just waiting to be turned on from the Settings but if you have taken a photo with no GPS then you can also add the location data to it by transferring it to your Mac and then using the Photos App on that particular picture. Here’s how to do both:
Way 1: Use iPhone Location Services
If you want to Geotag your vacation photos and post them online you need to activate the Location Services on your iPhone. To make it simpler, when someone opens your pictures online they will have access to the name of the location that photo was taken and its latitude and longitude coordinates as well. Here’s how to Geotag a photo:
1. Open your iPhone and go to Settings.
2. If you are unable to find the Settings app then go to Spotlight search bar and type “Settings”.
3. Now, in Settings tap on “Privacy”.
4. Inside ‘Privacy” find “Location Services”, this will lead you to a menu where you can manage Location Services.
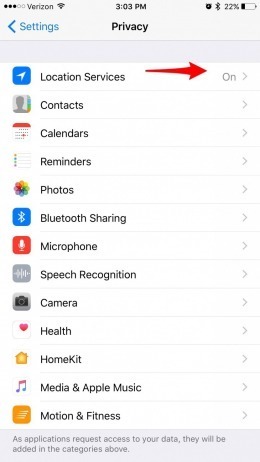
5. You need to activate the Location Services; a list of apps will appear on the screen.
6. Now, just tap on the app list, go to Camera and finally select “While using the App”.

Activating Location Services is very simple. This is Automatic Geotagging. You can also turn it off from the Location
Way 2: Use Photos App on Mac
These days a large number of users have become a fan of Geotagging but there are some cameras that can’t automatically Geotag the photos. Not to worry you can do it manually by using Photos App on Mac. The Photos app comes in-built with Mac and surprisingly it can help you Geotag photos manually.
Actually, when you snap a photo with your iPhone the pictures get automatically tagged with the location details but they are extremely precise. So, if you want to Geotag photo app then do the following:
1. First of all, you need to transfer the photos you want to be Geotagged to your Mac.
2. Now, run Photos App on your Mac.
3. Then press Command + I to see the photo’s metadata.
4. A panel for metadata will be opened on the left side of the screen.
5. It will include the mane of the photo, size, date, location and other details.
6. You can also add extra details if you want.
7. If you have taken that photo with a GPS disabled camera then the Location data won’t be available but you can add it manually by clicking on “Assign a Location” at the bottom of the panel.’

8. Just enter the first name of the location and a drop-down menu will open up containing the related location names. Select the right one and tap Enter.
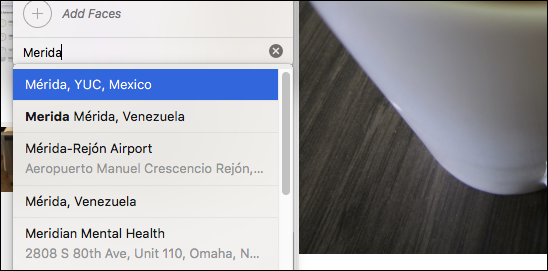
Unfortunately, this feat is only available on OS X. If you want to do it on the iOS then you will be unable to edit the metadata and also adding the location data will be impossible. This is manual Geotagging!
Way 3: Use Aperture 3.5
If you have a camera without a GPS then you can easily add the location data to your snapped pictures using Aperture 3.5. It is a photo editing and photo management software that has the capability to Geotag photos even if the photos are clicked with a GPS disabled device.
There are 3 ways you can add location data using Aperture 3.5, the first two of the methods involves using a feature called Aperture Places. And the last one uses the data from the taken photos using iPhone.
We are only going to discuss the method that uses the Places function. It is a very simple yet effective method and this is how to make a Geotag using Aperture 3.5:
1. Download and install the software.
2. First, choose the photos you want to Geotag.
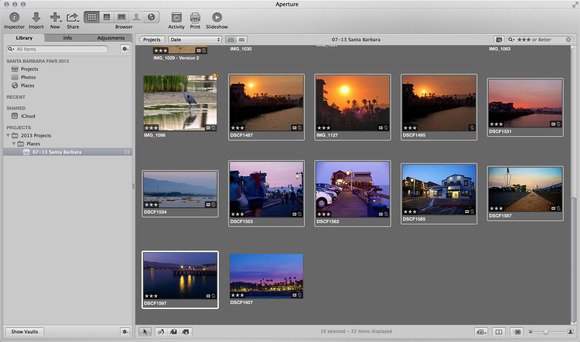
3. Look for the “Places” icon and click on it. It will show you the map.
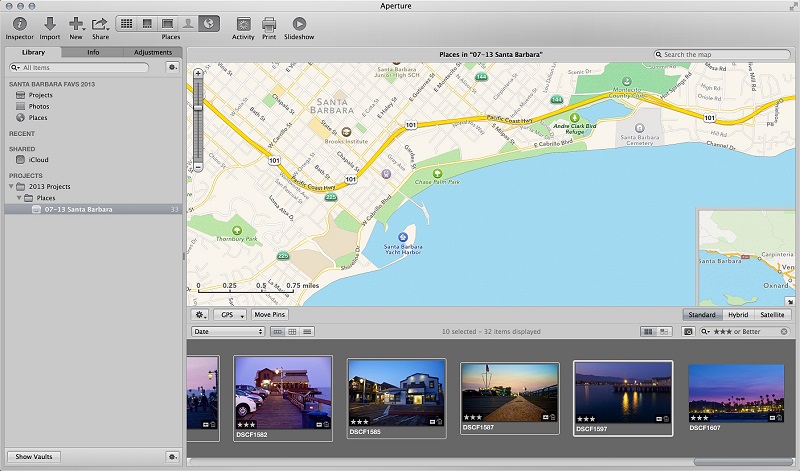
4. Now, zoom in the Map to get the exact location.
5. Just drag and drop the photo on that precise spot on the map.
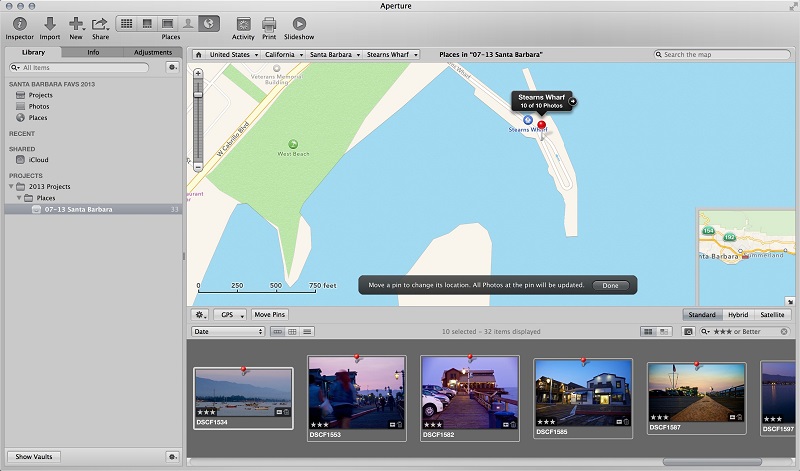
The photos will be Geotagged with that particular location. You can verify the work by checking the coordinates of each image. Aperture 3.5 is an excellent third-party app with the capability to Geotag your snapped photos. You can also Geotag photos iPhone with this app and this is hybrid Geotagging!
Conclusion
The idea is very simple, you wish to show the location of that fabulous photo when you post it online. But most of the users don’t know how to do it or they are using a GPS deactivated digital camera and have no idea how to add the location data manually. This article states the 3 efficient ways to achieve that task. Now, if you want to transfer and save geotagged photos and other pictures differently then you can always export them to other devices with Tenorshare iCareFone.
It is a data transfer program which is capable to transfer your photos from iPhone to PC with just 1-click. Available on both Mac and Windows, this stellar software can transfer just about anything. Just click the One-click Export Photo to PC feature from main interface, and all photos will be exported in the original folder. Here’s how you can do it in details:
1. Download and install Tenorshare iCareFone
2. Launch the program and connect your iPhone X/8/7/6/5 to your PC.
3. Now, after the software detects your iPhone, tap “One-click Export Photos to PC” option from the main interface.

4. The exporting process will start now.
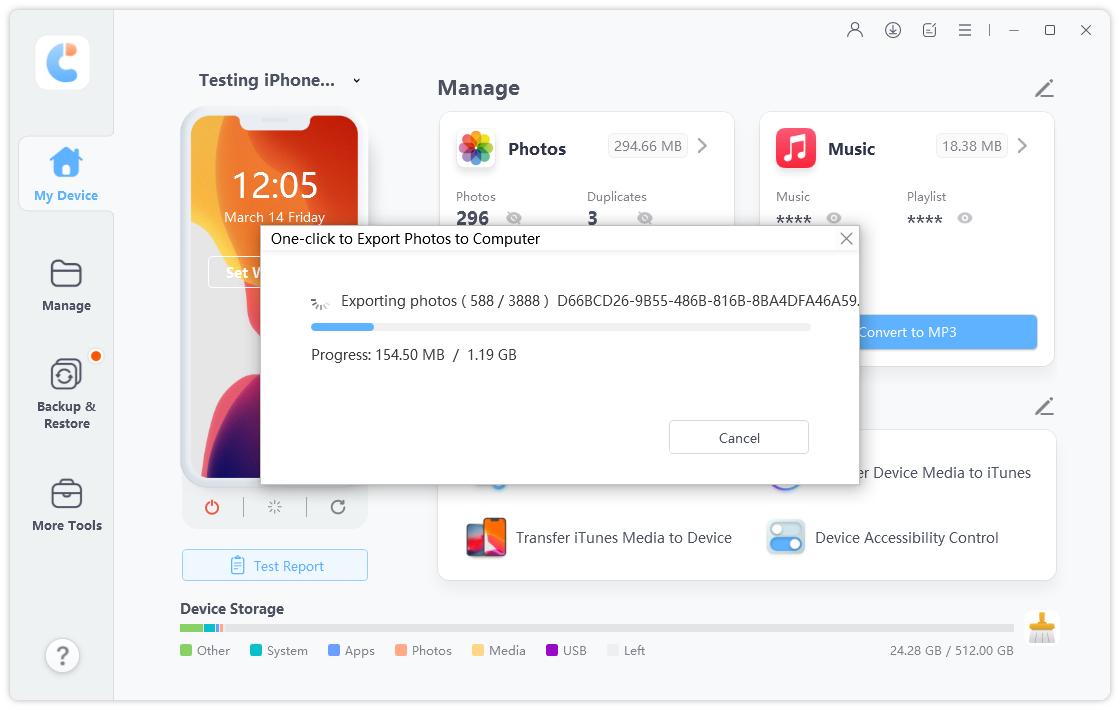
5. After the exporting process ends, simply tap the “Open Folder” option to get all your transferred photos in Places folders.
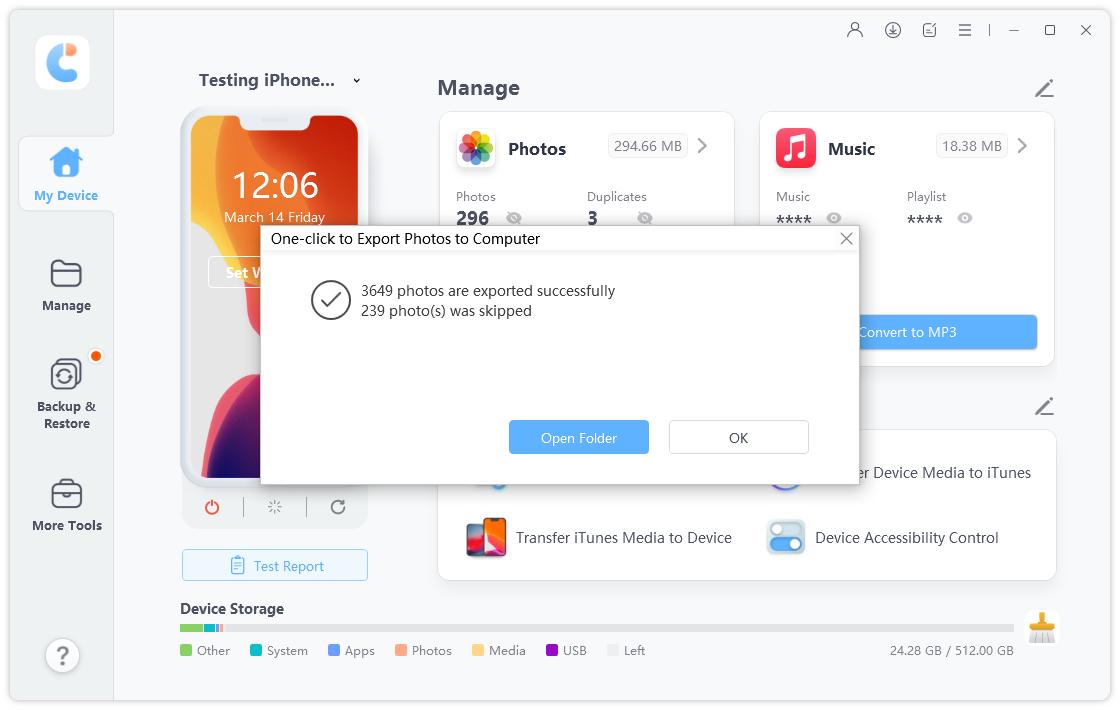
And that’s how it’s done. Highly recommended for any kind of photo/data transfer!
Speak Your Mind
Leave a Comment
Create your review for Tenorshare articles

Tenorshare iCareFone
Best Free iPhone Transfer & iOS Backup Tool
Easily, without iTunes


