How to Boot Windows 7 from USB Flash Drive
If you would like to install a new version of Windows or you would like to install another operating system on your Windows 7 PC, you will likely need to boot your PC either from a USB drive or a CD drive. In this guide, we’re going to talk about how you can boot your Windows 7 PC from a USB pen drive.
If you have a bootable USB pen drive, then you are good to go to install a new operating system on your PC as a bootable USB works just as fine as an actual bootable CD or DVD. All you have to do is plug in your USB drive to your PC and then instruct your PC so that it boots up from the USB drive and not from the hard drive which it usually does.
If you have never booted your PC from a USB drive, you might think it is hard to do that. In fact, it is just as easy as normally booting up your PC. You just have to press a key while your PC is booting up and you will be able to boot it up from your USB drive.
Part 1: How to Create a Windows 7 Bootable USB
Before you get started, you’ll need to have a Windows 7 bootable USB drive. Below we list 2 ways for you to make a Windows 7 bootable USB.
Create Windows 7 bootable USB with Windows 7 Install Files
- Firstly, download ISO files for Windows 7 directly from Microsoft.
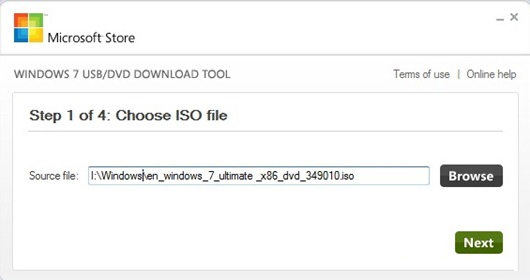
- Next, download and install the Windows USB/DVD Download Tool. Run the tool and click “Browse” to locate your Windows ISO file and then click “Next.”
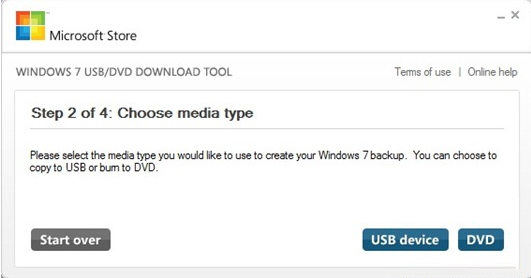
- Select your media type. As we are here to create a bootable USB, simply click on USB device button.
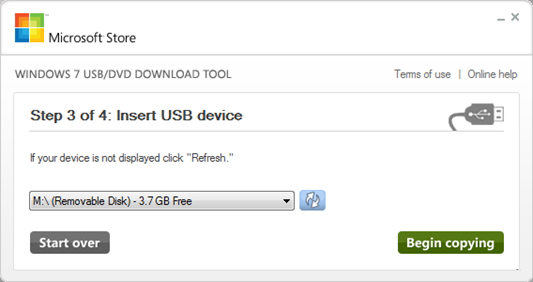
- Select your USB flash drive from the drop down box and click on Begin copying button. The Windows 7 USB/DVD tool will take a few minutes to complete the procedure.
Burn Windows 7 bootable USB with Window Boot Genius
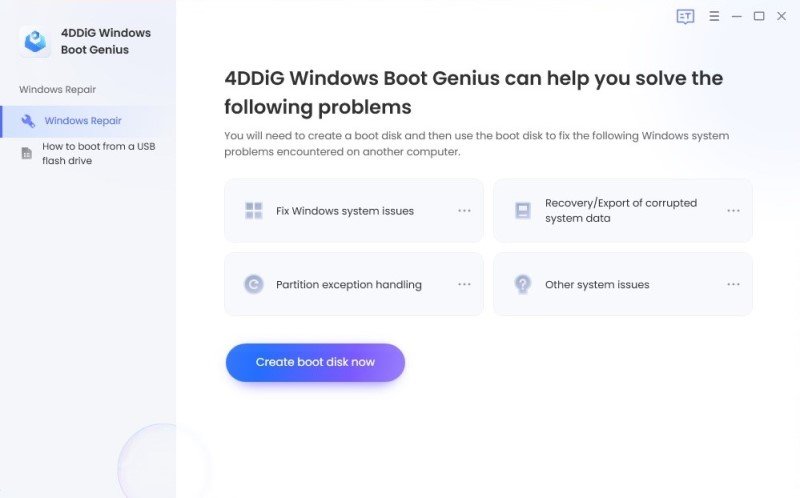
Don’t have Windows 7 ISO files? An easier way to create a Windows 7 bootable USB is using Windows Boot Genius, which will offer you the bootable iOS file. First of all, install the app in any workable computer you can access.
- Run Windows Boot Genius and insert a blank CD or USB into the workable computer and click “Create boot disk now” to create a bootable CD or USB.
- Insert the bootable CD or USB to your problem computer and boot your PC from the bootable CD/USB you just created.
Part 2: How to Boot Windows 7 from a USB Drive
Now follow steps below to boot your Windows 7 PC from USB.
- Plug in your bootable USB drive to one of the USB ports on your PC. If your USB is 3.0, then make sure to plug it into a USB 3.0 port on your PC for faster data transfer speeds.
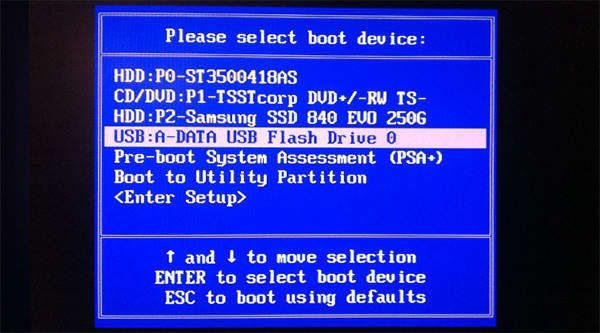
- Then, boot up your PC as you would normally do. When you see the BIOS screen, you will see a key that you need to press to select a boot device. Usually, it’s the F12 key, but if your screen shows another key, press it and you will be able to select a boot device.
- On the following screen, you will be able to select what device you would like to boot your PC from. Since your aim is to boot it from a USB drive, select your USB device from the list and your PC will boot up from it.
- You can then follow the on-screen instructions.
So, that was how you could boot Windows 7 from a USB ISO. If you haven’t created a bootable USB drive yet, I highly recommend Windows Boot Genius for it not only helps you burn Windows 7 bootable USB easily but also fix all Windows won't boot issues like booting failure, crash, freeze, black screen of death, or blue screen of death and lets you have a smoothly running system.

Speak Your Mind
Leave a Comment
Create your review for Tenorshare articles

