How to Fix Wi-Fi Not Working in iOS 16 on iPhone/iPad
by Jenefey Aaron Updated on 2023-02-17 / Update for iOS 10
"When I updated my iPhone to iOS 16/15, it started disconnecting with the Wi-Fi signal randomly. I've tried pretty much everything to fix it. I restarted my router and that didn't work. Other devices that aren't Apple don't have this problem in my house."
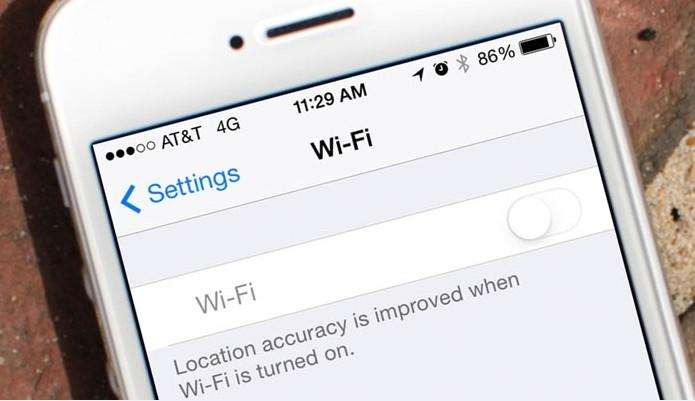
iOS 16/15 update brings tons of new features as well as some unexpected bugs. One of the most frustrating bugs is iPhone WiFi connection problems. If you have installed iOS on your device and find Wi-Fi malfunctions, try below methods to fix WiFi not working on iPhone 14/13/12/11/X/8/7/7 Plus/SE/6s/6/5/4.
- Part 1:Regular 10 Methods to Troubleshooting WiFi Network Connection Problems after iOS 16 Update
- Part 2:[Video Guide] Ultimate Solution to Fix WiFi not Working After iOS 16 Update
Part 1: Regular Methods to Troubleshooting WiFi Network Connection Problems after iOS 16 Update
Below are the most common iPhone WiFi problem solutions for your information. You are free to pick one or more as long as it works.
Method 1: Check Wifi Router
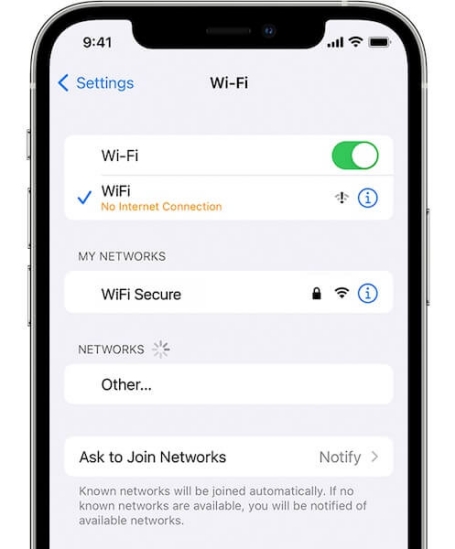
Check to see whether your iPhone or iPad is within the range of the router using the first method.A "No Internet Connection" notification indicates that your iPhone has determined that your Wi-Fi network is most likely not currently receiving internet service. As it is not in use, your router or modem should be powered off and turned back on when needed.
Method 2: Set Airplane Mode On & Off
- To access the control center, just slide up from the bottom of the screen to bring it up, and then hit the symbol that looks like a little plane.
- When you want to automatically search for accessible Wi-Fi networks, exit Airplane Mode afterward.
Method 3: Initiate A Force Restart of Your Device
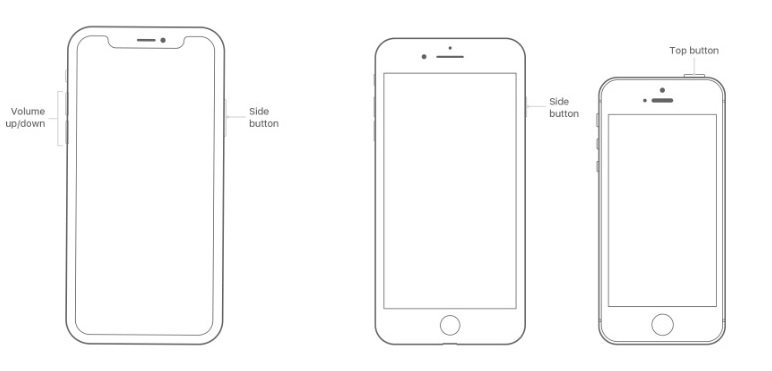
1. To do a hard restart on an iOS device, press and hold the Sleep/Wake button while simultaneously pressing and keeping the Home button on an iPhone 6s or lower or any iPad.
2. Keep it like that for more than ten seconds, or until the Apple logo appears.
3. On the iPhone 7 and iPhone 7 Plus, the Home button has been swapped out for the Volume Down button.
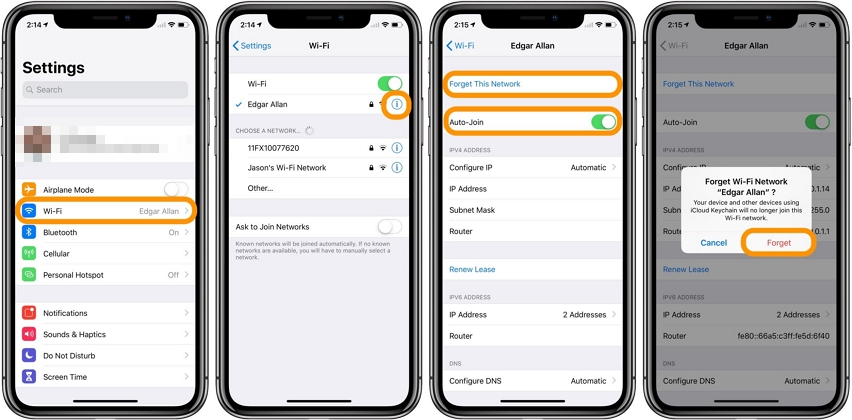
Method 4: Reconnect after Forgetting the Wi-Fi Network
- Select Wi-Fi under Settings. Across the network name, tap the information icon.
- Then choose to Forget This Network.
- Tap Forget once more.
Once again, the network will appear in the list of networks. To join, tap it and reenter your password.

Method 5: Reset Your Network Settings
Via network settings, your iPhone may connect to Wi-Fi and mobile networks. It is helpful to reset network configuration so that the iPhone can utilize the new and updated configurations to access networks. Major upgrades, like the one from iOS 15 to iOS 16, often carry with modem firmware changes.
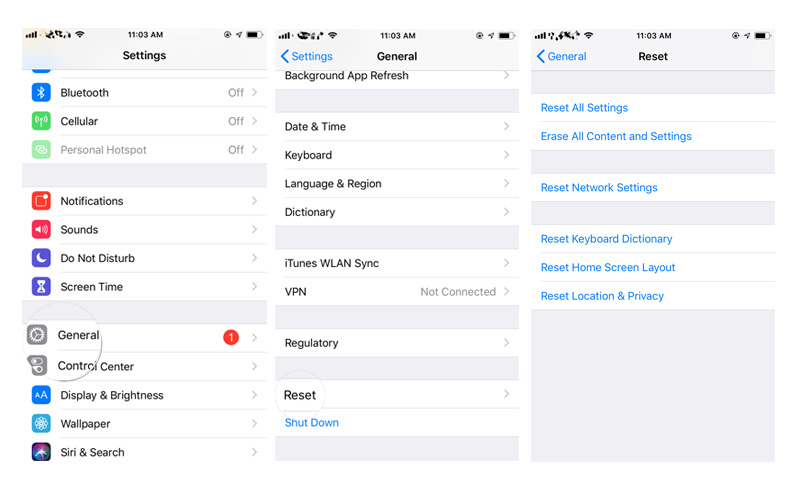
Step 1: Just choose Transfer or Reset iPhone under General in Settings.
Step 2: Then choose Reset.
Step 3: Confirm by tapping Reset Network Settings.
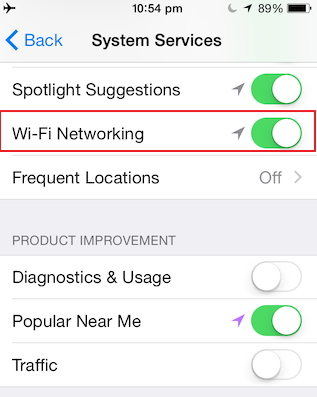
Method 6: Disabling Wi-Fi Networking Services
To assist Apple in creating a database of all open Wi-Fi networks, WiFi Networking Service scans neighboring Wi-Fi networks and transmits the information gathered to Apple. Unfortunately, some users have discovered that while providing this generosity, their device is unable to join a WiFi network.
1.To start, go to your device's Settings menu.
2.Go to Privacy > Location Services after that.
3.Go to System Services then and turn off Wi-Fi Networking Services.
Method 7: Use Google DNS on iPhone and iPad
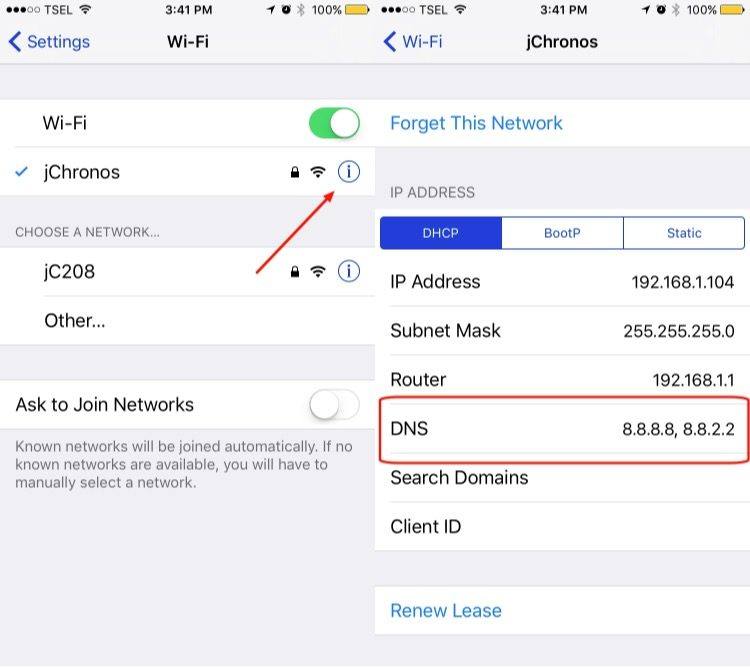
By following the instructions below, you may change the DNS servers on your iPhone or iPad at any time.
- On your iPhone, go to Settings and choose WiFi.
- Tap the I symbol next to your WiFi network on the WiFi Screen.
- Scroll down and hit the Configure DNS option on the next page.
- Choose the Manual option and click +Add Server on the following screen.
- As the New DNS Server domain, enter 8.8.8.8 and click Save. Add 8.8.4.4 as a second Google DNS server in the same manner.
You may remove your service company's DNS servers after installing Google DNS servers.

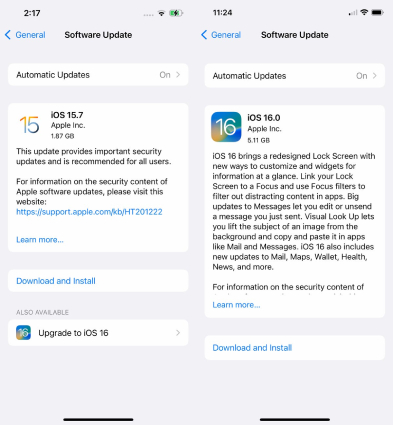
Method 8: Upgrade to iOS 16 or Downgrade to iOS 15.7
After you tried all of these, you can give the shot to changing the operating system itself. To downgrade your iOS, you can use iTunes or Finder.
iOS 16 downgrade requirements:
- Choose the iOS 15.7 IPSW file below that corresponds to your iPhone model.
- Finder or iTunes on a Mac or Windows computer.
- The iPhone and PC are connected via a USB Lightning wire.
1.Choose your iPhone from the sidebar menu in Finder on a Mac or iTunes on a Windows computer.
2.Click the "Restore" button while holding the OPTION key on a Mac or the SHIFT key on a PC in the "Summary" section.
3.Locate the iOS 15 IPSW file that you previously downloaded for your iPhone model. Select "Restore".
Method 9: Reset your Device
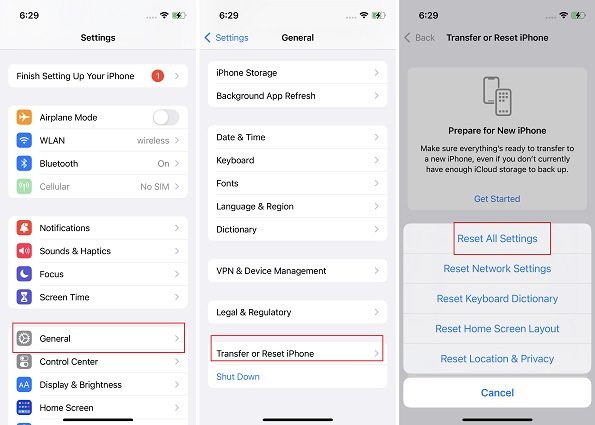
It follows therefore that you should first create a backup of all the data and only then carry out the following procedures:
Step 1: Go to Settings > General to get started.
Step 2: Then choose Reset under Transfer or Reset iPhone.
Step 3: Use your Apple ID to configure your device when the reset is finished.
Step 4: The fundamental WiFi problem ought to be fixed at this point.
Part 2:Ultimate Solution to Fix WiFi not Working After iOS 16 Update
Instead of spending much time in trying methods one by one and wondering what's wrong with your iPhone, there is a much easier and more efficient way to resolve WiFi not working after iOS 16/15 update with a freeware Tenorshare ReiBoot. It enables users to fix all iOS related issues within a few steps. And it supports the latest iOS 16. After that, your device will boot up to normal condition.
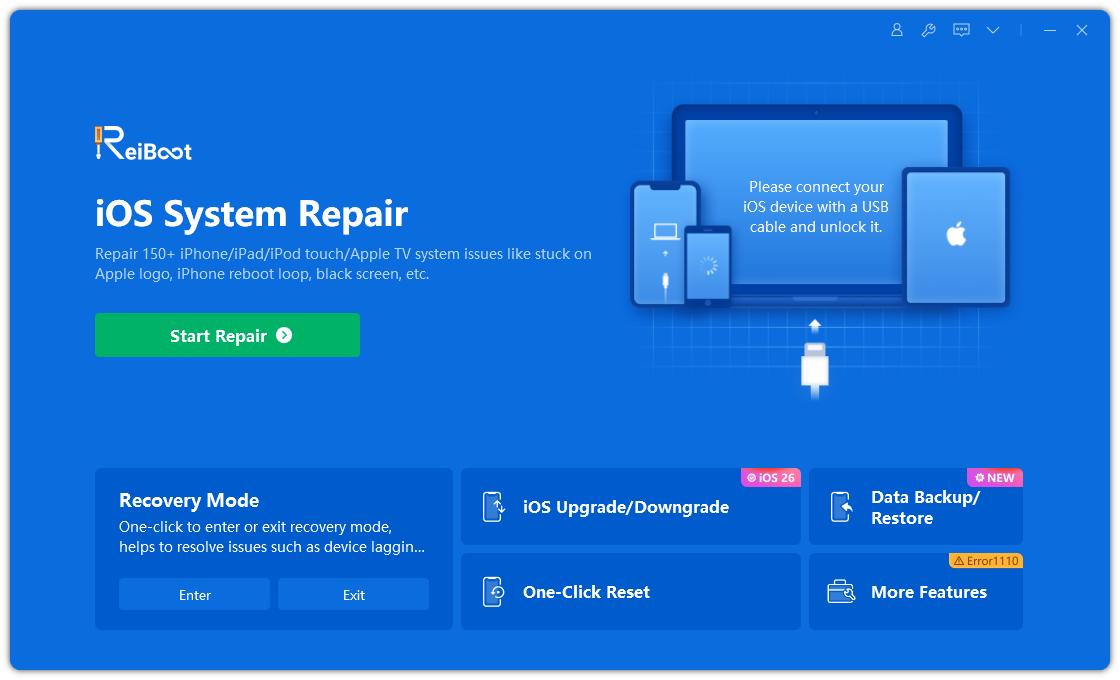
Install Free Tenorshare ReiBoot on your PC/Mac and connect iDevice with it. Put your device into and out of Recovery Mode for a quick try to repair iPhone WiFi problems.

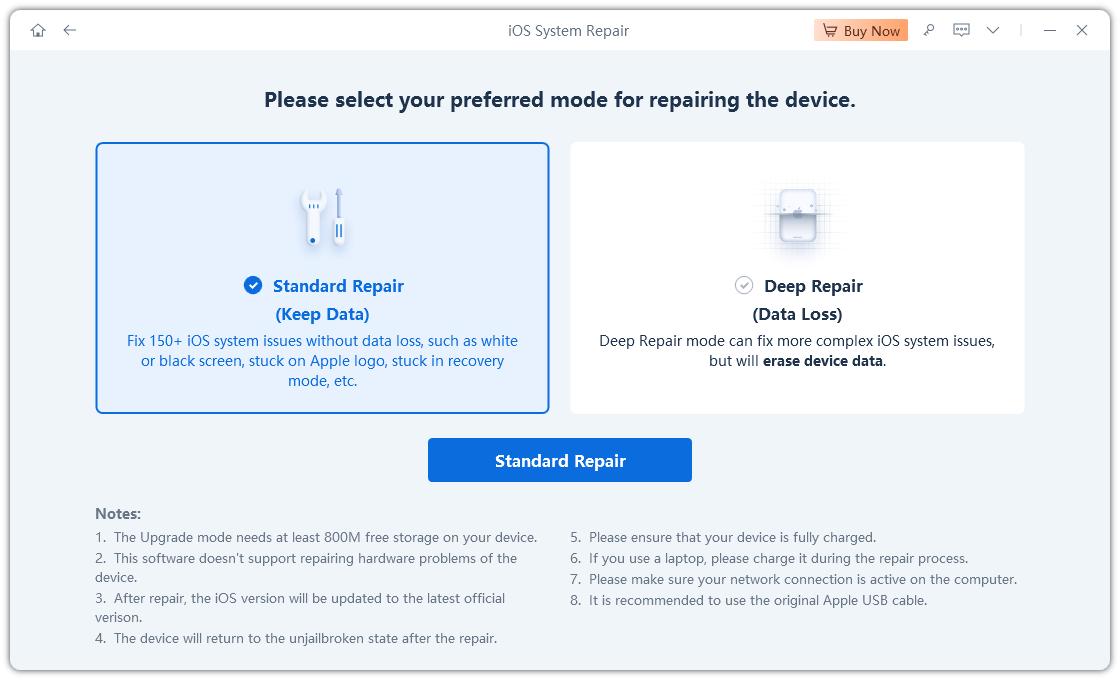
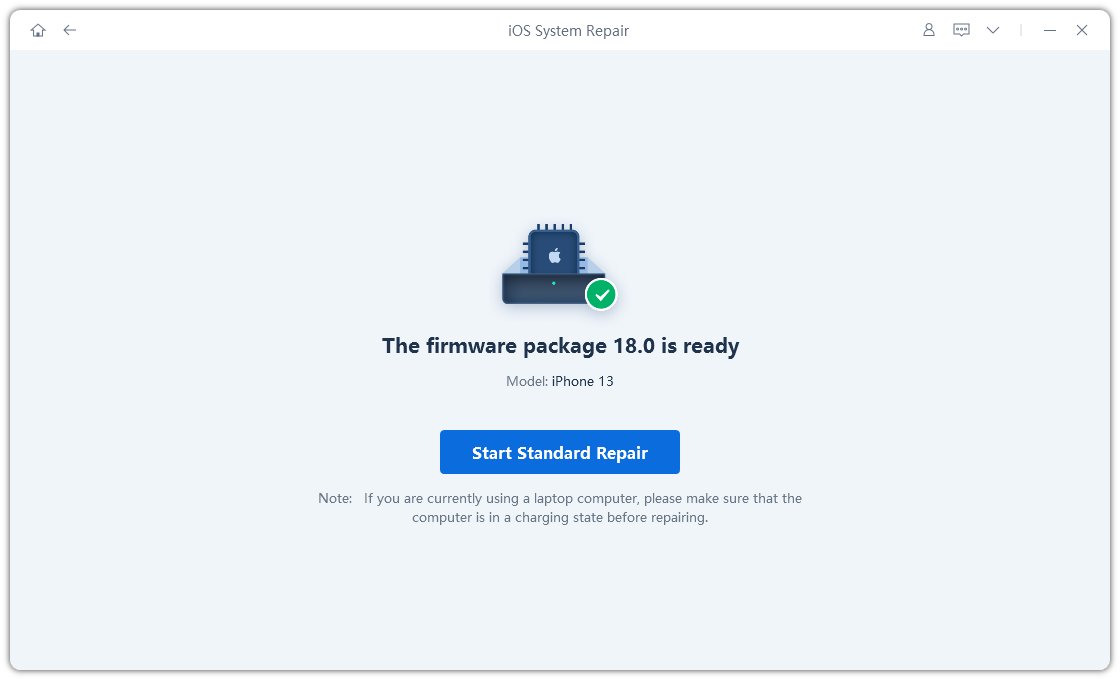
If that doesn't work, you are good to click Start and then choose Standard Repair iPhone operating system.

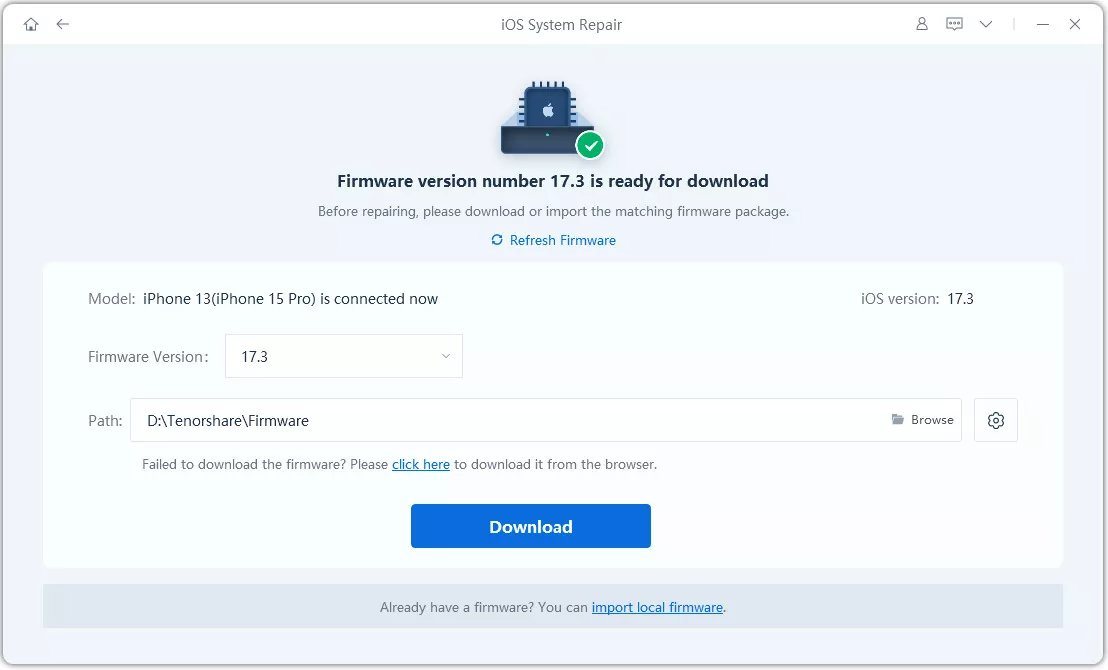
By default Tenorshare ReiBoot will provide the newest iOS firmware package as alternative of the corrupted system on your device. Click Download to proceed.

As the soon as the downloading process done, it will automatically start to repair iPhone/iPad. Within a few minutes, you will have iPhone WiFi not working for iOS 16 issue solved without any data losing.


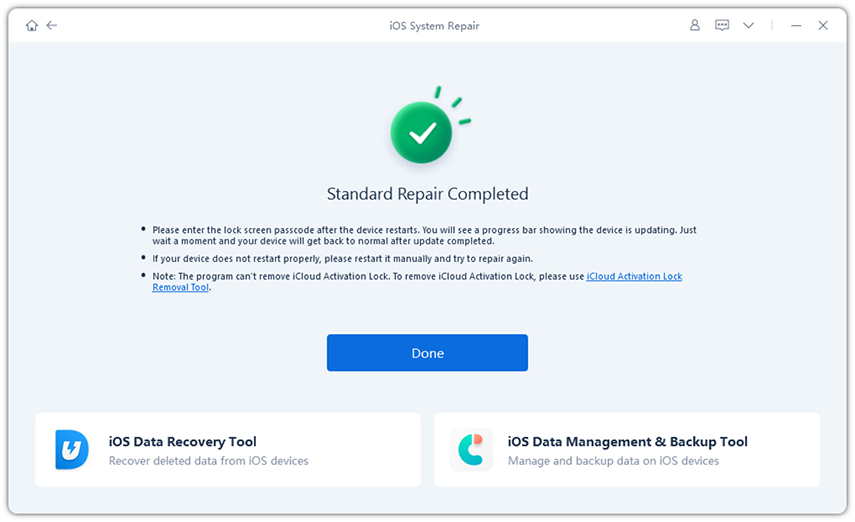
After the repair is done, your iOS device will automatically reboot and all your data will not be deleted.
Let us know whether the problem that iPhone/iPad won't connect to a Wi-Fi network after iOS 16/15 has been fixed with above methods in the comments below.
- Downgrade iOS 18 Beta to iOS 17 ;
- Fix iPhone won't restore in recovery mode, my iPhone is stuck on the Apple Logo,iPhone black screen of death, iOS downgrade stuck, iPhone update stuck, etc.
- Support all iPhone models and the latest iOS 18 beta and earlier.
