How to Use PDNob Team Plan - User Guide
PDNob Team Plan is designed for enterprise and team use cases, providing centralized account, member, and license management. Administrators can view team information, assign product licenses, and manage member usage permissions through the Enterprise Management Center, helping enterprises handle PDF document workflows more efficiently.
This guide details the differences between PDNob Team Plan and Individual Plan, how to set up a team, and how administrators can manage members and usage permissions.
1. Differences Between Individual and Team Plans
Before choosing a plan, it's important to understand the differences between the Individual and Team Plans. The Individual Plans is built for single users with everyday PDF tasks, while the Team Plans is purpose-built for organizations that need centralized management, flexible license allocation, and member-level controls.
1.1 Individual Plan
- For personal use: PDNob Individual Plan is suitable for a single user handling everyday PDF tasks such as document reading, editing, conversion, OCR, and more.
- Usage limits: An individual account is limited to a single user. It does not support multi-user management or enterprise license assignment.
- Device limits: An individual account can be signed in on up to 2 devices at the same time, supporting up to 2 Windows devices, 2 Mac devices, or 1 Windows device plus 1 Mac device.
1.2 Team Plan
- Enterprise management backend: PDNob Team Plan provides a dedicated Enterprise Management Center, where administrators can centrally manage enterprise inquiries, purchase orders, team members, product licenses, and related usage permissions.
- Flexible license management: Team Plan supports flexible license allocation. Administrators can add, remove, or adjust licenses as team members change. For example, when a member leaves or changes roles, you can reclaim the original license and reassign it to another user, improving license utilization.
- User count limit: A team can invite an unlimited number of members to join the enterprise account, but the actual number of users who can use the PDNob subscription depends on the number of licenses purchased. For example, purchasing 20 licenses provides up to 20 members with access to the product.
2. Purchasing Team Plan and Setting Up a Team
Getting started with PDNob Team Plan requires purchasing a plan and binding the benefits to a designated email. This section walks you through placing the order, confirming the email, and creating the team administrator account.
2.1 Purchasing Team Plan
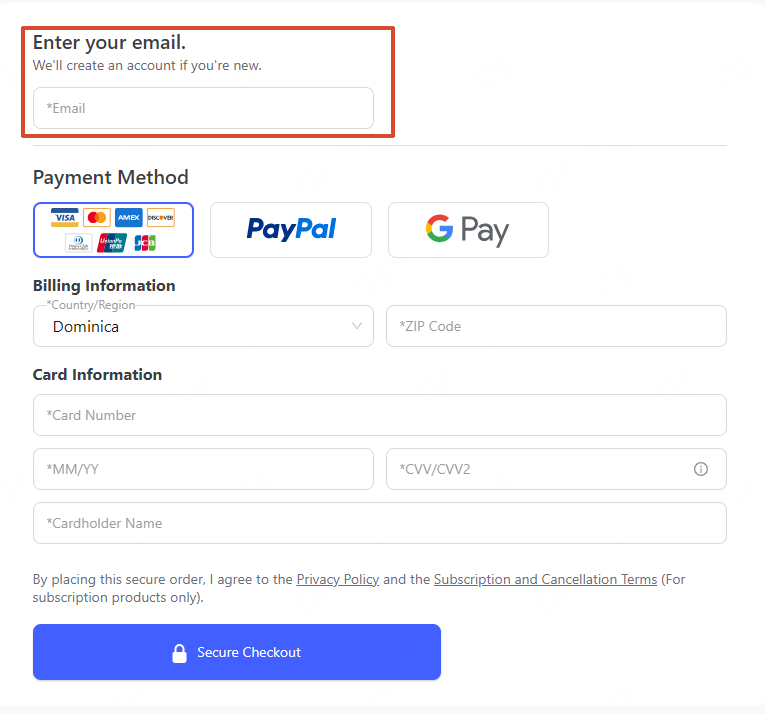
- How to purchase: Go to the official PDNob "Team Plan" purchase page, select the plan you need, and enter a valid email address during the checkout step to complete your order.
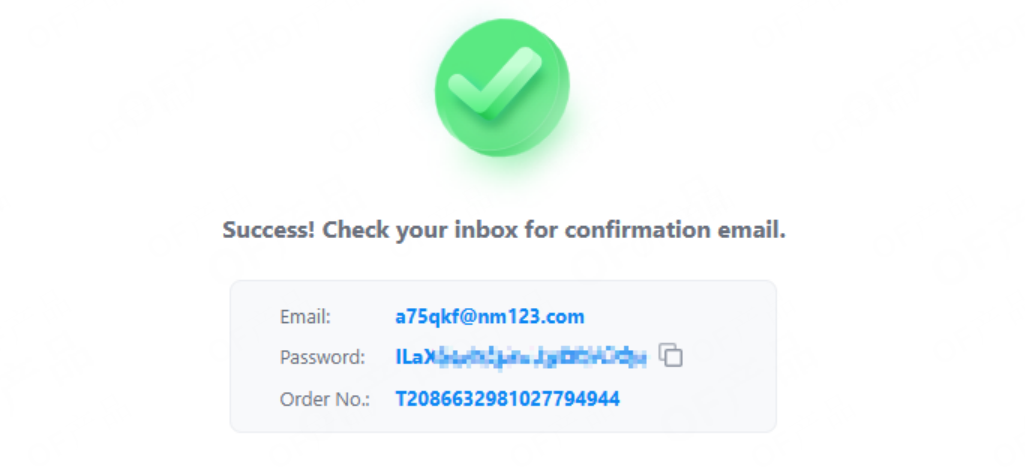
- Email usage: After a successful purchase, the system sends a Team Plan confirmation email to that address, which includes order information and a login password. Please make sure the inbox can receive emails normally.

2.2 Setting Up a Team Account
- Administrator account: After the purchase is complete, Team Plan benefits are automatically bound to the email address used at checkout, and that account becomes the enterprise team administrator account.
- First-time purchase: If you have not yet created a PDNob account, the system creates one automatically after the purchase and sends the login password to the email address used at checkout.
- Forgot password: If you already have an account but forgot your password, use the link in the purchase confirmation email to reset your password.
3. Enterprise Management Center
3.1 Account Login
- How to log in: Go to the Tenorshare Account Center and select Business Login to enter the team management page.
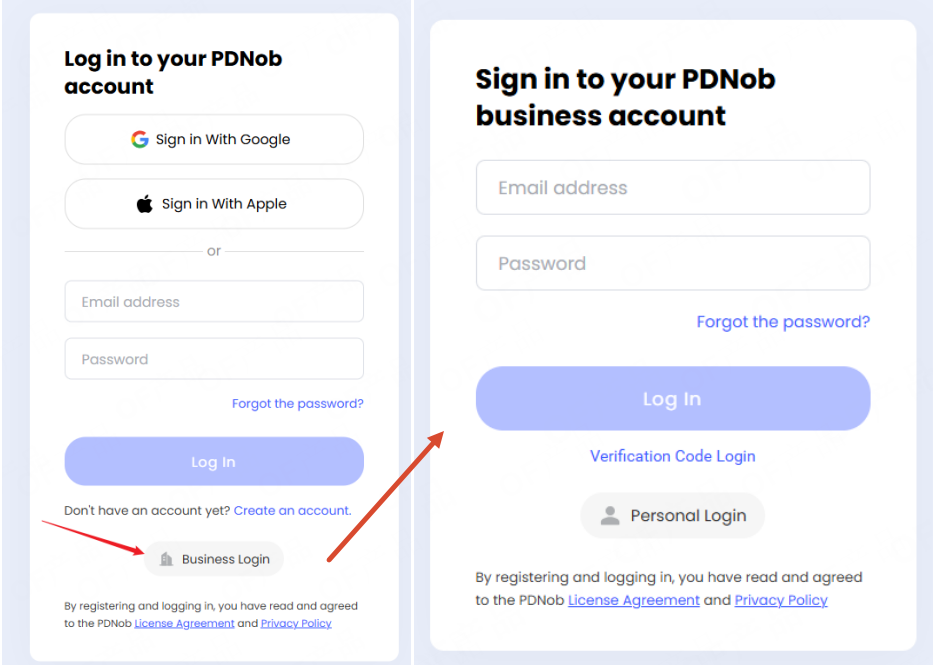
- Login options: You can sign in using your email and password, or via an email verification code.
3.2 Enterprise Information Management
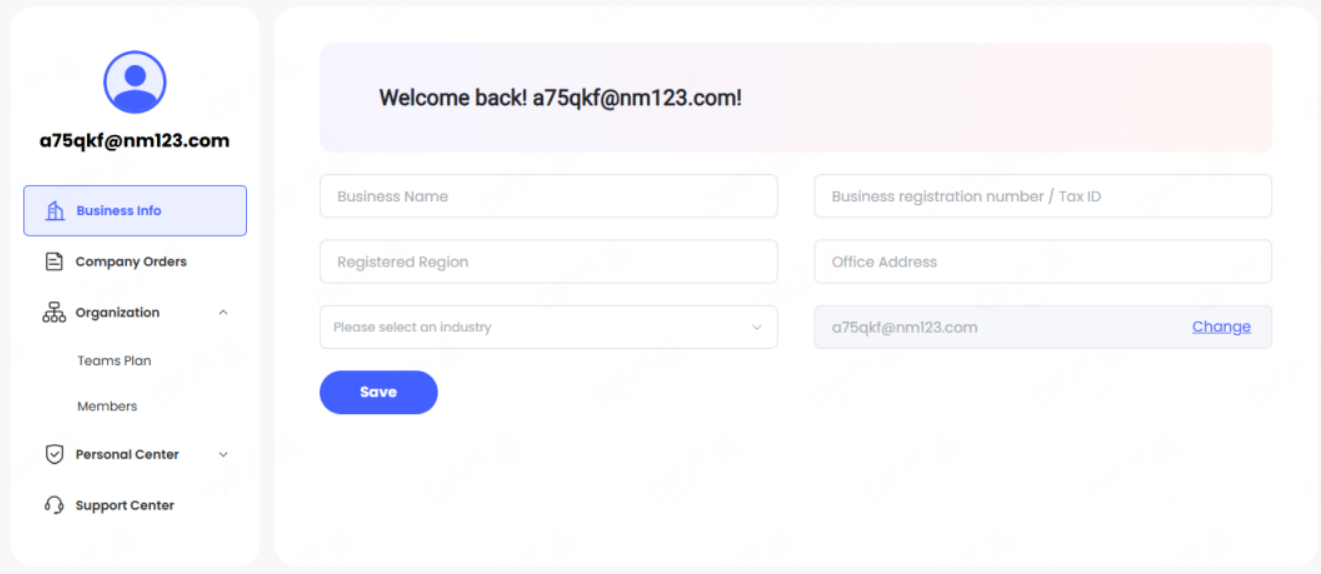
- Enterprise information: On the Business Info page, administrators can view and manage basic enterprise information, including enterprise account details and administrator settings.
- Administrator change: If the enterprise needs to replace the administrator, click Change, complete the verification, and enter the new administrator's email address to update the administrator account.
3.3 View Purchase Orders
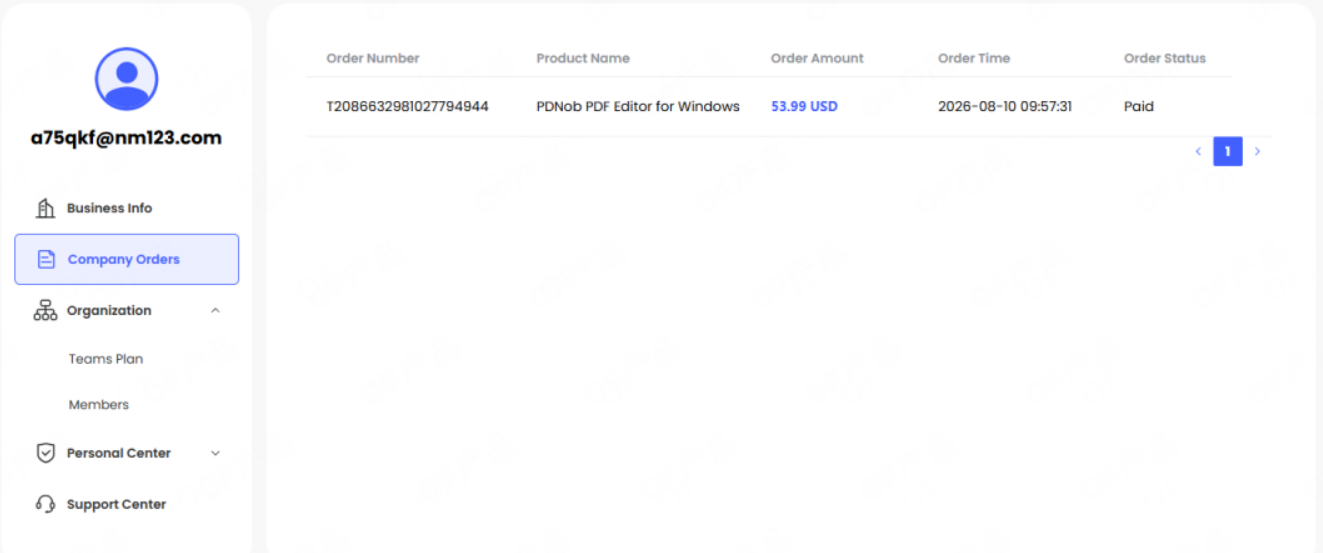
- Order management: Click Company Orders to view all Team Plan purchase records, making it easy for administrators to check historical order information and license purchases.
4. Member Management
4.1 Add Licensed Members
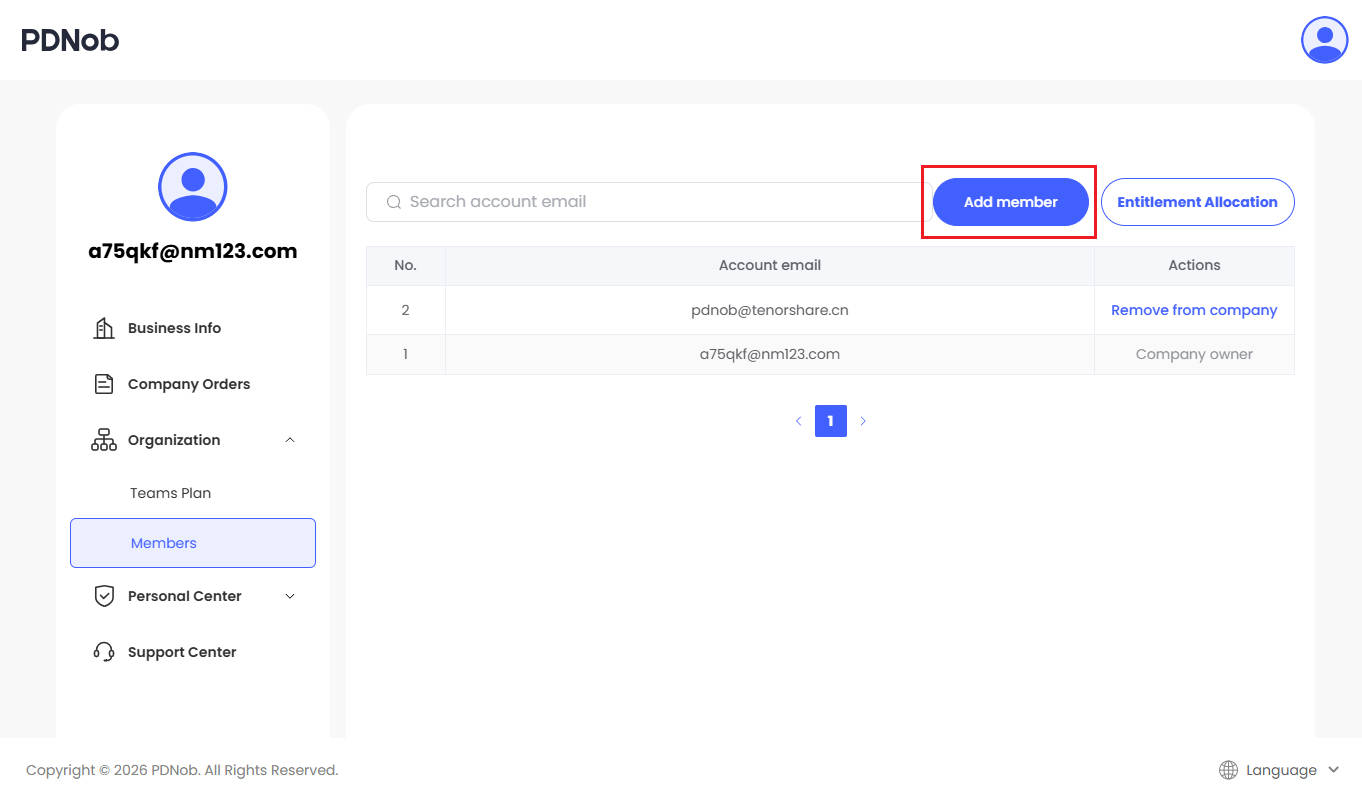
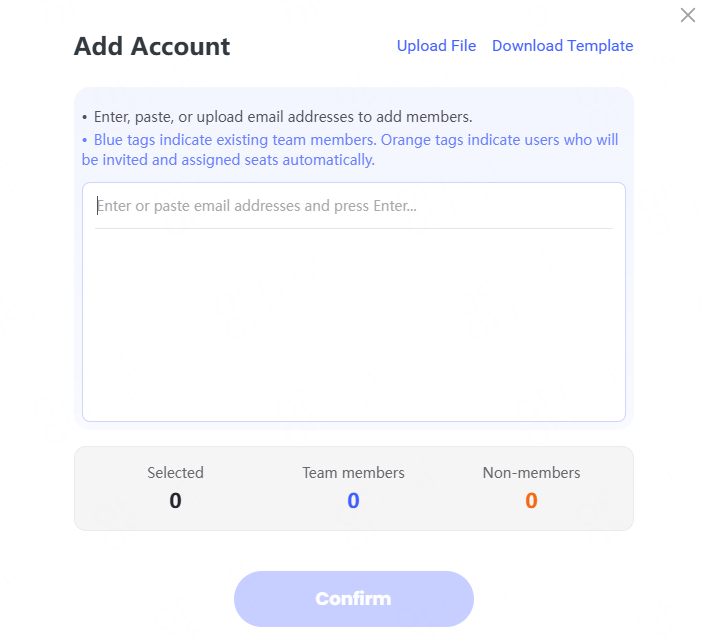
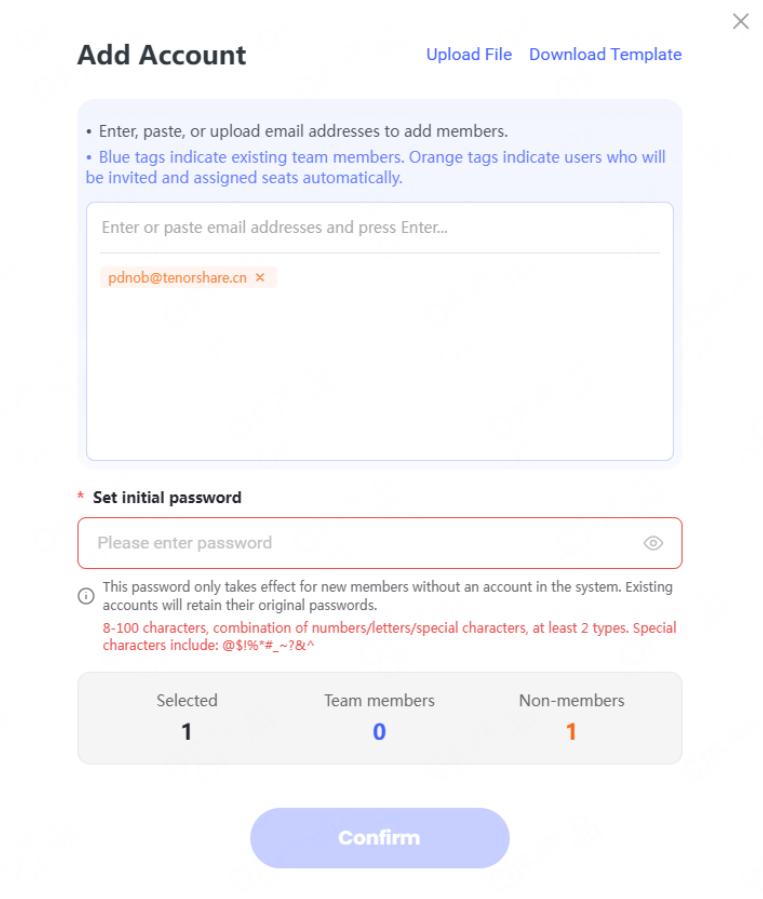
- How to add: Open the Add Member feature, enter the member's email address, and add them to the enterprise account.
- Account status: Use the text color to check account status.
Orange account means the user has not yet joined the current team and requires account setup (the administrator must first set a default password);
Blue account means the user has already joined the current team.
- Default password note: The default password only works for orange accounts that haven't joined the current team yet. When an admin adds these accounts, they need to set up the default password first, and members can log in to PDNob later using that email and default password. Blue accounts that have already joined the team aren't affected by the default password.
- Permission assignment: Joining the team doesn’t mean you get immediate access to the product. The admin still needs to assign the appropriate licences in the 'Team Plan' for members to use the PDNob team version features.
4.2 Batch Add Members
Batch Import: When a company needs to add a large number of members at once, you can use the batch import feature to quickly create team accounts.
Steps Guide:
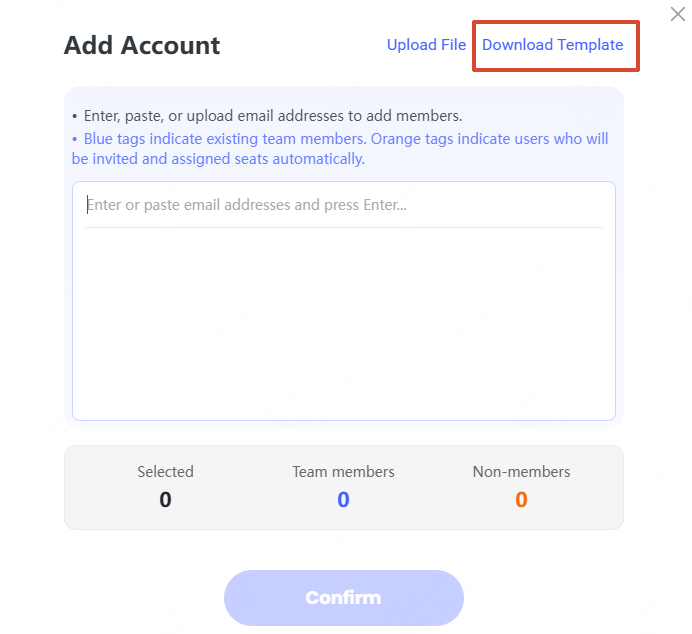
- Click Download Template, enter the member email addresses in the template, save the template file.
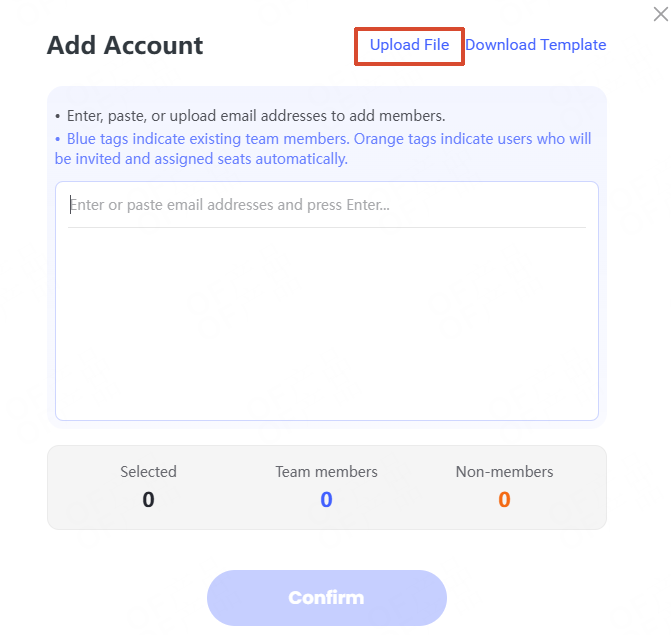
- Click the Upload File button to upload the completed template with email address of members.
- After the upload is successful, the system displays the list of newly added members. If an account has not yet joined the team, set its password first to complete the joining process.
4.3 Replace Licensed Members
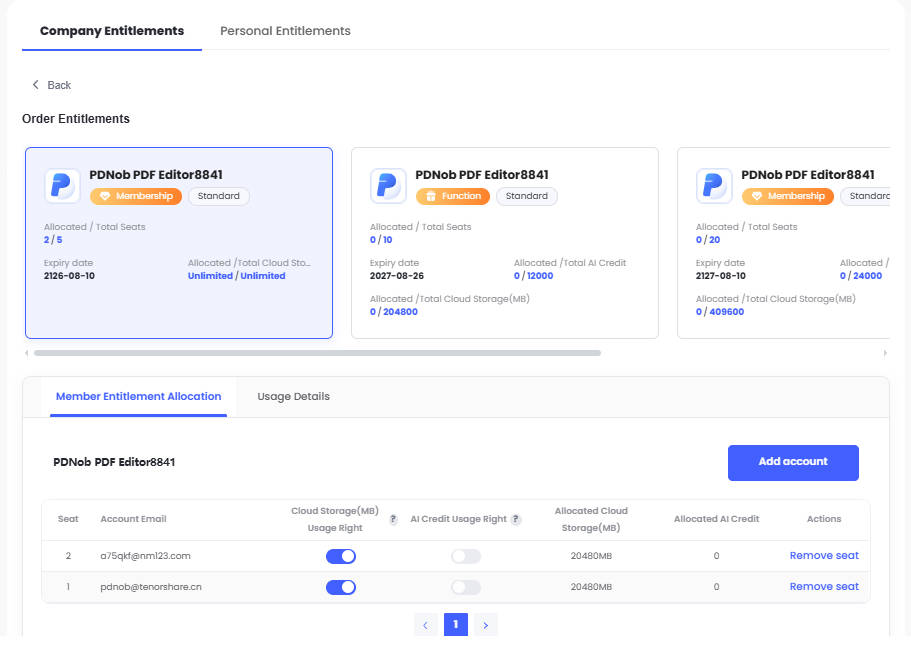
- Cancel License: If you need to change a team user or stop a member from using the product, Click Remove Seat next to a licensed member to reclaim the license.
- Reassignment: After the license is removed, reassign it to a new team member.
4.4 Remove Team Members
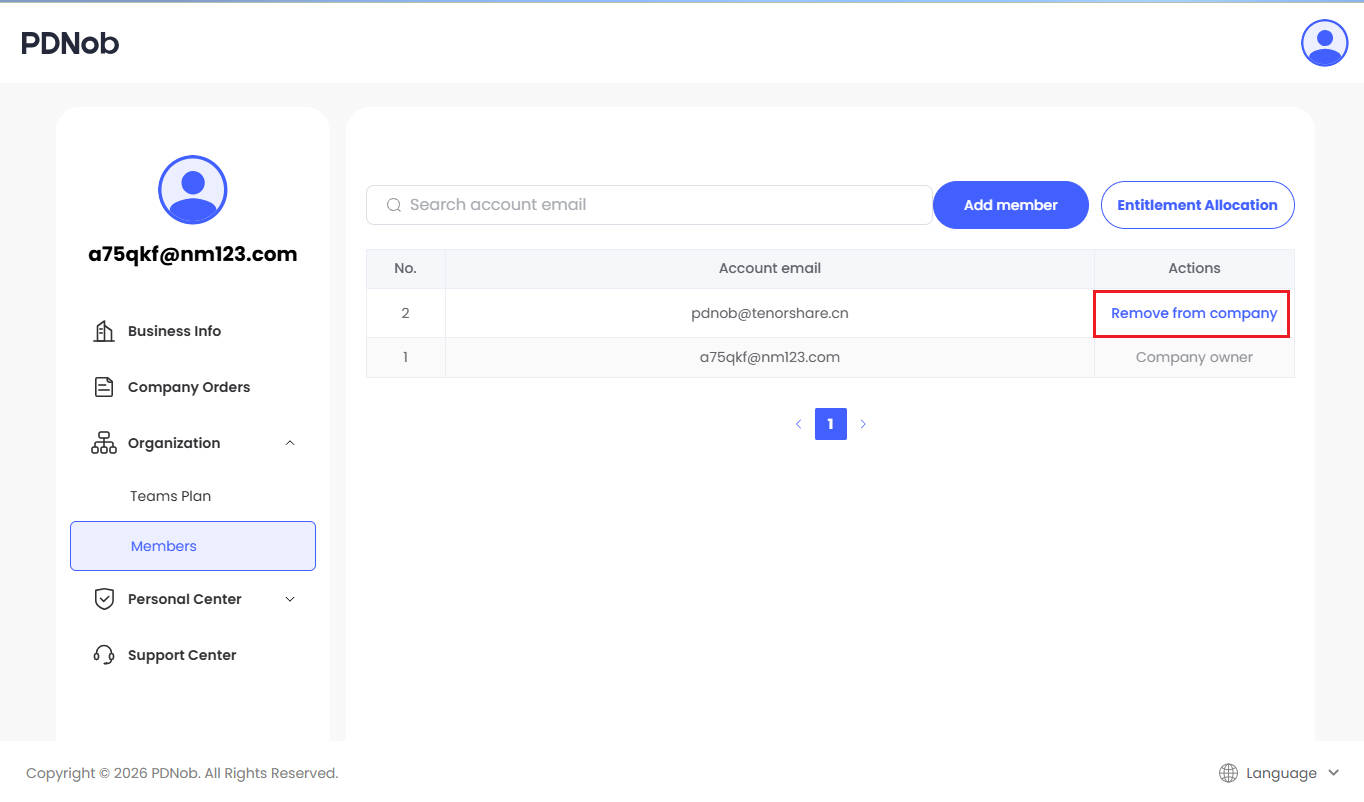
- How to remove: If you need to completely remove a member from the company team, you can go to the Members page to find the member to remove, and click Remove from Company, and confirm to unlink the account from the enterprise team.
5. Company Entitlements Management
5.1 View Company Entitlements
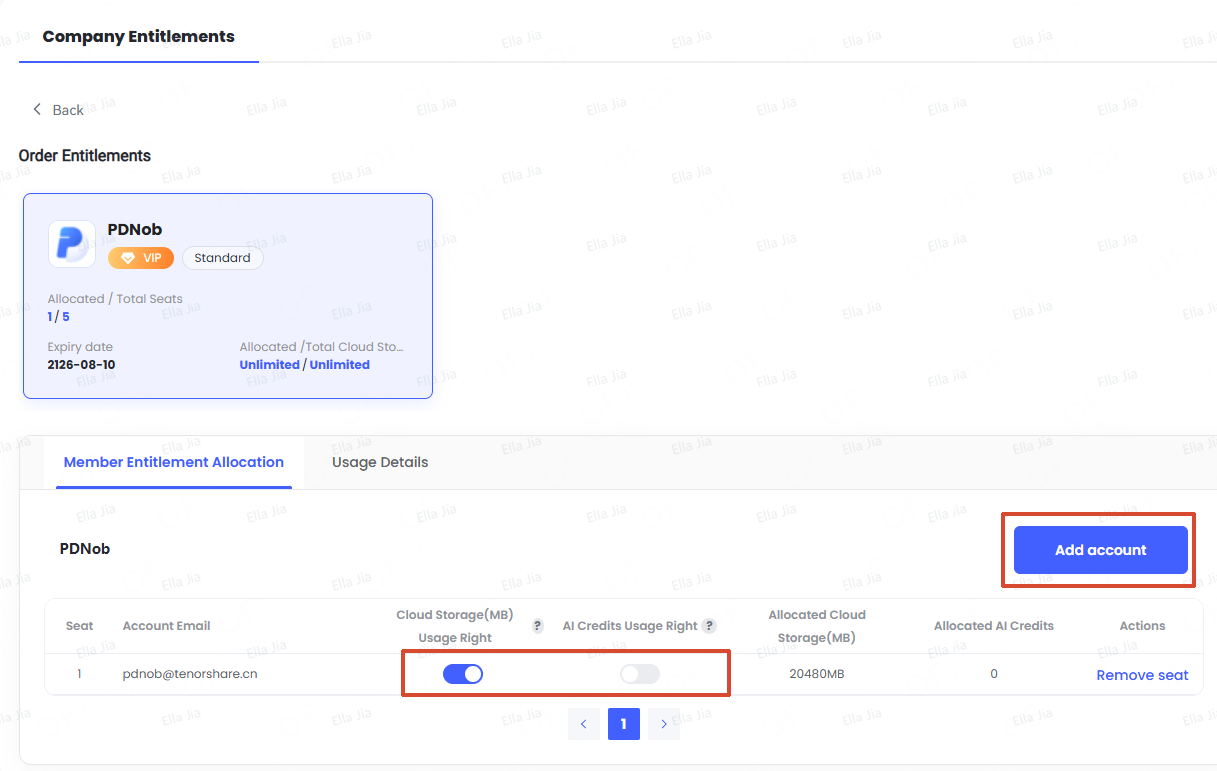
Entitlements overview: Go to the Team Plan page to view all PDNob entitlements information under the current enterprise account.
Steps Guide:
- Access the Teams Plan panel.
- Select PDNob and click Detials to view detailed license information.

5.2 Allocate Member Entitlements
- Entitlements Alloction: On the licence management page, admins can check the current licence usage status and assign PDNob licenses to specific members.
- Add a new licensed user: Click 'Add Account' and select the member account you want to assign benefits to, and the authorisation will be completed.
- AI and cloud storage management: Enable or disable each member's access to AI features and cloud storage based on enterprise needs.
- Data privacy: The cloud storage used by a member belongs to their personal account, and administrators cannot view files stored in another member's cloud storage. AI usage rights are managed according to administrator settings.
6. Team Member Onboarding and Using PDNob
6.1 How Members Join
- Joining method: PDNob Team Plan currently adds member accounts directly through the administrator; members do not need to accept additional invitations.
- Usage flow: After the administrator completes member addition and license assignment, the account information is provided to the member, and the member can log in to the product to use the Team Plan benefits.
6.2 Log In to PDNob
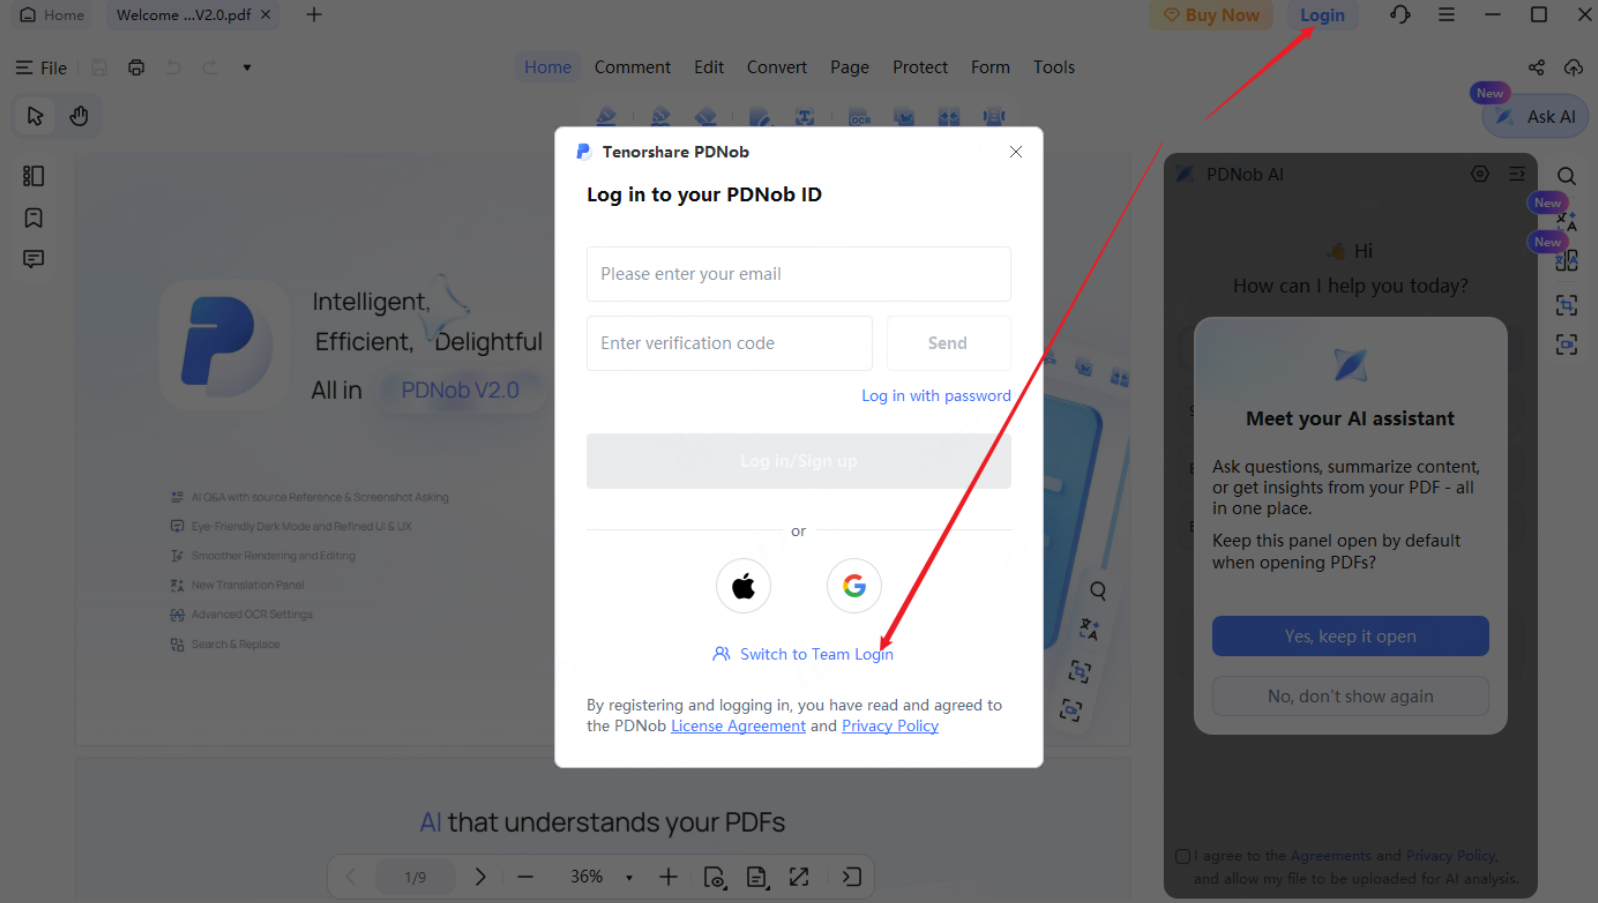
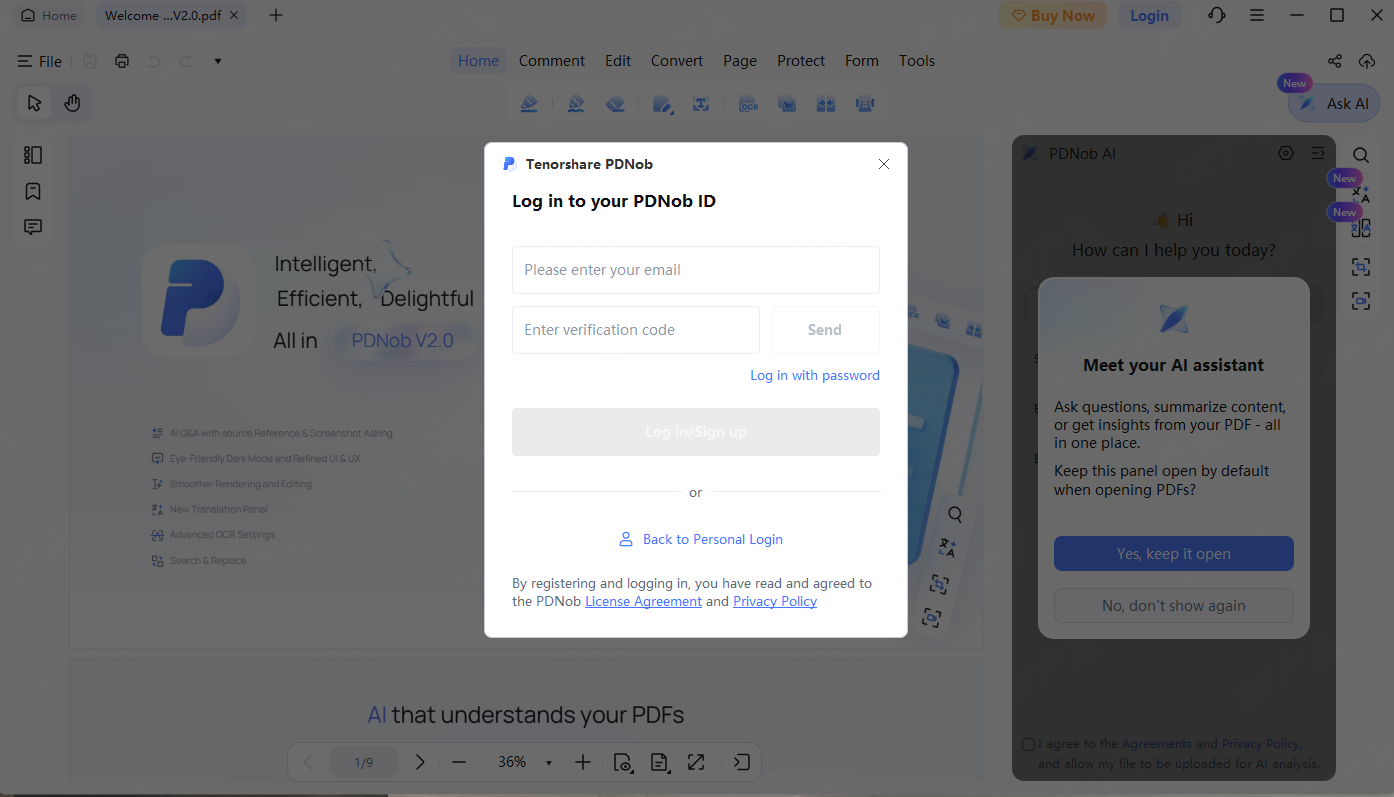
How to log in: After downloading and installing PDNob, team member can open the product and select Team Login to use the assigned benefits.
Step Guide
- Open PDNob, click Login in the PDNob application, then select Team Login.
- Enter the account and password to log in.
6.3 Using PDNob
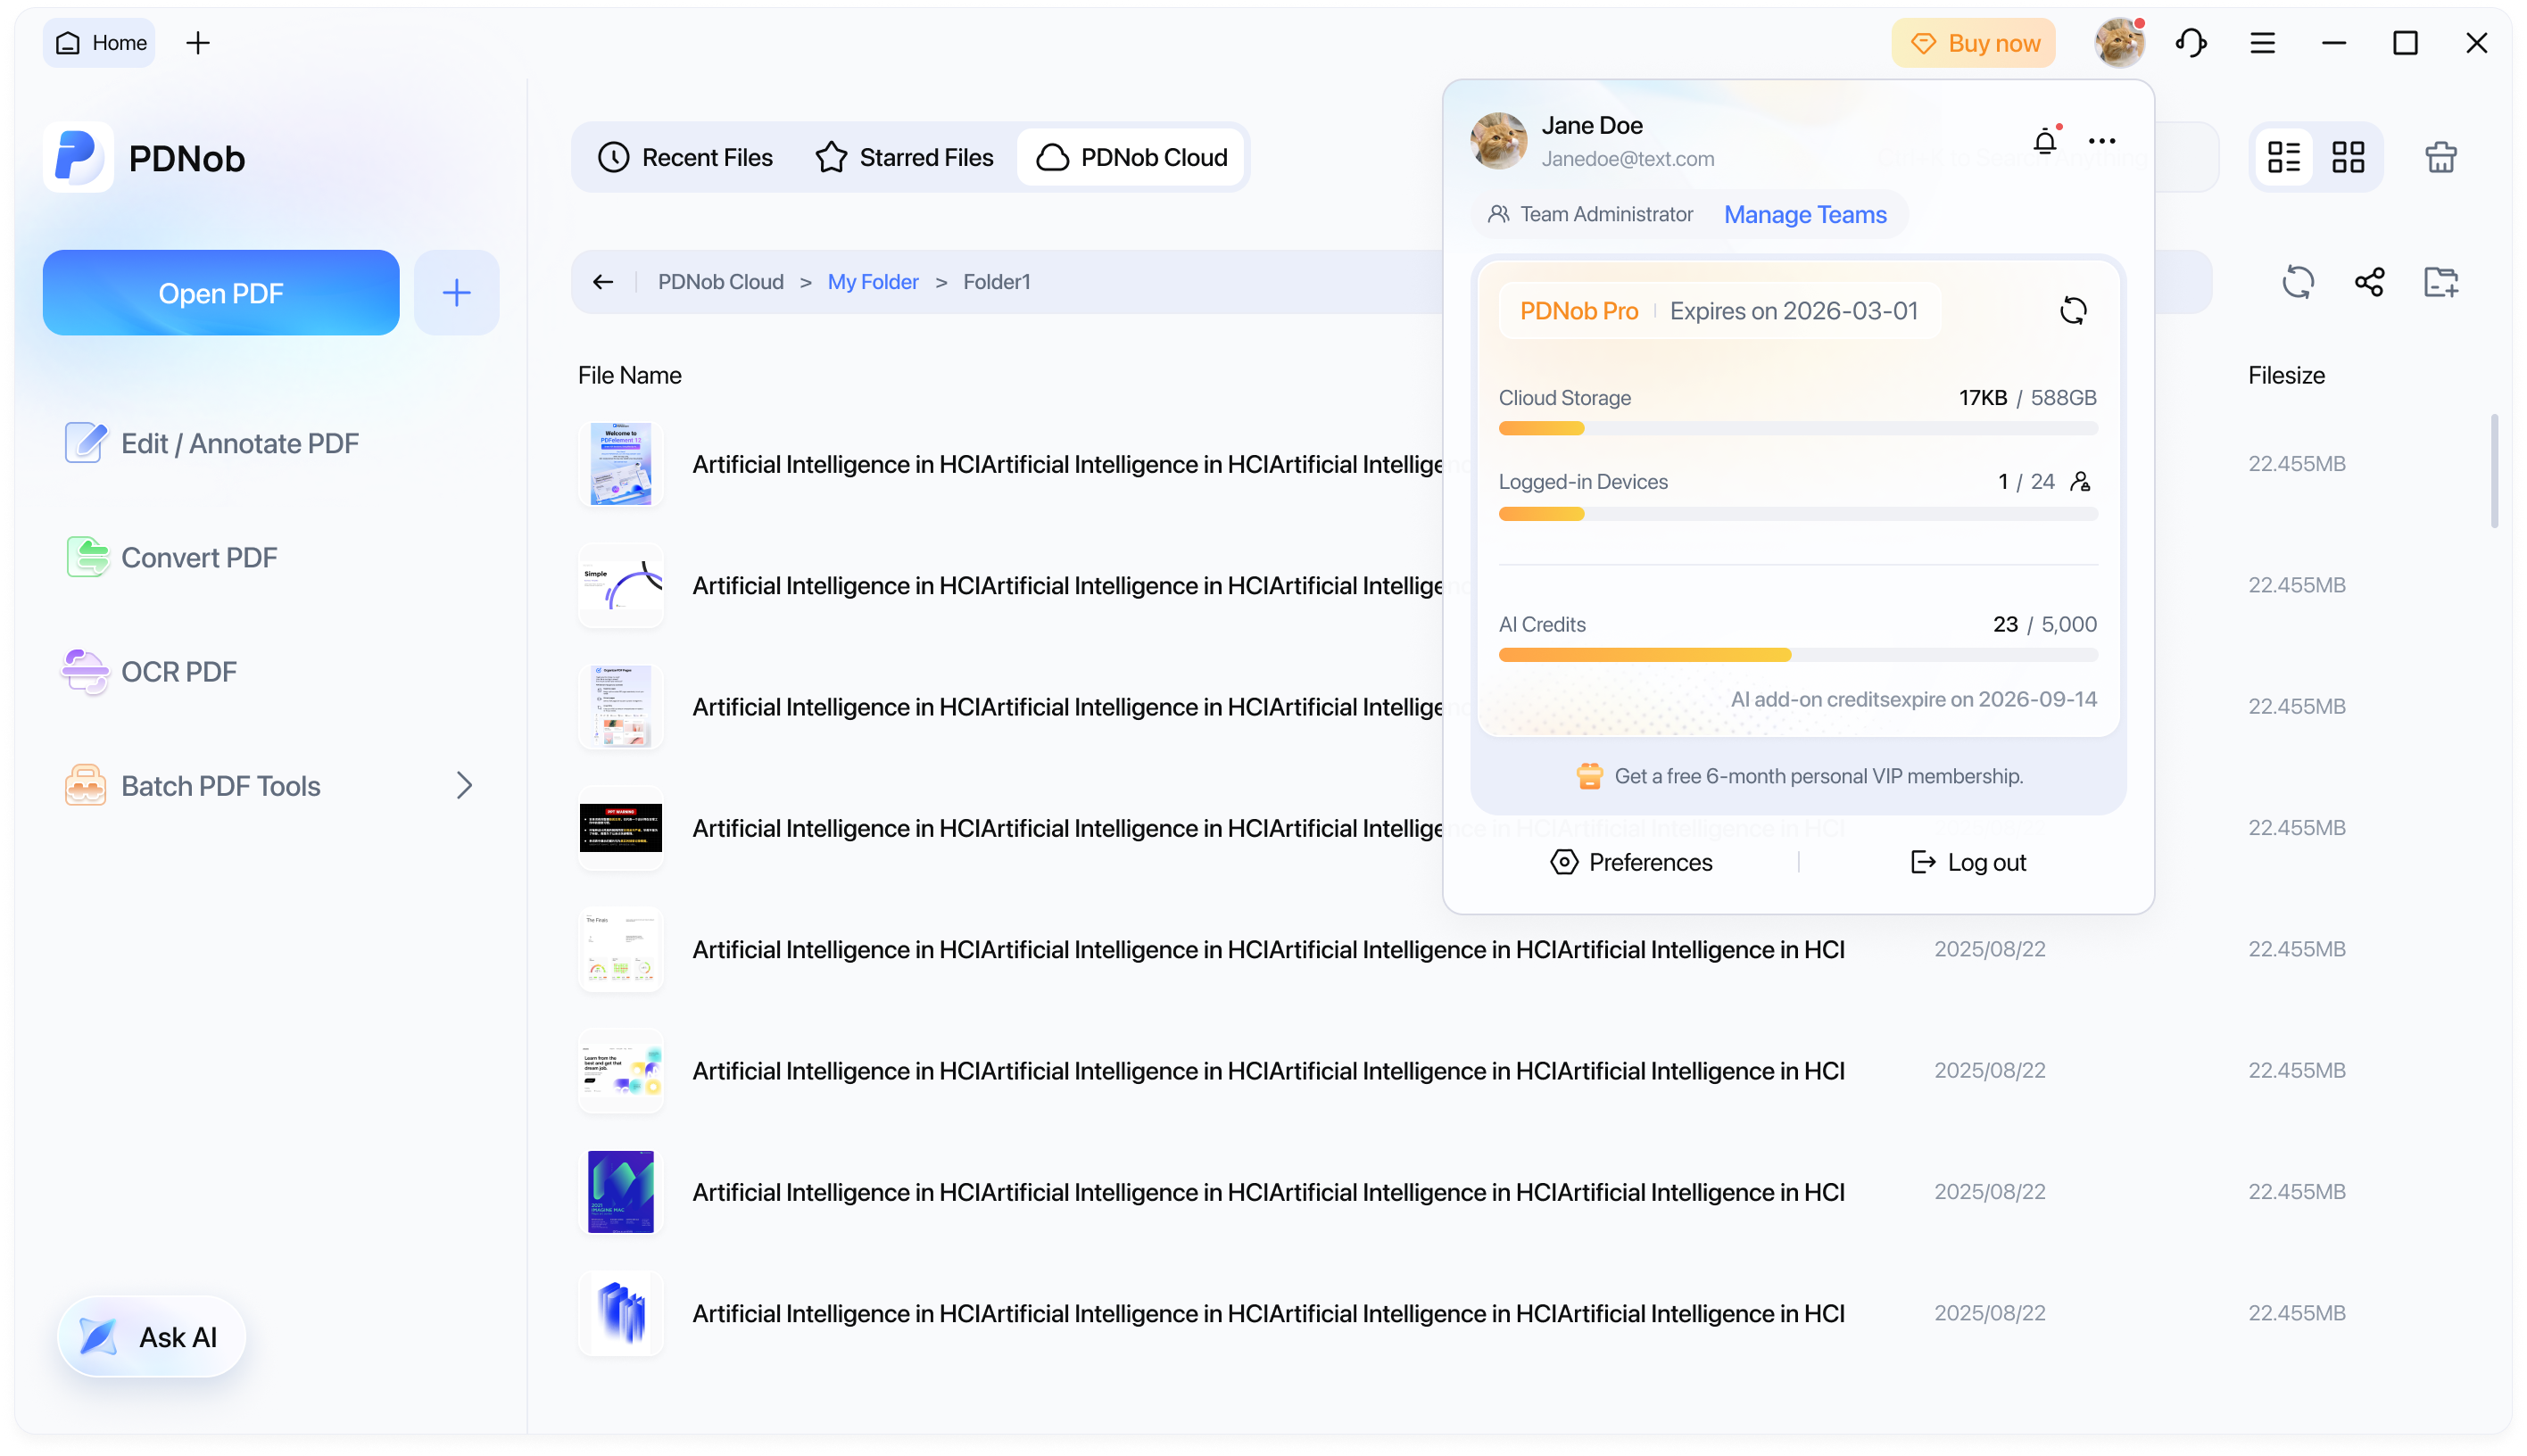
- Administrator panel: View your own device logins, cloud storage, and AI credits usage. Click Manage Teams to jump to the team management backend to manage team members and licenses.
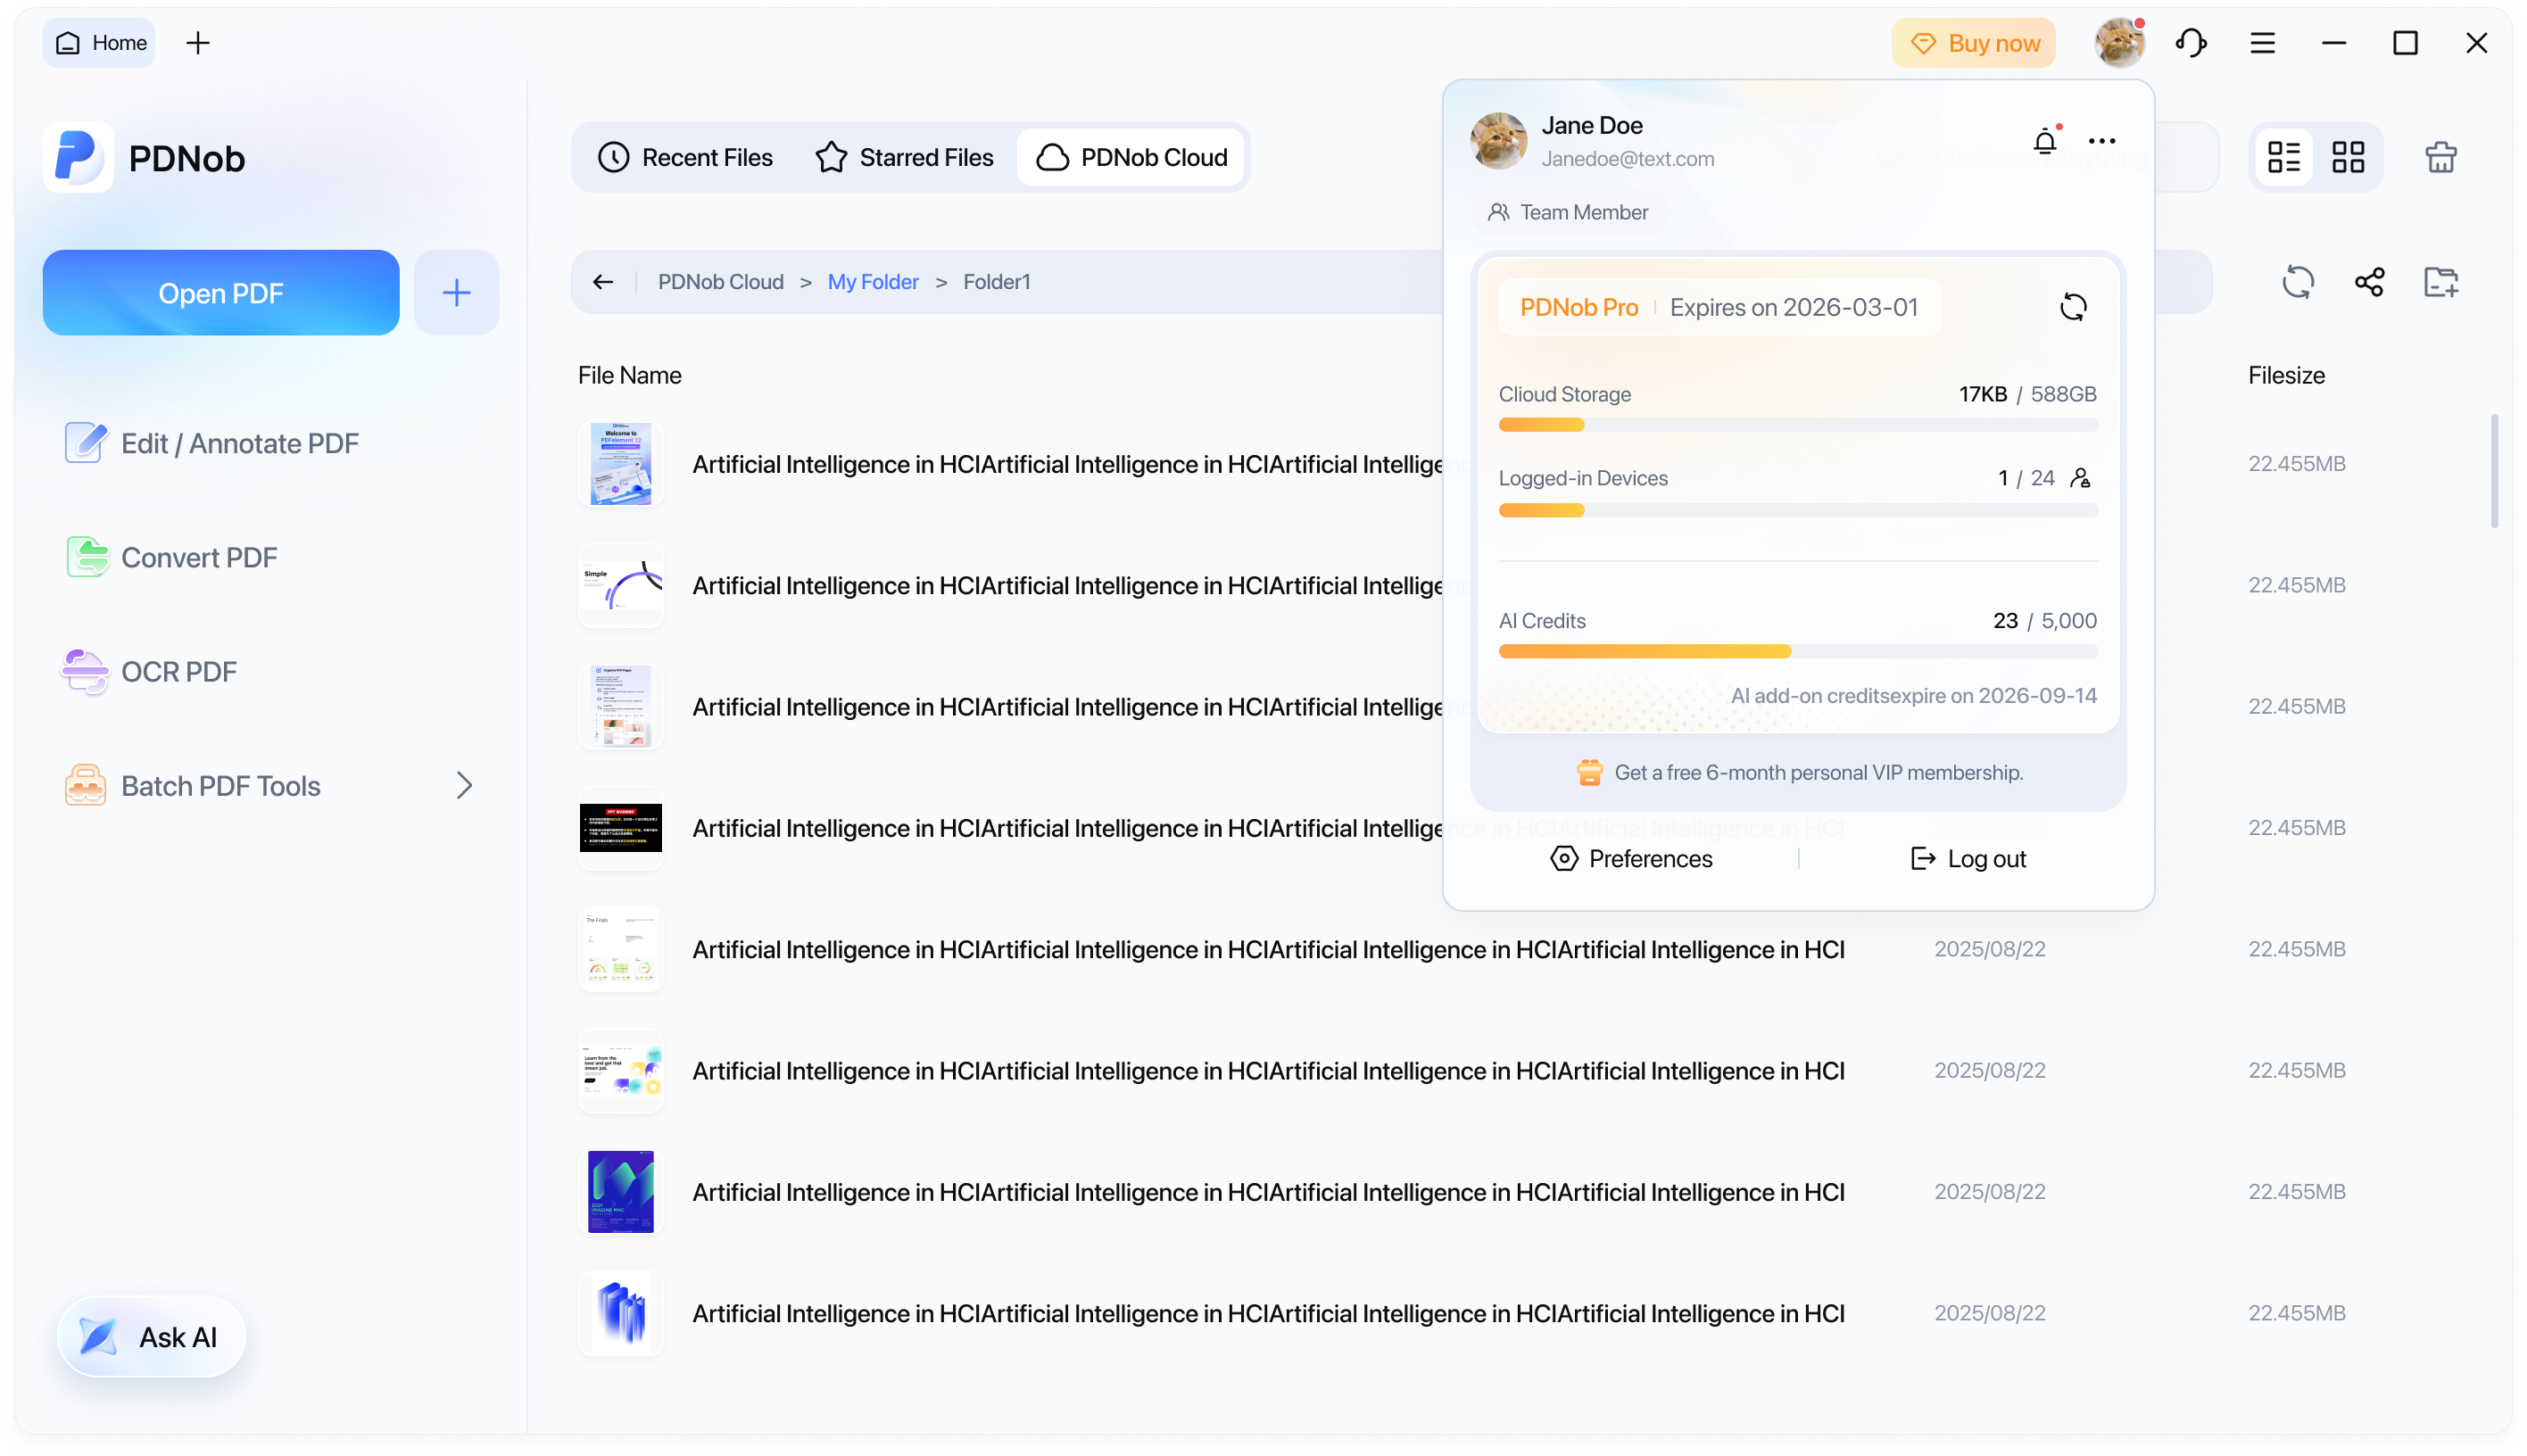
- Regular member panel: View your own device logins, cloud storage, and AI credits usage. You cannot view other members' information or manage the team.
- How to log in: Go to the Tenorshare Account Center and select Business Login to enter the team management page.