Guideline for Tenorshare PixPretty
Guideline for Win
Try PixPretty Now
Discover how to enhance your photos with PixPretty in just a few clicks. Explore AI-powered tools for color correction, retouching, and creative effects today.
Try PixPretty Now
Presets are categorized into: Color Presets, Portrait Presets, and Composite Presets.
Video Guide: How to Use Presets in PixPretty?
Guide Preset Overriding & Layering
When editing the same image, if you apply one preset type and then apply another of the same type (including first applying a single preset and then a composite one containing that type), the final result will reflect the last applied preset. However, if the applied presets are of different types, the final result will be a layered combination of all effects.
Guide How to Create a New One?
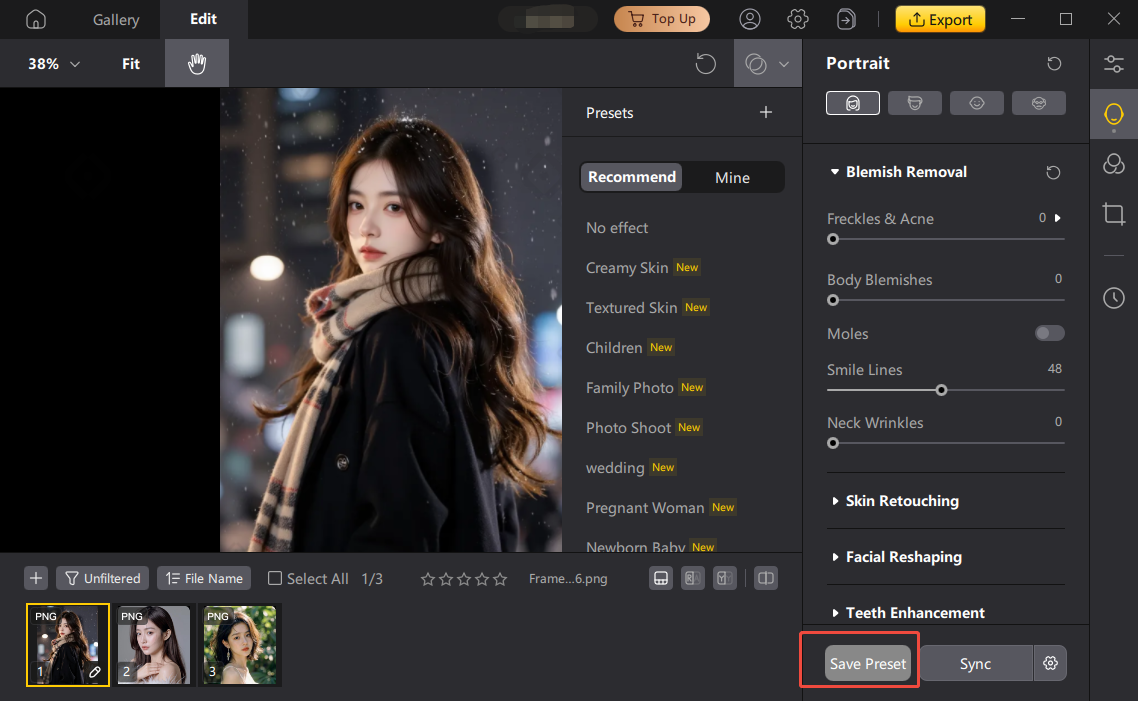
Step 1 Save New Preset
1. After adjusting the parameters for your retouched image, simply click "Save New Preset" at the bottom right of the function panel to create a new preset.

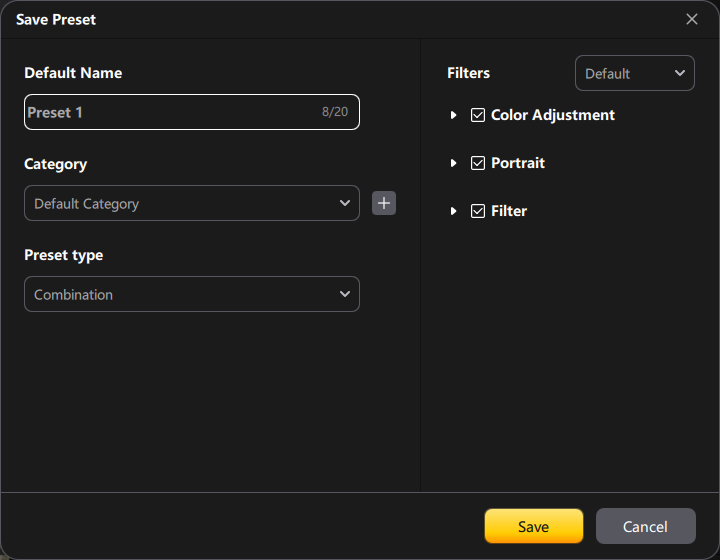
Step 2 Save Preset
2. After clicking, a "Save Preset" window will pop up. Fill in the settings according to your needs: Preset Name: Enter a name for your preset.

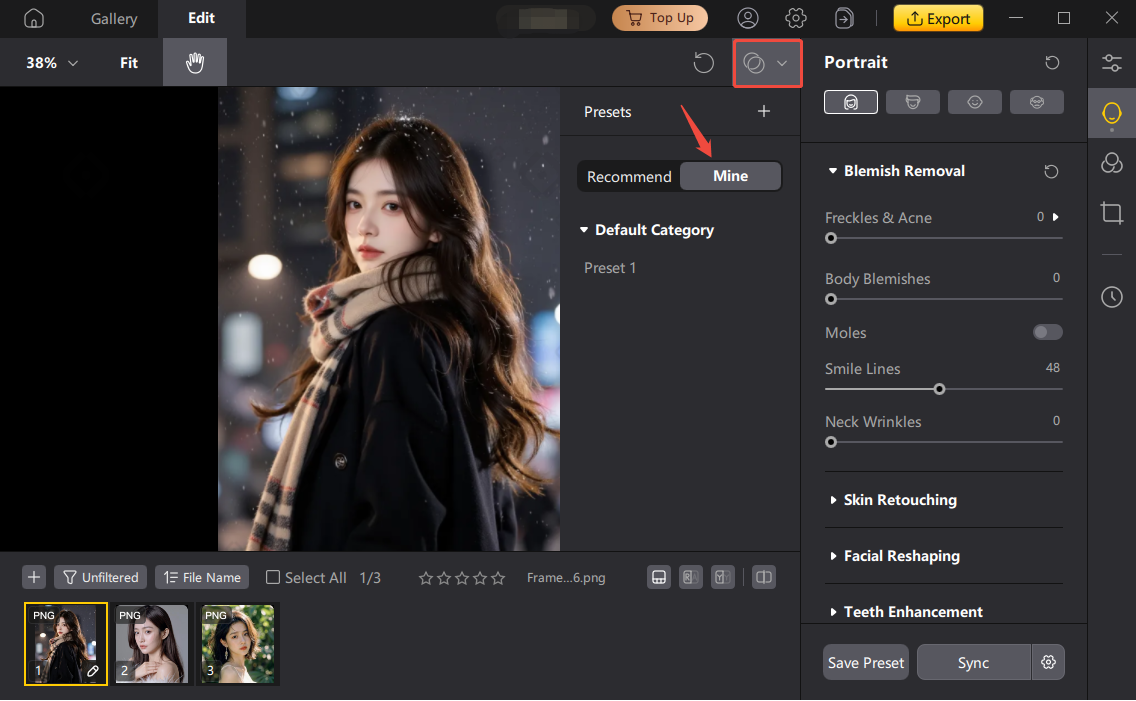
Step 3 My Presets
3. After saving, go to the "My Presets" section to view and use it.

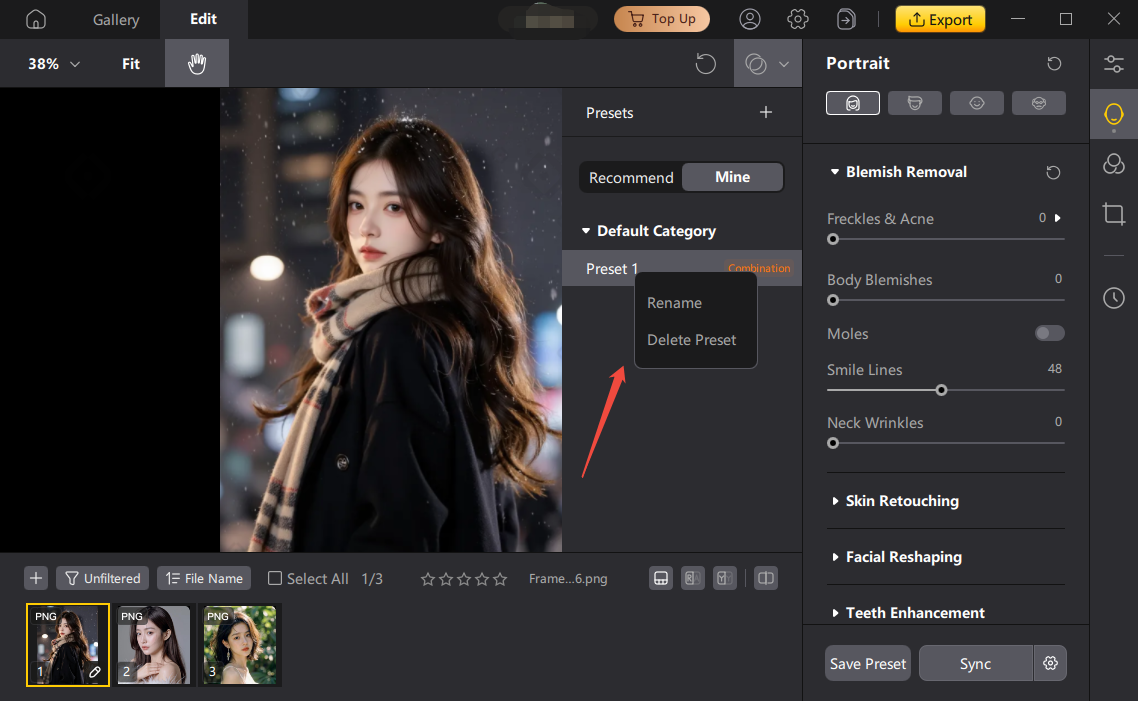
Guide Rename/Delete a Preset
Hover your mouse over the preset you want to edit. Once highlighted, right-click to rename or delete it.

Was this page Helpful ?
Still Need Help?
Just contact our support team and we will reply to you within 24 hours on business days.
Contact Support
