Use Best Disk Utility for Mac to Find Lost Data
by Anna Sherry Updated on 2021-06-08 / Update for Mac OS
When it comes to best disk utility, most of you may recommend Mac disk utility to be powerful application for its multiple functions. With this disk utility, you are able to walk through a series of disk management. Repair, partition, restore and carry on other maintenance on SSDs, flash drives and disk images. However, you still need to solve some problems when you accidentally lose data during the process of using disk utility. If you exactly experience this, what would you do? Here is the best disk utility for mac to put missing data back.
- Part 1: Do You Really Know about Mac Disk Utility?
- Part 2: When Using Mac Disk Utility You May Have Some Problems
- Part 3: You Possibly Lose Data When You're Having Problems
- Part 4: Try Best Disk Utility for Mac to Recover Lost Data
- Bonus Tips: Additional Tips on How to Recover Deleted Files from PC
Part 1: Do You Really Know about Mac Disk Utility?
There is little doubt that macOS is fully-featured because you benefit a lot with less effort. Many useful utilities such as Activity Monitor, Terminal, System Information and so on, enable you to have a better understanding of Mac operation situation. Especially, disk utility on Mac, stands out from those utilities as best mac disk utility app. Do you have deep insight of disk utility?
1.1 What Is Disk Utility?
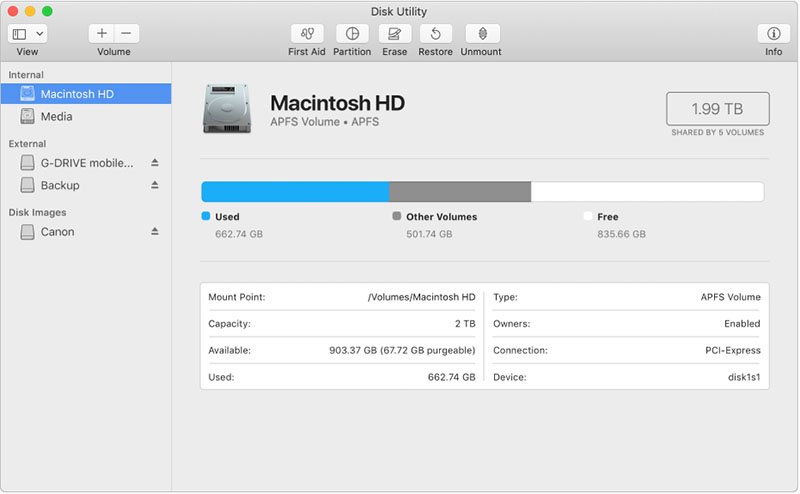
disk utility is a system disk utility applied to macOS and Mac OS X, which can be used to manage built-in disk performance and external drive. If you have some problems, you can fully take advantage of it to repair corrupted disk volume. Sometimes, you can also create image to transfer files from one computer to another. More, this application enables you to set up and manage RAID disk sets. Surely, there are some other available functions accessible if you’re trapped in disk dilemma.
1.2 Why Need Disk Utility?
It’s known to us that all data you create including photos, documents, files, videos is stored on your hard drive. Everyday, debris come with your operation on Mac and it becomes urgently to maintain slower and overloaded macOS. disk utility, obviously one of best macOS disk utility, definitely lives up to its reputation for helping you to solve problems about hard drive in some cases.
Part 2: When Using Mac Disk Utility You May Have Some Problems
How do you use disk utility on a mac? Most of time, it is not that easy to use this disk utility. Firstly, there are many ways to enter disk utility: Key in “disk utility” in Spotlight to open disk utility, or click Application in Finder to find disk utility, or enter recovery mode to select disk utility. Secondly, in the process of using this application, you might be confronted with many issues and let’s figure out what kind of problems you have.
- 1. Partition of Mac drives is deleted.
- 2. Mac hard drives don’t show up in the disk utility window.
- 3. SMART status reports errors or failure.
- 4. Disk error results in directory damage.
- 5. You accidentally format disk.
The above list of 5 common problems are greatly complained from users when they use disk utility. Indeed, there are always some issues coming out even if Apple claims to have enhanced Mac performance. So the best suggestion for users would be like having backup timely before problems happen. Problems, of course, do not stop there, other questions are warmly welcomed to be discussed in our comment community.
Part 3: You Possibly Lose Data When You're Having Problems
When having problems, you’re confronted with big issue that vital data is going to be gone. As what have been demonstrated above, the majority of problems involves software or hardware or human error. When it comes to disk partition, some unhoped questions like partition table corrupt, sectors go wrong, hidden virus attack and other technical problems have fatal effect on state of partition. If partition is deleted all of sudden because of reasons mentioned, there is no denying that data is missing.
On the other hand, if disk utility reports that hardware fails SMART, nothing will save your data on Mac except you have a backup of all important data. Because your hard drive possibly needs to be replaced by new one. Virtual certainty that you lose data 100%.
Part 4: Try Best Disk Utility for Mac to Recover Lost Data
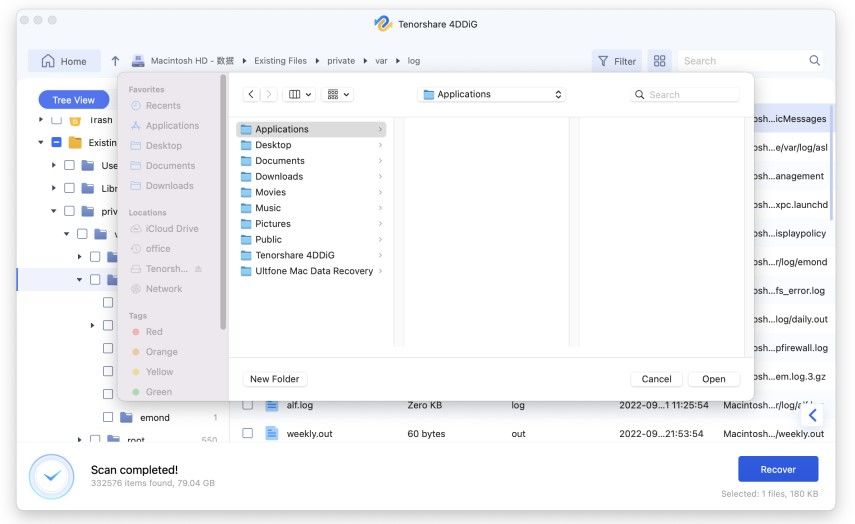
Is there any chance to rescue important data when you lose them? Obviously, you feel overwhelmed by this problem. Don’t worry about that, try Tenorshare 4DDiG for Mac Data Recovery, this best disk utility for Mac to restore data out of various reasons. This software features multiple data recovery covering photos, videos, audios, documents, emails, webfiles, archives and other types of data. No matter how they are lost, this best disk recovery software for Mac always gets you retain those missing data. Apart from this powerful characteristic, Mac Data Recovery also supports the latest macOS Catalina. Usually, it favors mainstream file system APFS, HFS+, FAT32 and exFAT. Let’s check out how to do this recovery thing now, only three steps:
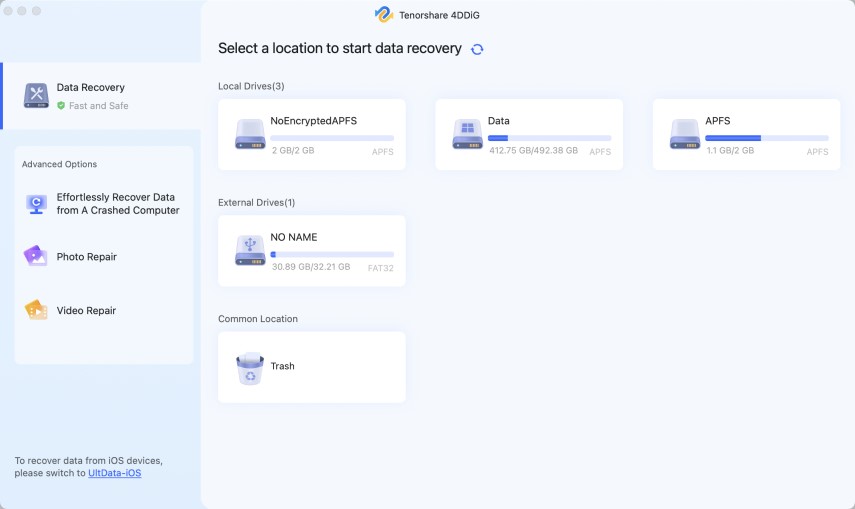
Step 1 Choose any location after you successfully download
When you open 4DDiG for Mac Data Recovery, please choose the location you may lost data recently.
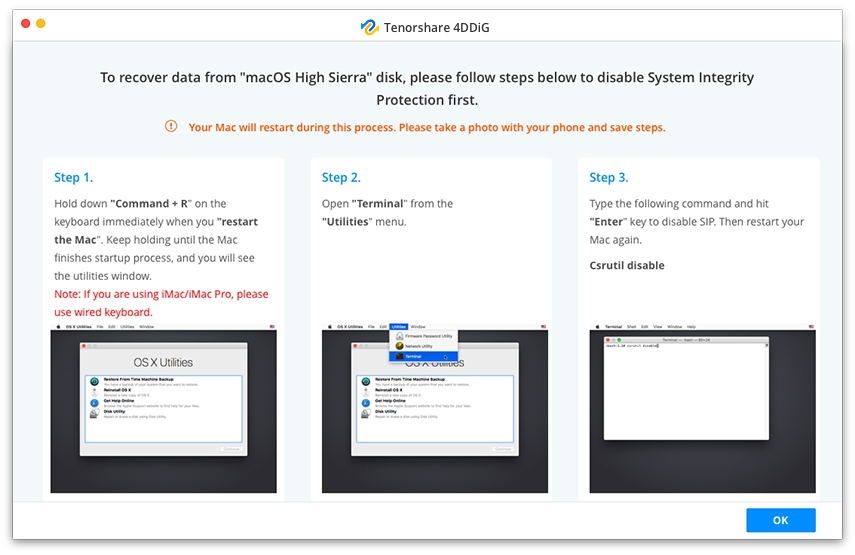
Note: This tip is tended for macOS High Sierra and later system. Disable SIP firstly to give permission of access of Mac files.
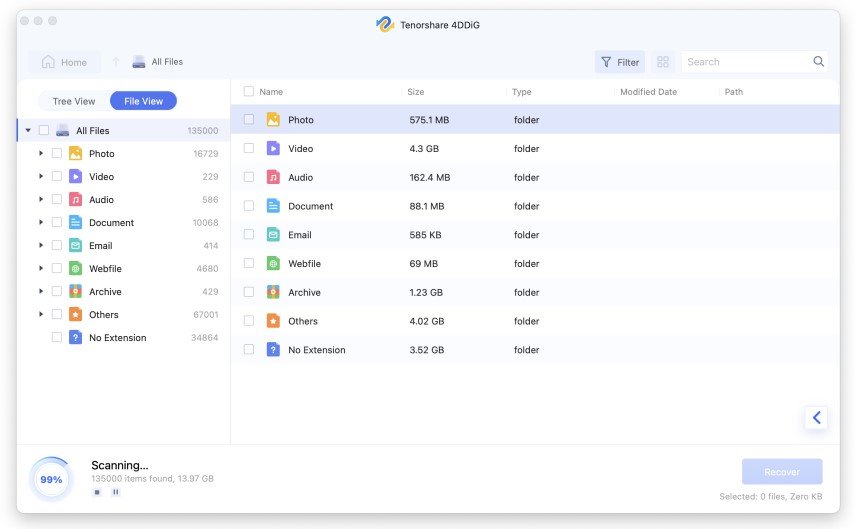
Step 2 Data scan begins now and preview
After you select designated section, the software starts to seek for all data stored on Mac at its best. And you’re allowed to preview retrieved data.
Step 3 One click to recover retrieved data
Preview data and select accurate files you’re going to recover. Remember not to put data back on partition you once lost them. Just wait seconds and everything is OK.
Bonus Tips: Additional Tips on How to Recover Deleted Files from PC
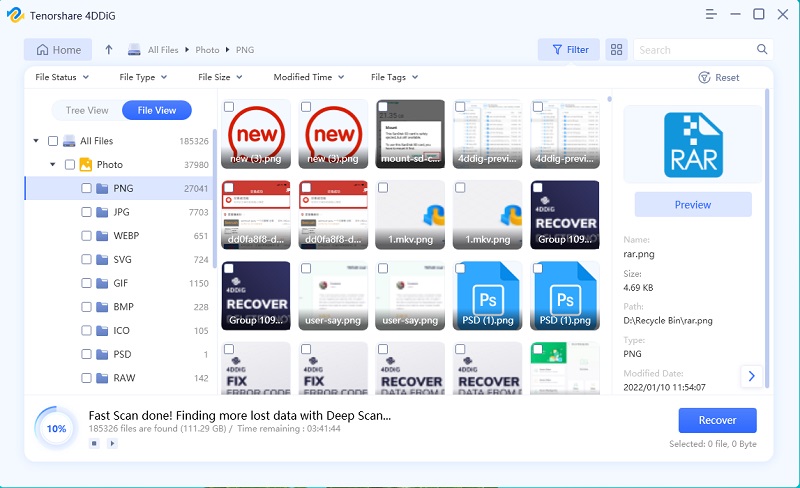
After you have deeper knowledge about Mac disk utility is one of best Mac disk repair application built-in Mac. What could you do if you happen to delete files permanently on Windows computer? Here is a good way recommended to you for data recovery, whether files corrupt, hardware fails to run, you empty trash, undergo unforeseen event or not. Tenorshare 4DDiG for Windows Data Recovery support almost types of data, such as photos, videos, documents, archives, mails, PDF, game saves and so on. No worry since you have owned this software.
Besides that, you’re able to recovery data from other devices including USB drive, digital camera, HDD/SSD and media player. Definitely without concerned with data loss anymore when you go through problems. With this handy software, you can feel ease at restoring data from now on.
Conclusion
This article walks you through a detailed description about disk utility. We all know the truth that disk utility Mac doesn't work all the time and there are still some problems you may encounter in the process of using disk utility. To be specific, losing data tends to be the first headache, because that means you have to start from scratch then. Hopefully Tenorshare 4DDiG for Mac Data Recovery will become your best disk utility for Mac to solve this big issue when you accidentally lose data on Mac.

