A Simple Guide on How to Clear History on Android
by Jenefey Aaron Updated on 2024-04-18 / Update for Android Data
Question: Should I delete browsing history?
Answer: To better protect your privacy and improve the performance, it's always a good idea to clear your browser history , cache or cookies regularly.
In this article, we will share a comprehensive tutorial for you to learn how to clear history on Android devices. Follow our step-by-step instructions to find out everything you need to know!
- Part 1. Complete Guide to Clear History on Android
- Part 2. One-Click to Clear System Cache on Android
Part 1. Complete Guide to Clear History on Android
With the upgrade in Android versions and devices, it’s now easier to clear history on Android. Comprehensive guides for each purpose are discussed briefly in the following sections, read clearly for inclusive approaches.
1.How to Clear Google Search History on Android
Unlock your Android phone and search for “Google” App in App drawer.

pic: app drawer and google - On the “Google” app, you will find tabs of- Discover, Updates, Search, Recent and More on the button of the app screen, click on the "More" tab.
On the customize section, select “Setting” icon, then find and select “Account and Privacy setting.” This process will lead to an activity setting.

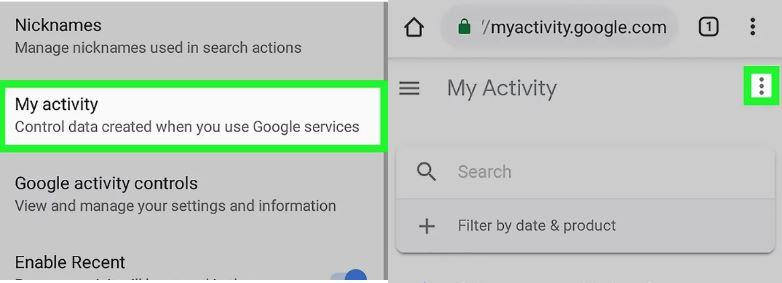
pic: account and privacy You will see a bunch of activity control section, Select “My Activity.” On the activity control, you will find three action dots. Click on it for further process.

pic: my activity settings On the provided drop-down, select “Delete Activity by.”

pic: delete activity by Now, you are in the critical section to clear search history in Android phones. On the first drop-down box, select “All time” > select the “Search” option in the final drop-down section > After all selected, tap on the “Delete” option.

pic: delete activity by Confirm the deletion if agree with the completion of the task.

pic: confirm delete
Note: The process may differ from one Android device to another as well as the Android version installed in your device.
2. Clear Call History on Android
It may sound odd, but intruders who get access to your Android phone can easily penetrate through your call logs and cause harm. Often deleting call history increases secrecy and privacy; thus, why delay permanently dumping them.
Note: Deleting call logs may differ from one Android phone to another in this very section we are discussing ways on top brand devices. It includes Samsung, LG, Sony, and Google Pixels. Follow the following steps on how to clear the call history on Android.
Samsung Android devices:
Step 1: Open Phone application, on the Call log section, long press on any of the contact information.
Step 2: A checkbox will appear on the left side of each contact information. Tick on the “All” box to select every contact.
Step 3: On the right upper part, the “Delete” option will be available. Click on it, and you are done.
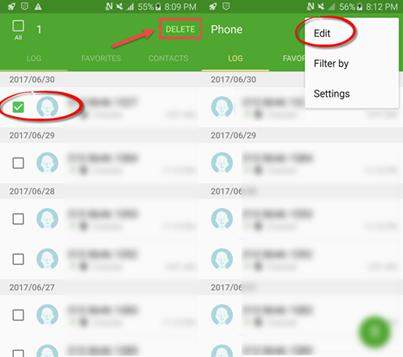
LG Android Phone
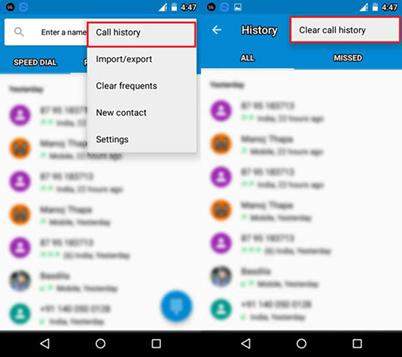
Step 1: Open Phone application. On the three action dots available in the right top corner
Step 2: Choose “Call history” and tap on “Clear call history” to delete entire call logs.
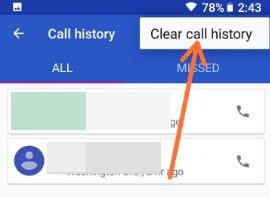
Google Pixel Android Phone
Step 1: Open Phone application. On the three action dots available in the right top corner
Step 2: Choose “Call history” and tap on “Clear call history” to delete entire call logs.
Sony Android Phones
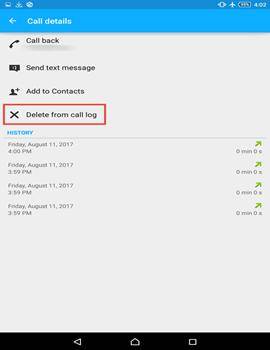
Open Phone App > Tap on phone number or name > Select Call details options > Perform the “Delete from call log” option.
Part 2. One-Click to Clear System Cache on Android
Tenorshare developed an application named Tenorshare ReiBoot for Android, considering the preferences of entire Android users to clean the whole system cache on a single click. Tenorshare ReiBoot for Android detects the system caches by itself and assigns it for the dump. The caches include temporary installation files, log events, and other unnecessary transient events in the system. Follow the guidelines below to use Tenorshare ReiBoot for Android.
- After proper installation, open the tool and connect the USB cable cord to the computer and the Android phone you are about to clear the system cache of.
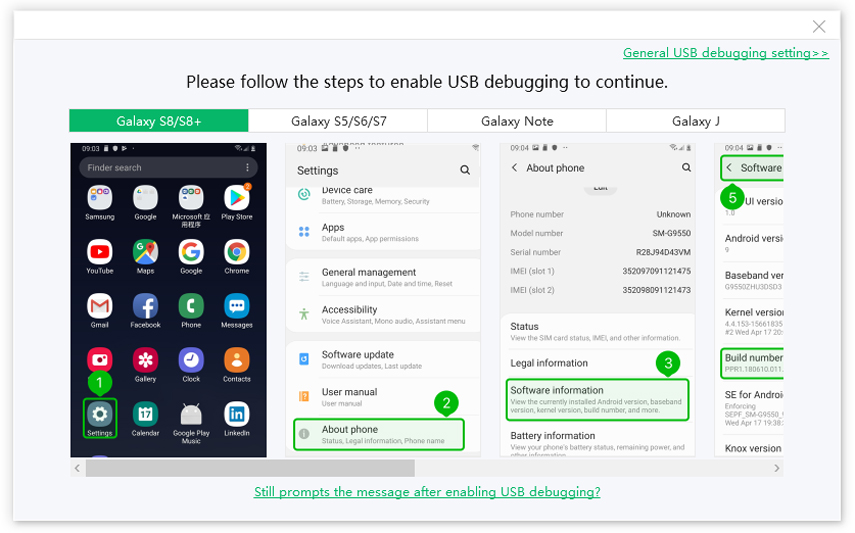
Tool require USB debugging “turned on” to access the cache location. The debugging option may vary from one device to another. Here are some of the general Android device settings to perform the setup.
Samsung Phone users follow the following picture guide:

pic: USB debugging in Samsung phones Now choose your Android brand.

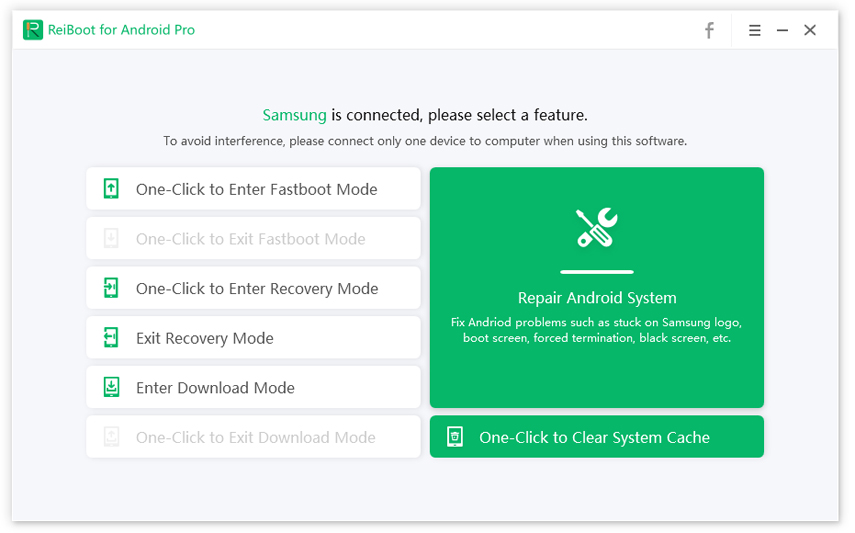
pic: android Phone brand Among the given opportunity, we are interested in “One-click to clean system cache.” Click on it and proceed further.

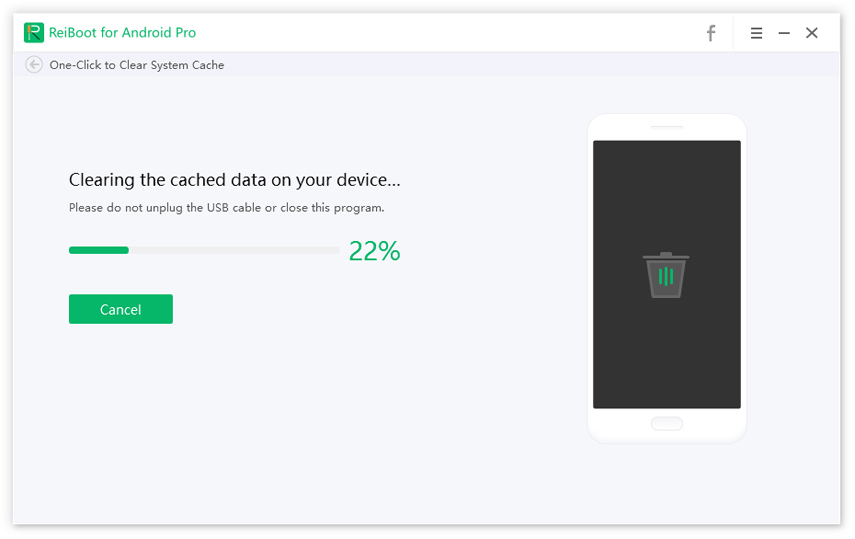
pic: clean system cache A process will begin to clear system cache (Temporary application data, log events, unnecessary zip files, and shortcuts). Sit patiently for the completion of the process. We recommend not detach the device from USB cable if it may damage your phone.

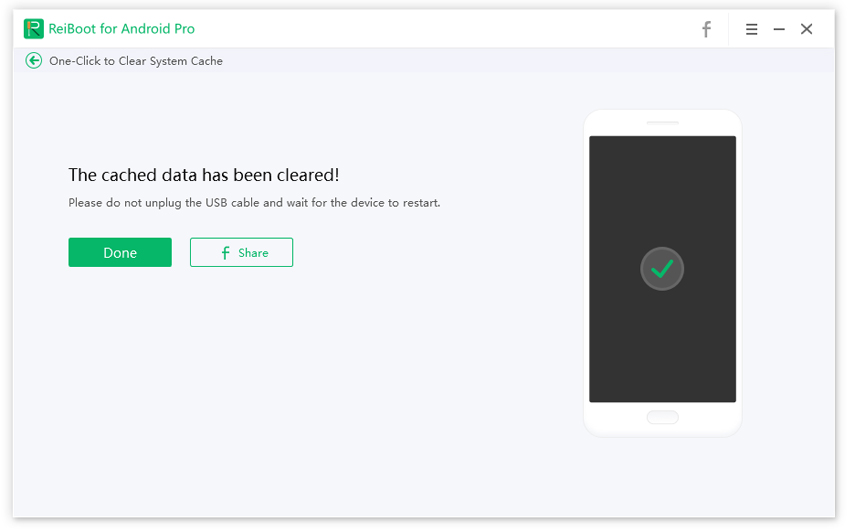
pic: clean system cache Cache cleared message will notice that the process is completed. Now boot your device generally for smooth performance.

pic: clean system cache
Conclusion
Large system caches and other temporary files will slow down the performance of the Android phones. Deleting those will help to accelerate the performance as well as provide security to your data. The above-discussed methods are well tested by our team members and acknowledged the significant improvements in the system. We recommend manually deleting browsing history and call logs from the device as well as using Tenorshare ReiBoot for Android to clear system caches in a single click.


